Invite a Colleague to Move Faster with Development
With the Access Control feature you can set authorization rules for every piece of your IoT platform. You can manage from general to fine-grained access for users and external applications to create, read, update or delete resources in the platform.
To give permission to the user, you need to create a Role and set up Policies in the Access Control module.
A Role is a group of policies. Roles can be applied to any subject to create flexible and reusable authorization rules.
Policies are the individual permissions which you can assign to Roles, Users, Apps, and Things in the AnythingDB. Ultimately, Policies determine the level of access, which is then given out in the form of an Access Token.
The Root Role is a default role created by the platform. This role can create, read, update and delete any resource of the account.
Before you can invite a colleague, you must first create a role.
Create a New Role
-
In , click New Role.

The New Role panel appears. The Name field is partially complete.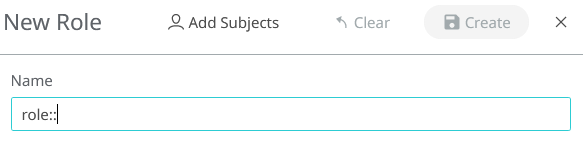
Figure 1. -
Click Add Subjects
 to select
the subjects (user, application or device) to assign to this role.
to select
the subjects (user, application or device) to assign to this role.
-
Enter the name of the subject to add.
An ID is generated for the added subject.
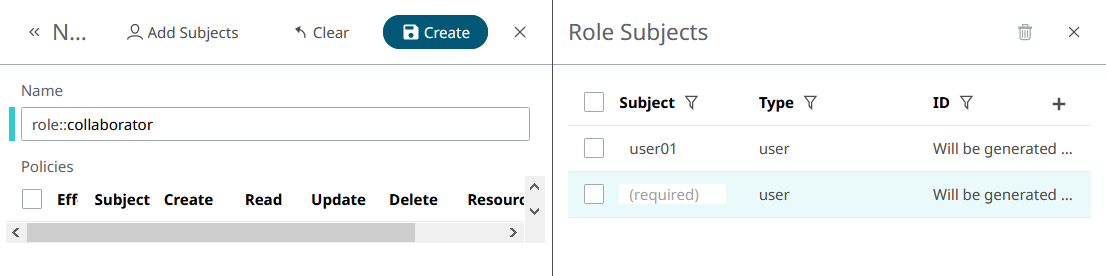
Figure 2. -
Some Policies appear by default. You can create more by
clicking the Add custom Policy button.
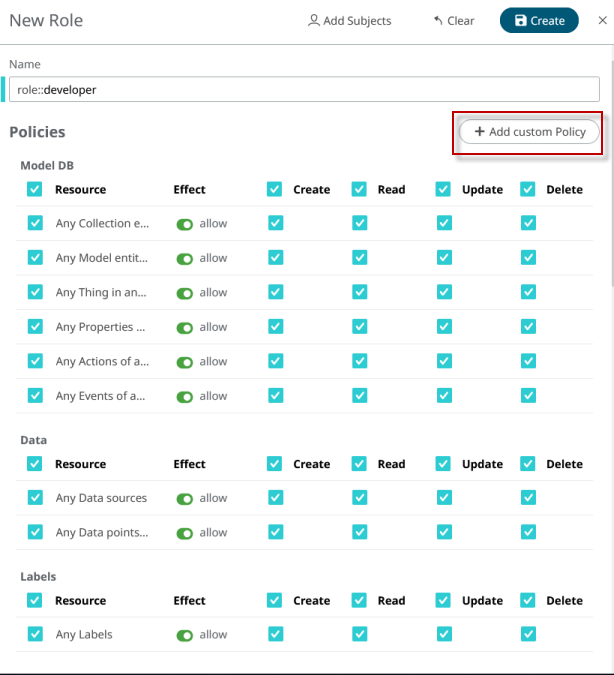
Figure 3.The Add Custom Policy panel appears.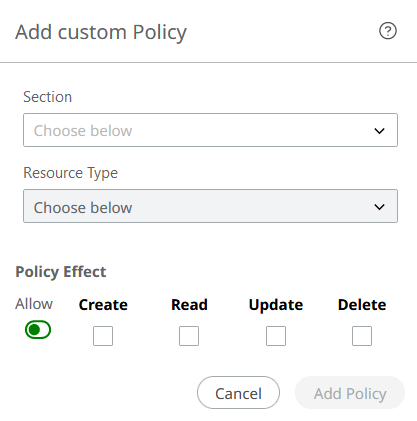
Figure 4. -
Select the configuration desired. In the example below, this Role allows for
all options: creating, reading, updating and deleting any resource.
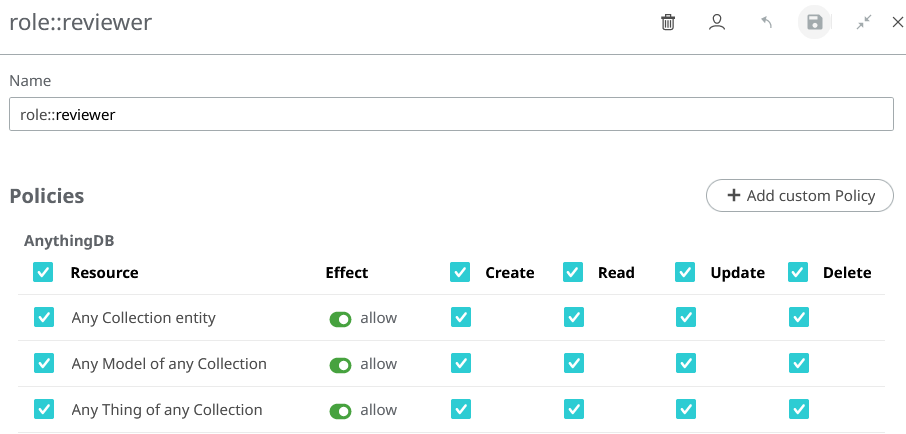
Figure 5.
Invite a User to the Space
Once the Role and Policy is created, invite a user to the space.
-
In the New Invitation panel, enter the email address of the user and assign a
Role.
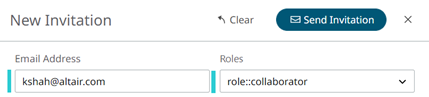
Figure 6.