


|
Specifying General Settings
Let’s get started by specifying general settings for our process.
Steps
1. On the Processes page, click the Add icon  . The page with general process settings will be displayed.
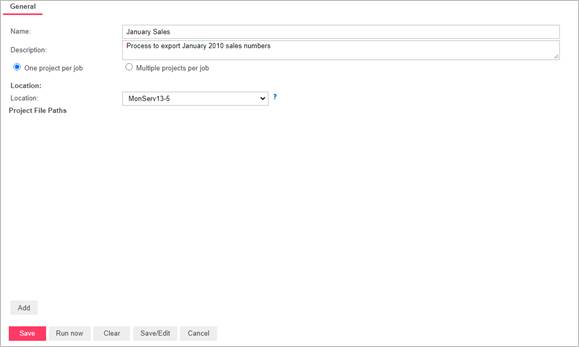
2. In the Name field, enter January Sales.
3. In the Description field, enter Process to export January 2010 sales numbers.
4. Select the One project per job option since we will only be adding the Automator Tutorial project file to the process.
|
|
NOTES For more information about choosing the number of projects per job, see the "Process Handling Scenarios" topic in the web help. |
|
|
|
|
|

5. In the Location field, select the location of the Automator Tutorial project file.
|
|
NOTES If the required server is not on the list, you need to create it. For the information about adding a new location, refer to the Locations Management topic in the web help. In case of a single server configuration, refer to Monarch Server Configurator Guide to change location settings. |
|
|
|
|
|
6. In the Project File Paths box, specify the path to the project file. In this lesson we will use the path to the project file we have created. For this click the Add button and the Add Project File Path dialog box is displayed:
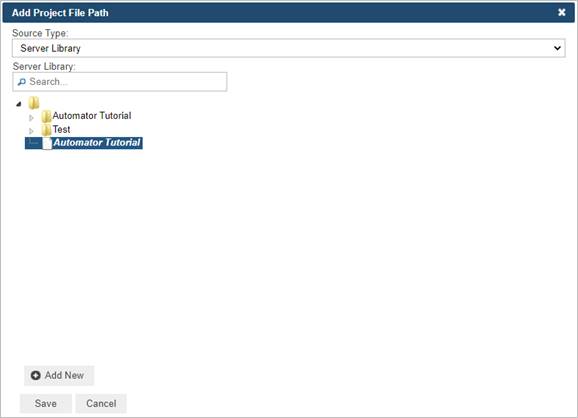
a. From the Source Type list, select the Server Library data source type.
b. Below the Server Library field, select Automator Tutorial.
c. Click Save.
7. Click the Save button to save the process. The system saves the new process to the database and displays the updated Process page, if the operation is completed successfully.
After you have created a process you can specify its priority, whether to allow parallel jobs, and whether to enable process retries. For instructions, refer to the "Specifying Advanced Settings" topic.