Circles
Sketch, edit, and extrude a circle.
Sketch a Circle
Sketch a circle by defining three points, two diametric points, or the center and a point
-
Choose from the following options:
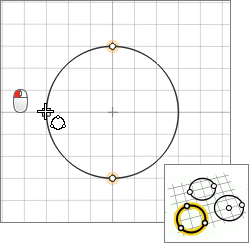
To sketch this Do this Note Circle by 2 Diametric Pts 
- Click twice to define the diameter.
- You can resize the circle by entering a diameter.
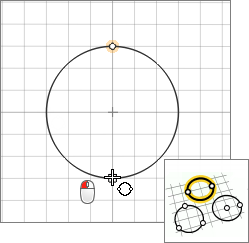
Use snap points to draw a circle that snaps to predefined points on your model such as end, middle, center, and intersection points. Circle by 3 Pts 
- Click three times.
- You can resize the circle by entering a diameter.
Use snap points to draw a circle that snaps to predefined points on your model such as end, middle, center, and intersection points. Circle by Center and Point 
- Click to define the center, then click again define the radius.
- You can resize the circle by entering a diameter.
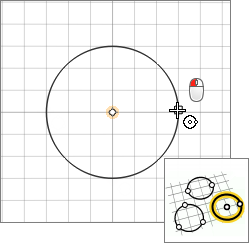
Use snap points to draw a circle that snaps to predefined points on your model such as end, middle, center, and intersection points.
Edit a Circle
Reposition, resize, or apply a sketch constraint.
First, you need to enter sketch editing mode:
- If a sketch tool is active, right-click and then mouse through the check mark to enter sketch editing mode.
- If a sketch tool isn't active, double-click a face or sketch curve.
-
Edit the circle.
To Do this Reposition the circle Drag the center point. Resize the circle - Click the circle, and then enter a diameter.
- Drag the perimeter.
Apply a sketch constraint to the circle Right-click the circle, and then select a sketch constraint on the context menu. 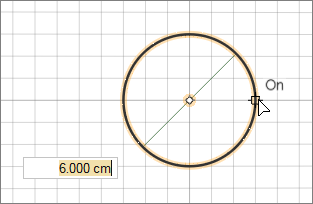
Extrude a Sketch Curve
In push/pull mode, extrude a sketch curve into a solid.
First, you need to be in push/pull mode. You are placed into
push/pull mode automatically when you exit sketch editing mode.
Tip: Open curves that cut across the edges of a face can also be pushed and
pulled, either to create new geometry or to carve away existing material.
Keyboard Shortcuts & Mouse Controls
| To | Do this |
|---|---|
| Place points | Click |
| Edit circle | Click while in sketch editing mode |
| Exit sketch mode and enter sketch editing mode | Right-click and mouse through the check mark to exit, or double-right-click. |
| Exit sketch editing mode and enter push/pull mode | Right-click and mouse through the check mark to exit, or double-right-click. |
| Exit push/pull mode | Right-click and mouse through the check mark to exit, or double-right-click. |
| Exit tool | Right-click and mouse through the check mark to exit, or double-right-click. |