The Report Configurator tool allows you to quickly create a Word document or
pictures.
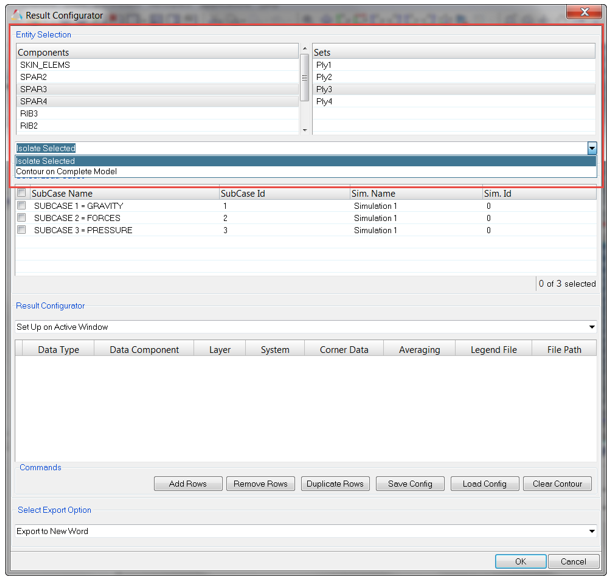
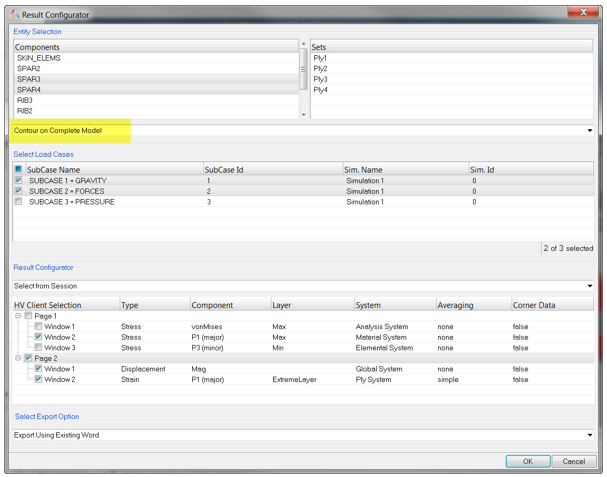
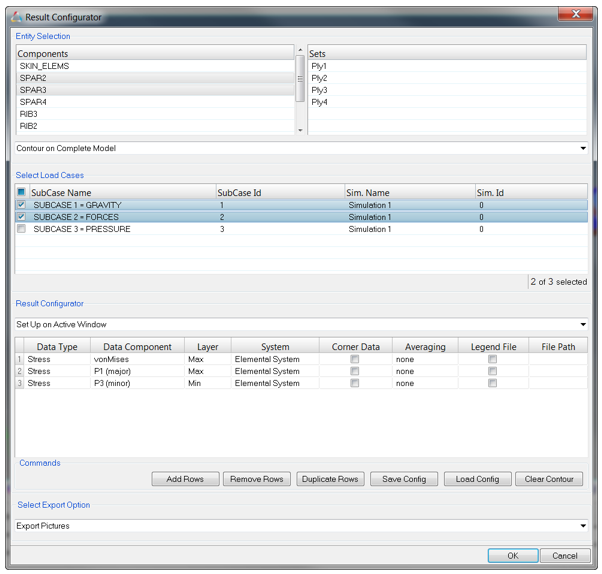
Entity Selection
Select available Components
(Parts) and/or Element Set; with the sub-option Isolate Selected/Contour on Complete Model,
the selected entities will contoured and isolated on the screen or contoured only on the whole
model respectively. Figure 1.
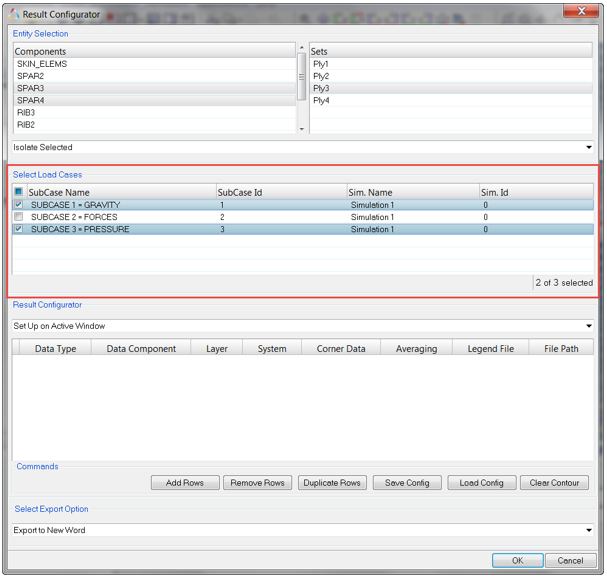
Select Load Cases
Select one or multiple load cases (each load case is structured as unique entity from the
combination of its subcase ID and its simulation ID). Figure 2.
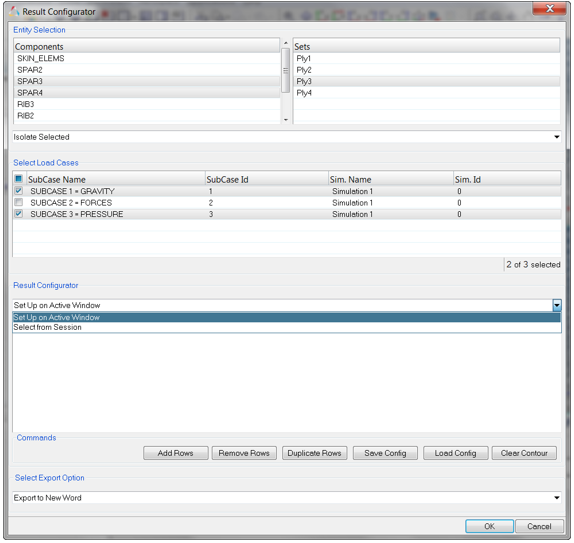
Result Configurator
Two different options are available:Figure 3.
Set Up on Active Window
Figure 4.
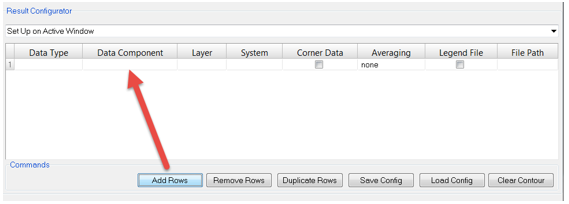
With this option you can insert the configuration of results for which you want to
extract an image using the Add Rows button. Figure 5.
Once a row is added the result configuration can be set up picking from the
following available options:
Data Type
Data Component (if available in the selected Data)
Layer (if the selected result is layer based)
System
Corner Data (on/off)
Averaging (method)
Legend File (if to be used or not)
File Path (to Legend File: *.tcl) Figure 6.
You can also:
Remove rows
Duplicate selected rows
Save the config (in the form of a CSV file) Figure 7.
Load the result config (from a CSV file)
Clear the current window contour in HyperView (if required)
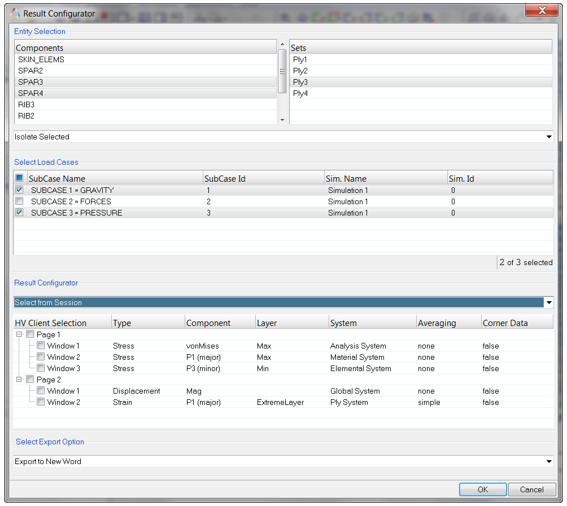
Select from Session
Figure 8.
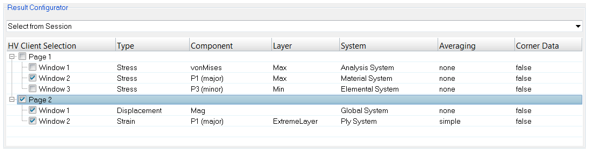
With this option you will get for each page and window in the current session
where HyperView is loaded, the result configuration of
each HyperView client. This configuration cannot be
changed, however the result to be exported can be selected by checking the box at the
very left of the tree widget. Figure 9.
It is important to point out that the components and set listed in the Entity
Selection box are referring to the model in the first available HyperView client. The process is therefore tailored to have a
session (or report template) pointing to HyperView clients
featuring (at least) the same model (structure).
The export options are:
Export to New Word (for Windows system only)
Export Using Existing Word (for Windows system only)
Export Pictures (for Windows and Linux)
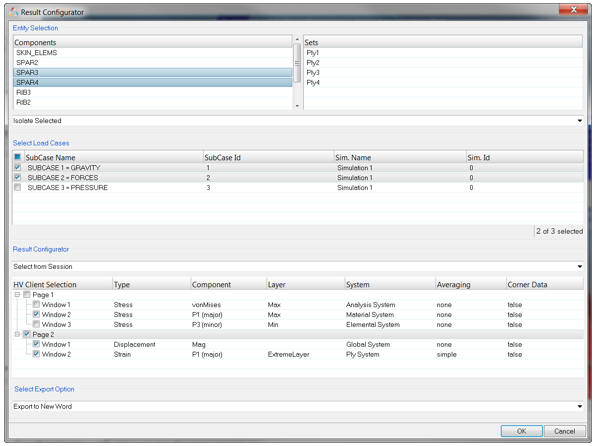
Export to New Word
This option will generate a new chapter for each selected results. Each chapter will have a
sub-chapter for each selected load case which then will have again a dedicated sub-chapter
for each selected parts.
For example, the below configuration: Figure 10.
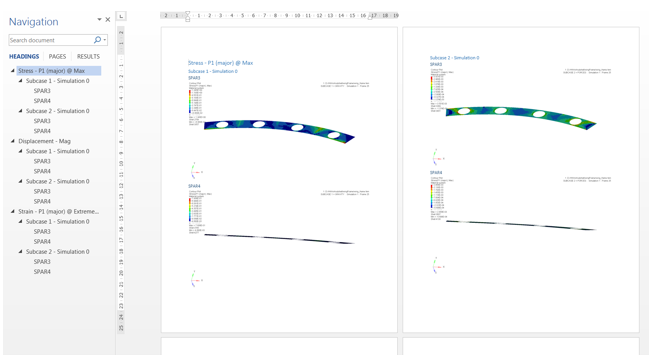
Will generate: Figure 11.
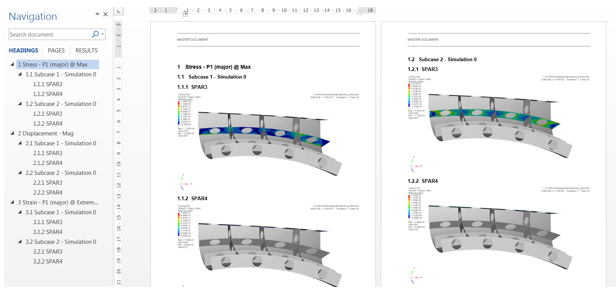
Export Using Existing Word
This approach is similar to the previous one, however you will be asked, after the
selection, to point to an existing document or template. The organization of the chapters is
the same as the previous use case, however the headings will be taken from the document set
up.
For example, the below configuration: Figure 12.
Will generate: Figure 13.
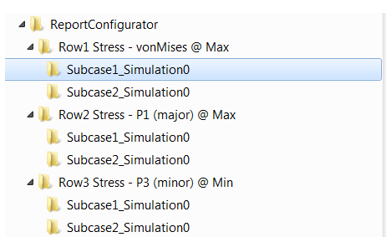
Export Pictures
After selection of the configuration, you will use these functions to input a destination
directory in which the tool will create a subfolder for result, then a sub folder for each
load case, and then a picture for each selected part/set.
For example, the below configuration: Figure 14.
Will generate the following folder structure: Figure 15. Figure 16.