HM-4070: OptiView
In this tutorial you will work with OptiView.
In the next several exercises you will:
- Import an optimization model
- Create a new set of optimization entities
- Organize these into optimization problems
- Run both problems
- View results
This exercise uses the cclip.fem file, which can be found in the hm.zip file. Copy the file(s) from this directory to your working directory.
Open HyperMesh and Set User Profile
In this step you will open HyperMesh and set the user profile to OptiStruct.
- Start HyperMesh Desktop.
- Set the user profile to OptiStruct.
Import the File
In this step you will import the cclip.fem file.
-
Select Import Solver Deck
 from the Standard toolbar.
- Select OptiStruct for the File type.
- Browse to <installation_directory>\tutorial\hm\ and select cclip.fem.
- Click Import to open the file.
Create Problem 1
In this step you will create problem 1 and organize optimization entities.
-
In the Model Browser, click
 (Optimization View).
-
Review the Optimization Repository. The Optimization Repository gives an
overview of all optimization related entities in the database. Info types and
children entities help give a clear snapshot without having to review individual
entities.
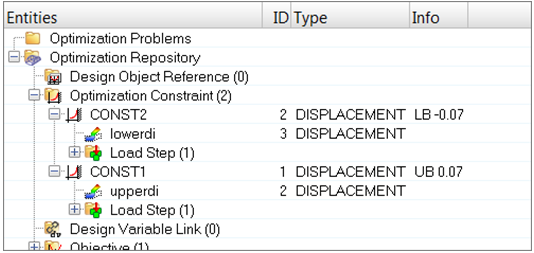
Figure 1.
Define Optimization Entities
In this step, you will define a new set of optimization entities.
Create Problem 2
In this step you will create problem 2 and organize optimization entities.
Set Problems to Export and Run
In this step you will set problems to export and run.