Edit Solver Specific Data (Template Data)
Every entity is assigned solver specific data, which you can modify using the Entity Editor.
Assign a Card Image
In the Entity Editor, you can assign a card image to an entity. The card images you are able to assign depend on the entity type you have selected in the browser.
Import and Export Data
- Import from file
- Append from file
- Export to file

Figure 1.
Turn Fields ON or OFF
-
Turn fields on and off in the Entity Editor.
Option Description Turn field off Remove its corresponding value or select OFF from the drop-down list. If you hover over a field that is turned OFF, its default value will appear in the Value column.
Turn field on Enter a new value or select a value from the drop-down list. When a field is turned ON, its corresponding value will always be displayed in the Value column.
In the example below, assume that initially the field ISOP is turned OFF and has a default value of FULL. To turn the field ON, click its corresponding Value field and select a value from the drop-down list. If you want to turn the field OFF, select <OFF> from the drop-down list.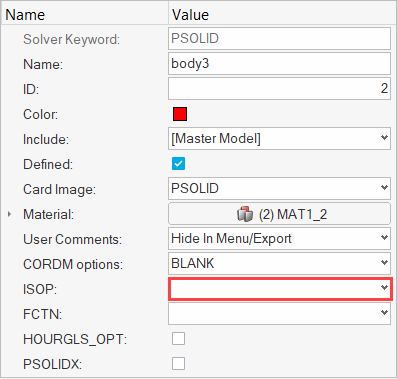
Figure 2. ISOP Field Off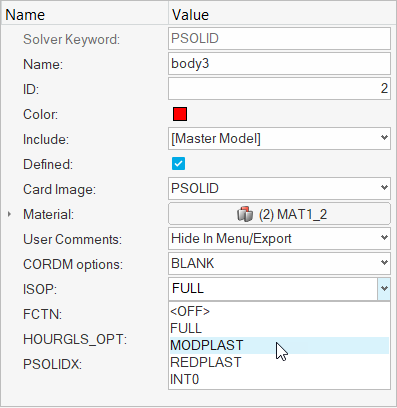
Figure 3. ISOP Field OnIn the example below, assume that initially the field G is turned OFF and has a default value of 80769.2. To turn the field ON, click the Value field and press Enter. To turn the field OFF, delete the value and press Enter. If you turn the field OFF, the Entity Editor will retain the previous value you specified.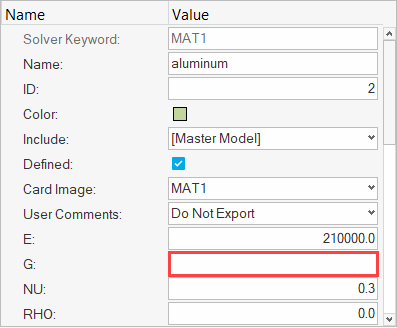
Figure 4. NU Field Off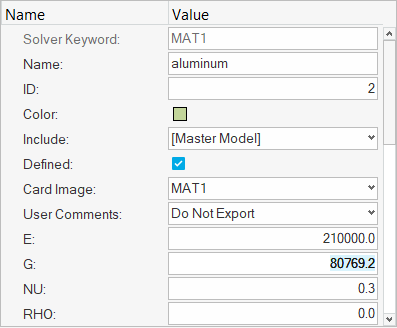
Figure 5. NU Field OnIn the example below, assume that initially the field MID4 is turned OFF. You can turn the field on and then assign it a material. To turn the field ON, click its corresponding Value field. You can then use the entity selector to select a material to assign to the field. If you want to turn the field OFF, click the drop-down menu on the entity selector and select <OFF>.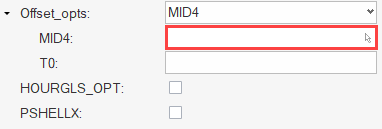
Figure 6. MID4 Field Off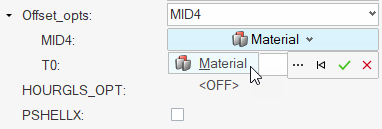
Figure 7. MID4 Field On -
Turn card image fields on and off in the Card Editor by clicking the field
heading.
When a field is turned ON, an additional field appears under the field heading, from which you can enter or select a value.
In example below, the card image MAT1 is displayed for a material in OptiStruct. By default, the field G is turned OFF. To turn the field ON, click its field header. The default value is displayed under the field heading.
Figure 8. MAT1 Card Image with the Field G Off
Figure 9. MAT1 Card Image with the Field G OnWhen defining data in tables, certain fields can be turned ON and OFF. To turn a field ON, right-click on the heading of the disabled field and select Status. In the image below, the NO field is being turned ON for the load collector TSTEP.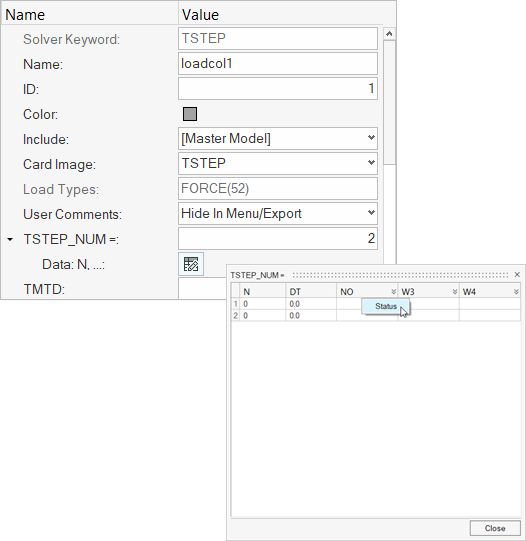
Figure 10.
Assign Entities
In the Entity Editor you can assign certain entities to another entity or a group of entities.
For example, you can assign a property to a component. When an entity has an entity assigned to it, the name and ID of the assigned entity will be displayed in the Value field. If an entity does not have an entity assigned to it, the Value field will display <Unspecified>.
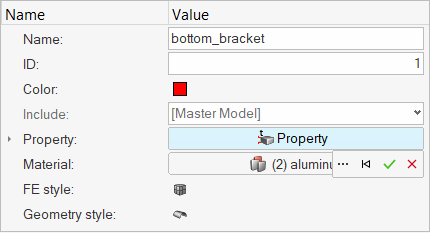
Figure 11.
If available, you can expand a drop down menu on the entity selector to view more entity types.
-
Select entities to assign in the following ways:
- Click
 to open the
Advanced Selection dialog. Select entities then
click OK.Tip: You can search for entities in the Advanced Selection dialog by entering a name, ID, or card image in the search field. When you click
to open the
Advanced Selection dialog. Select entities then
click OK.Tip: You can search for entities in the Advanced Selection dialog by entering a name, ID, or card image in the search field. When you click or press Enter, the dialog only displays the entities that
match your search string.
or press Enter, the dialog only displays the entities that
match your search string. - Select entities in the modeling window.
If the Advanced Selection dialog is open, the corresponding entity is automatically selected in the dialog.
- Click
-
To confirm your selection and assign the entity, click
 .
.
-
To clear your selection or unassign an entity, click
 .
.
-
To exit the entity assignment tool, click
 .
.
Resolve Unresolved Entities
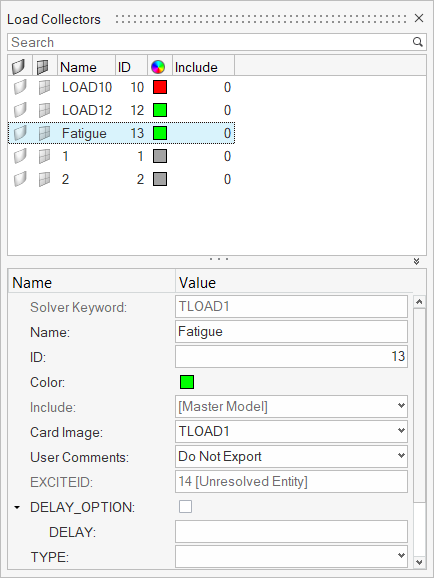
Figure 12.
-
Right-click on an unresolved entity, or click
 , then select Clear unresolved
entity from the context menu.
, then select Clear unresolved
entity from the context menu.
- Click the entity's Value field.
- Use the entity selector to choose a new entity.
Keyboard Shortcuts
| Function Key | Description |
|---|---|
| Tab | Moves from one row to the next in the Entity Editor. |
| Shift + Tab | Moves to the previous row in the Entity Editor. |
| Spacebar | Activates the Value field of the selected row. |
| Move up and down in the Entity Editor, a list of options in drop-down menus, or in a right-click context menu. | |
| Enter | Accepts the changes made to a parameter in the Value field, or selects an option in a right-click context menu. |
| Esc | Dismisses the changes made to a parameter in the Value field, or closes a right-click context menu. |