The multi-moving menu helps you to position parts by making translations and rotations.
Example:
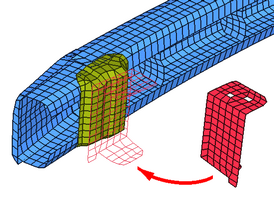
To move the red part to its final location doing translations and rotations, use the multi-moving menu.
|
|
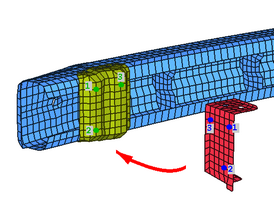
In the multi-moving menu, pick 1, 2, or 3 pairs of nodes. For each pair of nodes, the first node defines the starting point and the second node, the arrival point. Here, for instance, three pairs of nodes are defined:
|
|
When Apply move is clicked, HyperCrash tries to move the part from the starting position to the arrival position, automatically performing the necessary translations and rotations:
|

|
| 1. | Select the  sub-window. sub-window. |
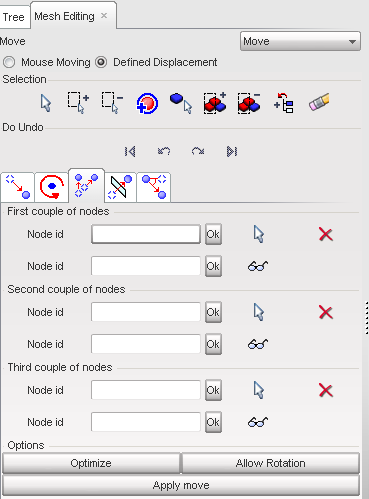
| 2. | Define the First couple of nodes by one of the following: |
| • | Click  and, in the graphic window, pick two nodes. and, in the graphic window, pick two nodes. |
| • | Set the two node IDs in the fields. |
| 3. | If necessary, define a Second couple definition, as described above. |
| 4. | If necessary, define a Third couple definition, as described above. |
| 5. | Click Optimize to optimize the displacements. |
| 6. | Click Allow Rotation to allow rotations; if unchecked, only translations occur. |
| 7. | Click Apply move to start the multi-move displacement. |
| 8. | If necessary, click the functions to undo or redo the displacement. |
| 9. | Click Close to close the menu. |
Go to
Move


