Review 2D Elements by Element Criteria
Use the Criteria legend to investigate the model via individual criteria, and view a breakdown of all failed and worst elements based on a set QI range. This is useful when you want to resolve criteria violations, and evaluate the overall quality of a mesh.
-
Click Criteria from the legend.
The color of the elements change according to the different criteria set in the criteria file. If elements are failing in multiple criteria, then elements will be colored as per their order defined in the criteria file.
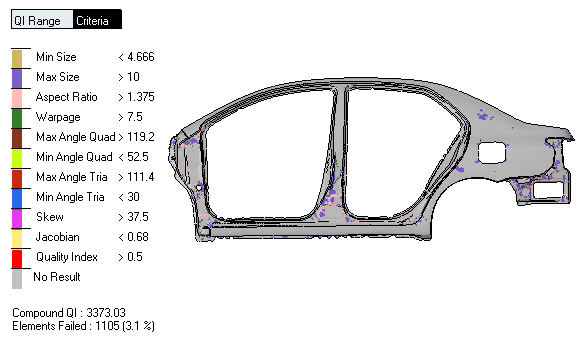
Figure 1. -
Review individual 2D element criteria.
-
Click on a criteria to review in the legend.
A single criteria legend displays. Non-editable criteria values are listed from min to max. The colors exhibited in the sliding scale reflect the quality of each element in the modeling window. The elements that are of the best quality always display in blue, whereas, the elements that are of the worst quality always display in red.The default contour display is “Divergent”. This can be changed to a normal display by right-clicking on the legend and deselecting the Divergent option.
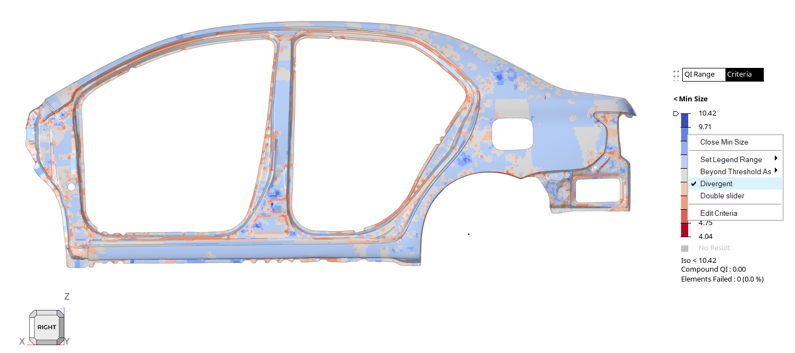
Figure 2.The default legend display can be changed to a normal contour by going to and unchecking the Display divergent contour option.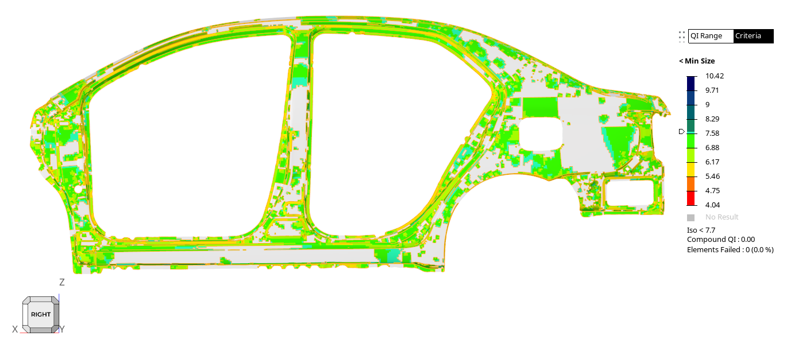
Figure 3. - Optional:
To display elements in a particular range , right-click on the legend
and select Double slider.
This splits the slider in two.
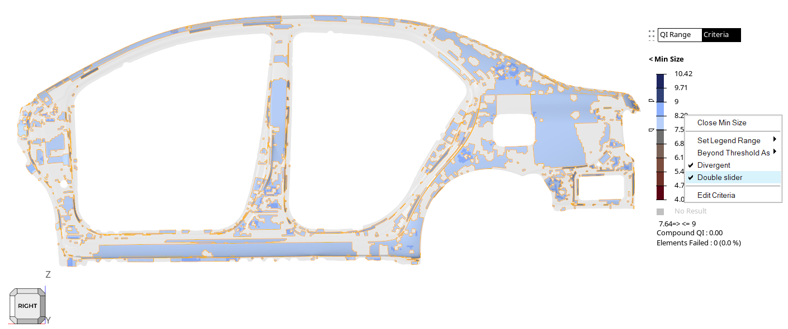 Figure 4.
 The double slider be turned off by unchecking the above option or simply collapsing the sliders on one another.
-
Click on a criteria to review in the legend.
Tip:
- Adjust the initial threshold values assigned to each 2D element criteria.
- In the Criteria legend, click and edit the numbers displayed to the right of each criteria.
- In the QI Range legend, select a different range.
- Directly edit the initial threshold values in the Criteria Editor.
Note: Any changes that you make in the Element Quality view will impact all of the other Element Quality view settings. The changes that you make to the threshold values in the Element Quality view will not affect the values in the criteria file, but any changes that you make to the criteria file will affect the Element Quality view.To restore the default value, delete the number to the right of each criteria and press Enter. - Set a legend range for the individual criteria legends by right-clicking on the legend and selecting Set Legend Range from the context menu. The second and second to last values adjust when different ranges are selected, such as good to worst, warn to worst (default), fail to worst, or min to max values. These values are taken from the criteria file, and can be edited. HyperWorks CFD interpolates the values in between these.
- In the Criteria legend, change the display of elements that have no results by right-clicking on the legend and selecting No Results As from the context menu. In the individual criteria legends, change the display of elements beyond threshold by right-clicking on the legend and selecting Beyond Threshold As from the context menu. This is helpful when you want to select elements of interest (for example, only failed elements) by setting the entity selector to Elements and selecting elements by window or displayed.