Blank Nesting Analysis
Create numerous configurations to determine the optimal material usage for the transfer or progressive die stamping of sheet metal components.
-
On the Feasibility tab, Nest icon, click Run
Blank Nesting.

The flattened blank from the last run executed is loaded into the session. If desired, you can measure the flattened blank with the Measure tool and provide input into the Blank Nesting
dialog as required.
and provide input into the Blank Nesting
dialog as required. -
Click Run.
After the run has successfully completed, view the results of the blank nesting. The nested results are available in .iges file format for downstream applications.
Blank Nesting
Use the following table to understand the process and components of blank nesting within the stamping process.
| Type | Description |
|---|---|
| Coil | Infinitesimally long sheet metal rolled into a coil |
| Sheet | Flat sheet metal with finite dimensions |
| Progressive Die | The blank sheet metal that is formed to finished part remain attached to the coil as it is fed from one stage to another until last stage and then the finished part is separated from the coil. |
| Transfer Die Stamping | The blank sheet metal is separated from the coil at the first stage. The blank sheet metal is transferred from one stage to another until last stage using robot or transfer mechanism. |
| Carrier | The carrier is the portion of the coil to which the blank sheet remains attached in progressive die stamping. It helps to carry the part from one stage to another until the final stage where the part is separated from the coil. |
| Single-sided | The carrier is attached to one side of the part.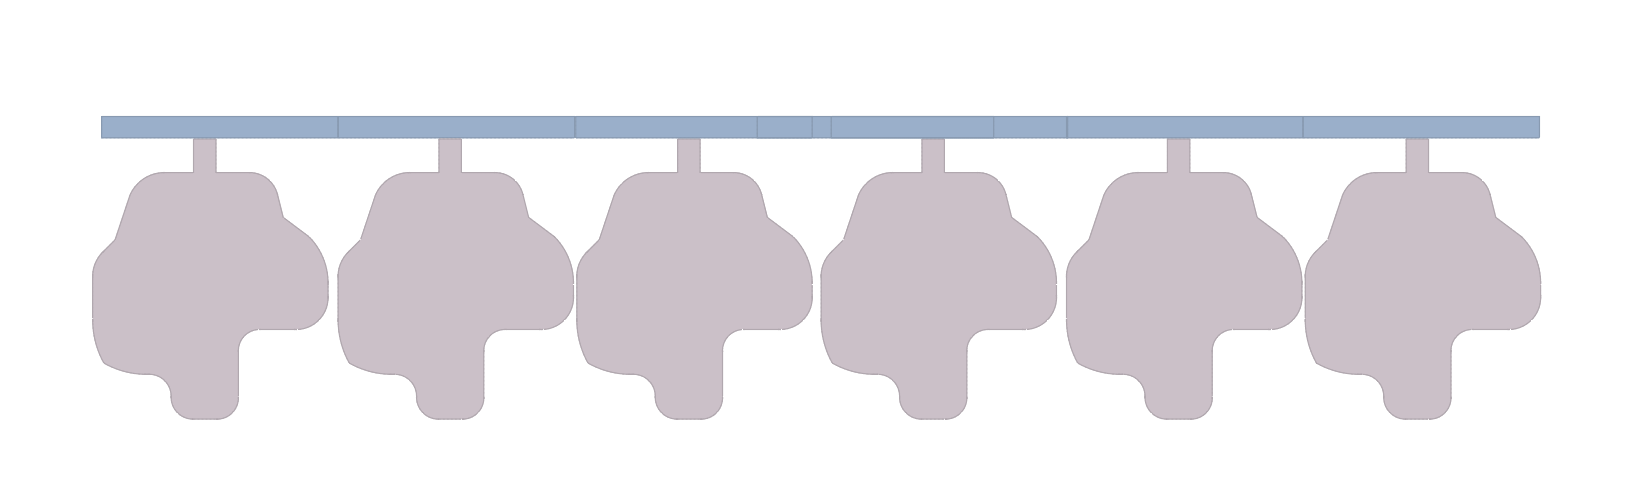 |
| Double-sided | The carrier is attached to both sides of the part.  |
| Nested | The carrier is nested within the part. 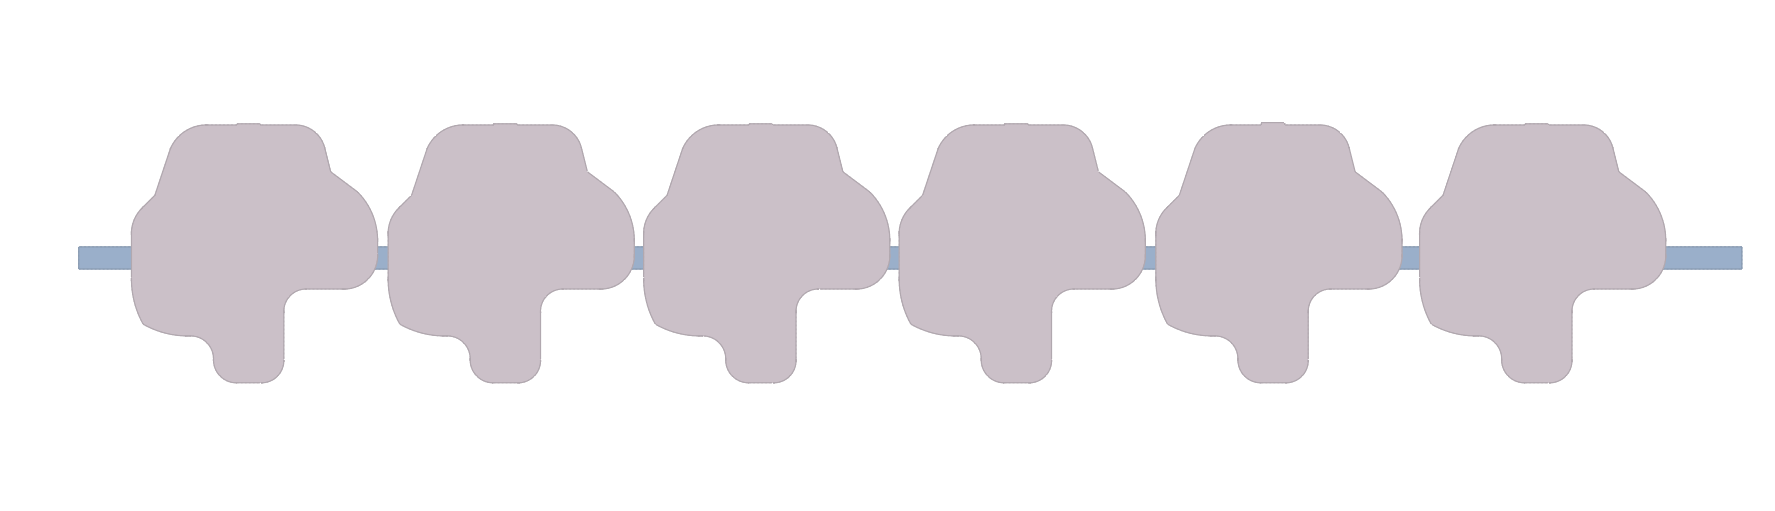 |
| Double-sided and nested | The carrier is attached to both sides of the part and it is
nested between the parts as well. 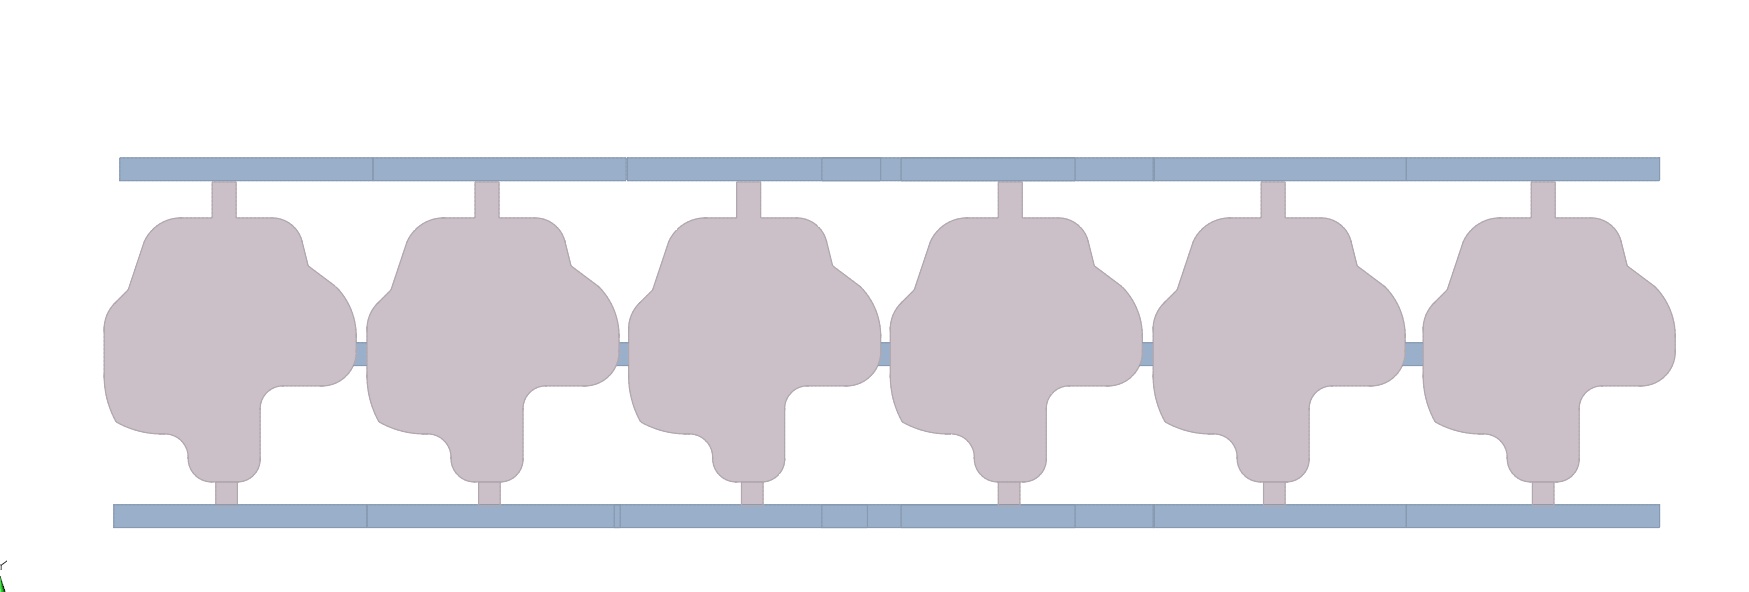 |
| Central | The carrier is in the center with the parts attached on both
sides. The parts mostly will be reflection of each other. 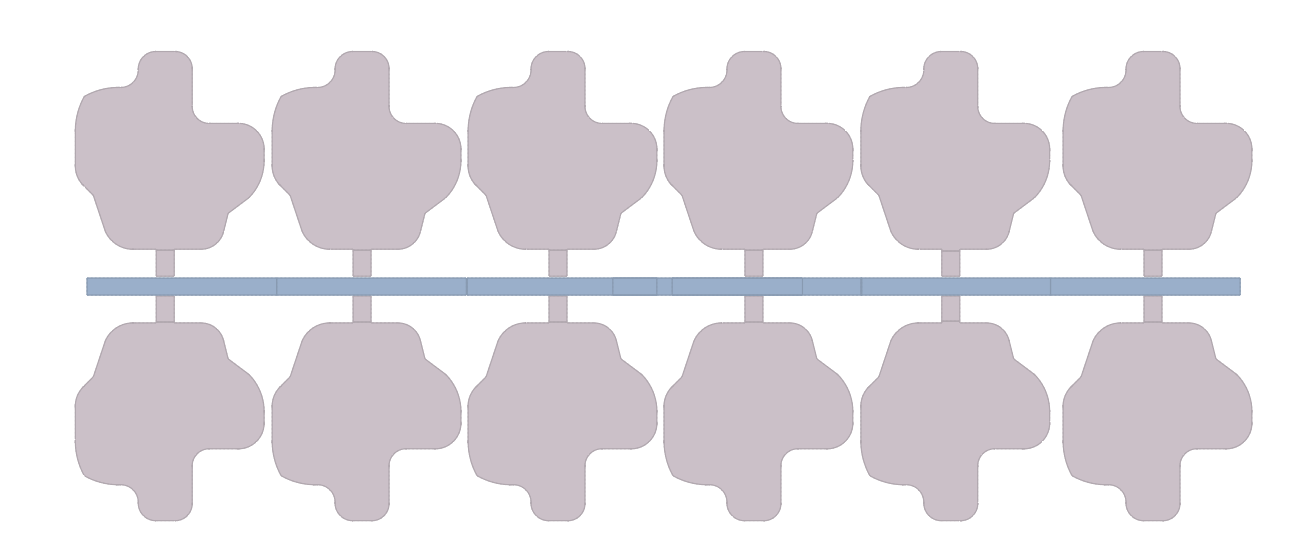 |
| Double-sided and central | The carrier is in the center with the parts attached on both
sides. The parts mostly will be reflection of each other. There is
also a carrier on both ends. 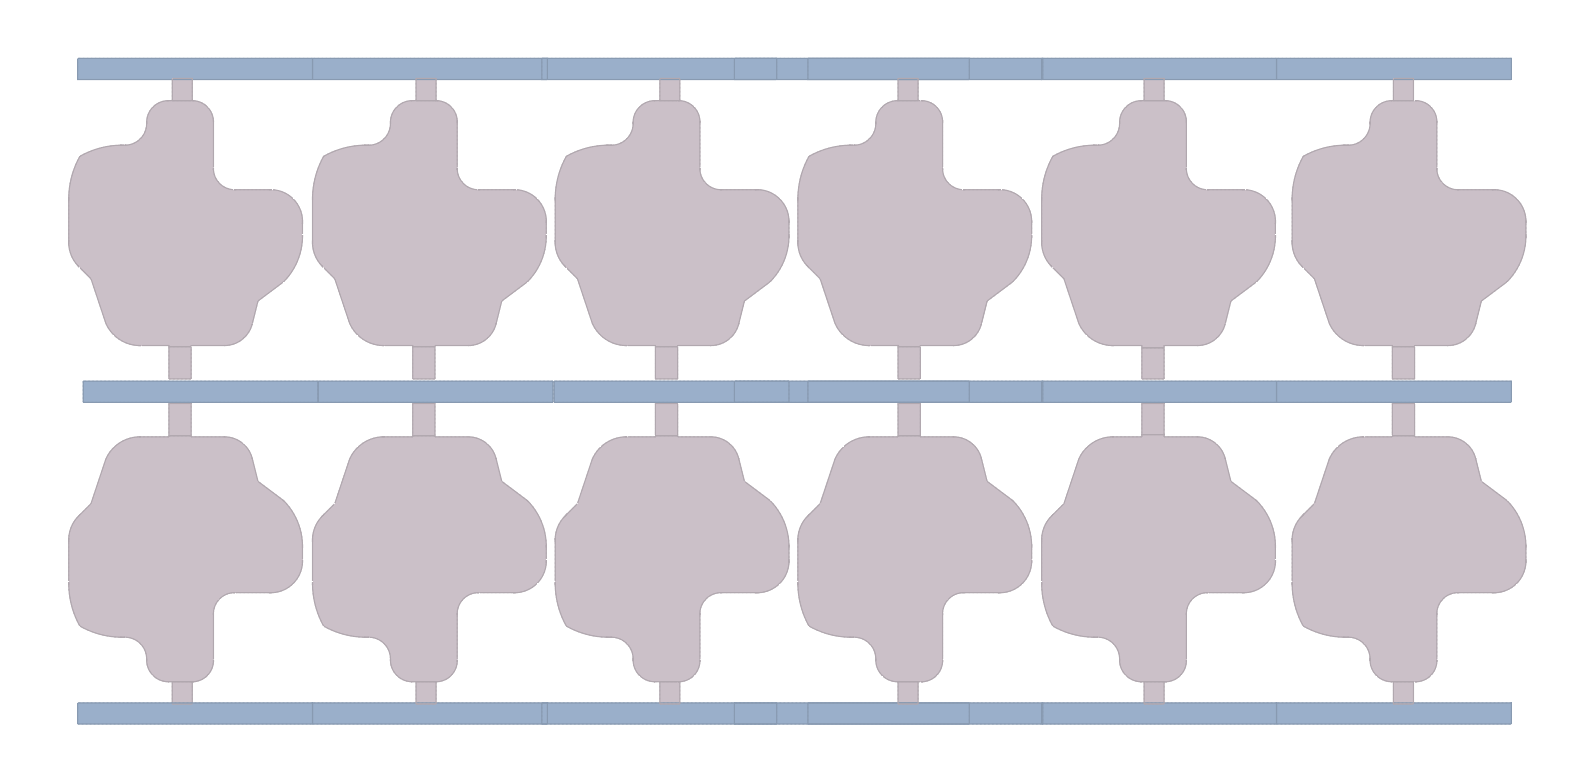 |
| One-up | This option allows you to nest one instance of the part on coil or sheet metal so that every stroke of press will produce a single part.  |
| Two-up | This option allows you to nest two instances of the part on a coil or sheet metal so that every stroke of press will produce two identical parts. 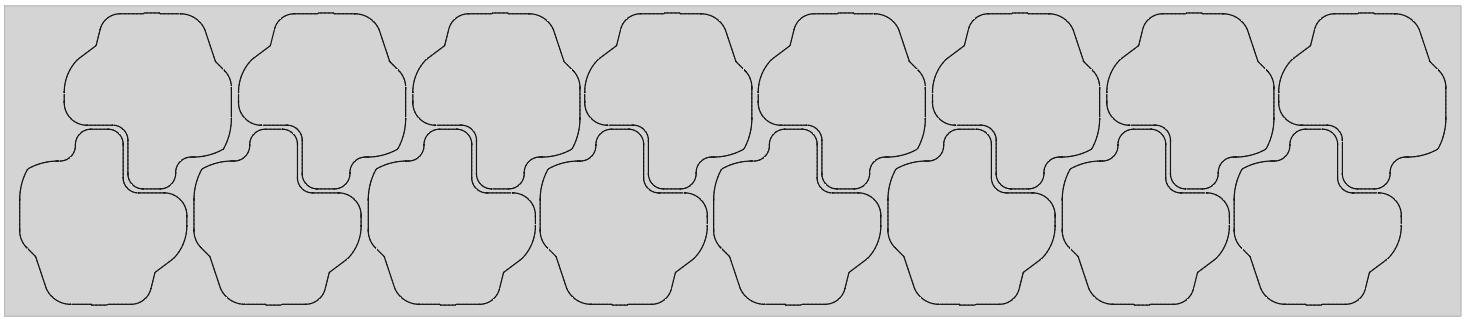 |
| Mirror | This option allows you to nest one instance of the part and its mirror image on the coil or sheet metal so that every stroke of press will produce two parts that are mirror images of each other. 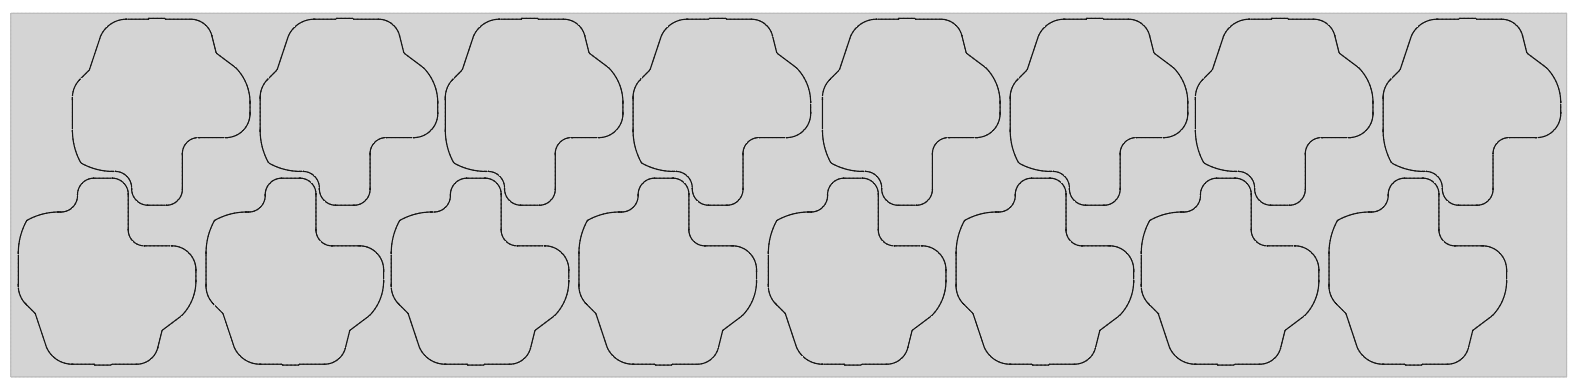 |
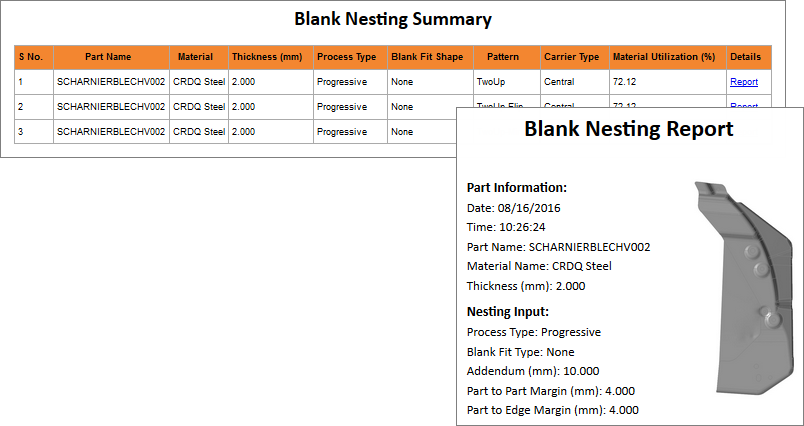
View Blank Nesting Summary
View the summary of a blank nesting.
-
On the Feasibility tab, Nest icon, click the Show Blank
Nesting icon.

A summary of the blank nesting opens in your browser.
By default, the most recent blank fit opens. View the results of a different blank fit by selecting a run in the Blank Fit Status or Blank Fit History dialogs.
-
To view a detailed report for any of the blank shapes, in the Blank Nesting
Summary table, Details column, click Report.
Blank Nesting Status
View the status of the current run, as well runs for the current model that have not yet been viewed. To see all past runs, you need to view the run history.
-
Hover over the Nest icon, then click
Blank Nesting Status.

The run status is displayed.
-
When the run is complete, review its status.
Status Description Note 
The run completed successfully. This is also indicated by a green flag above the Nest icon. You can click the green flag to display the results.

The run was incomplete. Some but not all of the result types may be available. You should run a new analysis to generate complete results.

The run failed and no meaningful results are available. This is also indicated by a red flag above the Nest icon.
Blank Nesting History
View, sort, open, and delete past runs for the current and previous models.
-
On the Nest icon, click Run
History.

The run history is displayed.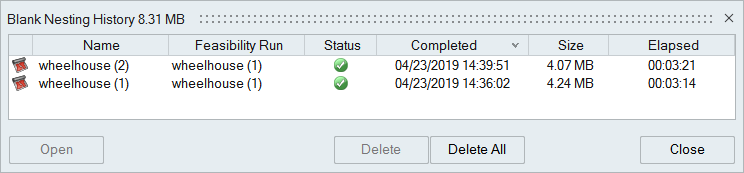
-
Review the status of the run.
Status Description Note The run completed successfully. The run was incomplete. Some but not all of the result types may be available. You should run a new analysis to generate complete results.
The run failed and no meaningful results are available.