High Pressure Process
Define the parameters for a high pressure die casting process.
Location: High Pressure is an option on the Basic Setup icon on the Casting ribbon.

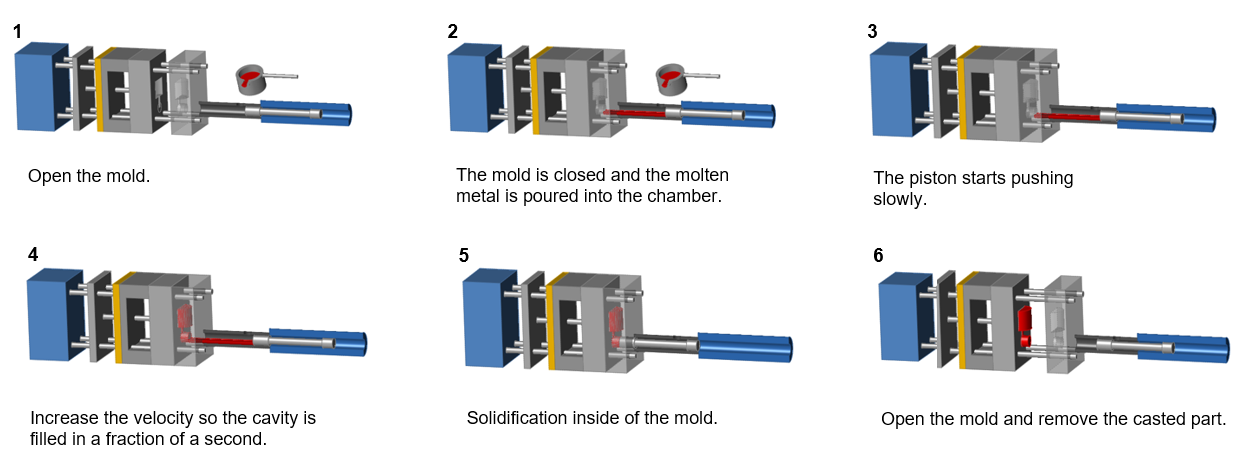
High pressure die casting uses a machine to inject molten metal into permanent metal dies under high pressure. It is a good technique for manufacturing complex parts with a high degree of accuracy, particularly lightweight parts with thin walls that require consistent dimensions. The high pressure is needed to fill the mold completely and avoid solidification during the casting process.
High pressure die casting uses two distinct velocities. The molten metal is first pushed at a low velocity (initial velocity) in order to avoid turbulence and the formation of bubbles. Just before the material enters the mold, the velocity increases (second phase velocity), and the molten metal is injected very quickly into the die assembly to fill it completely.
Define High Pressure Parameters
-
Click
 next to the
Basic Setup icon, then select High Pressure.
next to the
Basic Setup icon, then select High Pressure.
-
Define the Phase Change by selecting Basic
setup or Using Shot Sleeve.
High Pressure Options
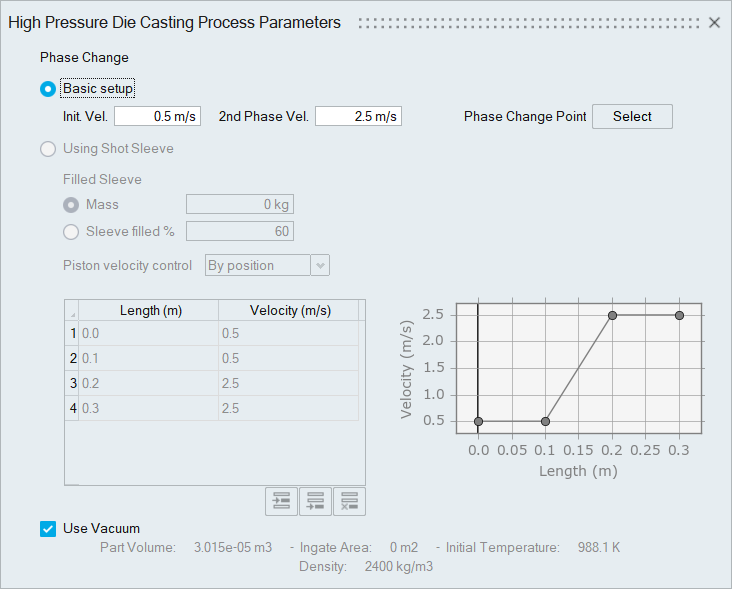
- Basic setup
- Initial Velocity (m/s)
- Typical values for Initial Velocity are 0.2–0.5 m/s.
- Second Phase Velocity (m/s)
- Typical values for Second Phase Velocity are 2.0–5.0 m/s.
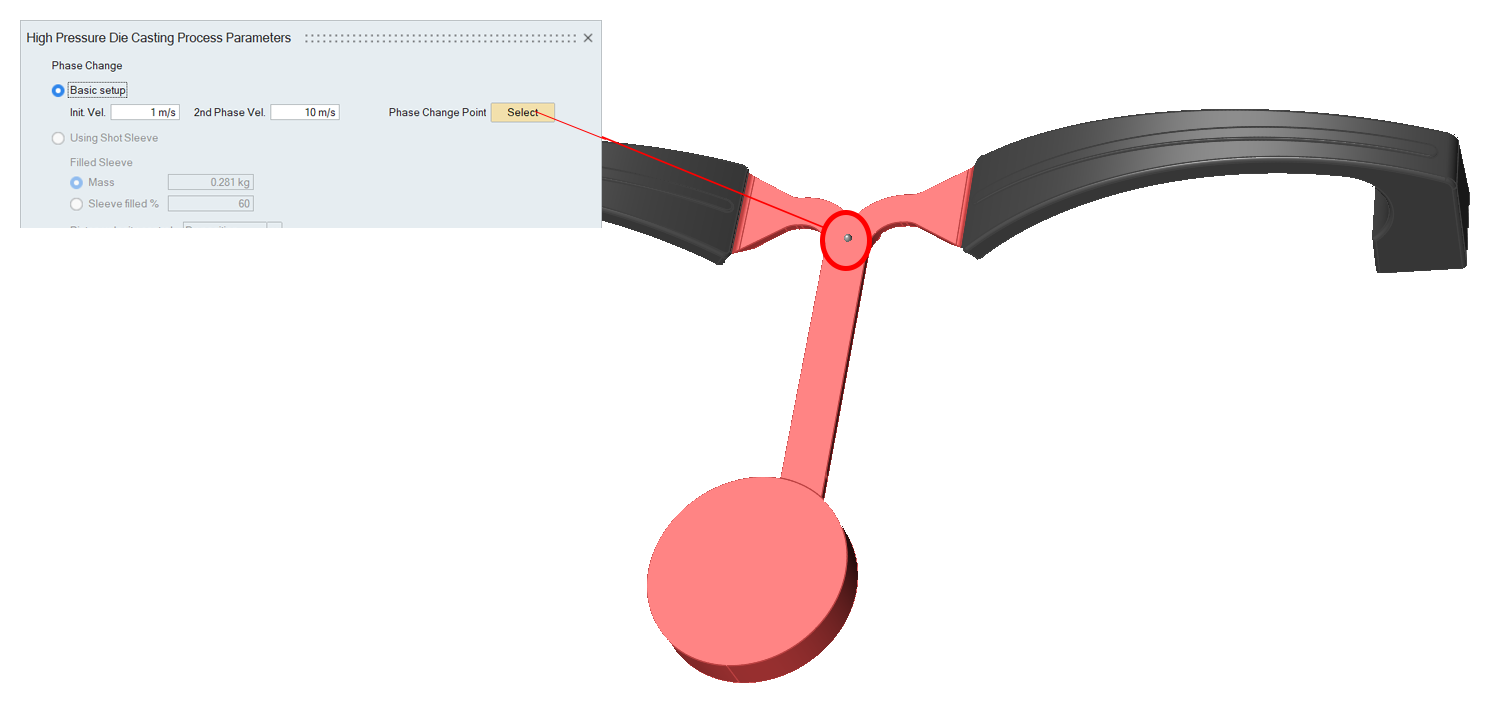
- Phase Change Point
- To specify where the initial velocity changes to the second
phase velocity, click Select, and
then click a point on the runner.Tip: The phase change point needs to be on the runner, before the material enters the mold.
- Using Shot Sleeve
- Filled Sleeve
- Select Mass to define the quantity of
metal introduced in the piston shot sleeve in kg or
Sleeve filled % to enter the
percentage that the piston shot is filled after pouring the
liquid in.Note: By default Mass will be the volume of the selected part plus the runner.
- Piston Velocity Control
- Select By position or By
time, and define the piston velocity
profile.
By position allows you to select the first and second velocity when the liquid reaches a selected position on the shot sleeve. The final position will be automatically edited depending on the designed shot sleeve length.
By time allows you to select the first and second piston velocity with respect to the filling time.
You can enter values in the table or edit the points on the graph. Click to
add a new row after a selected data point, add a new row
after the last data point, or delete a selected row.
to
add a new row after a selected data point, add a new row
after the last data point, or delete a selected row.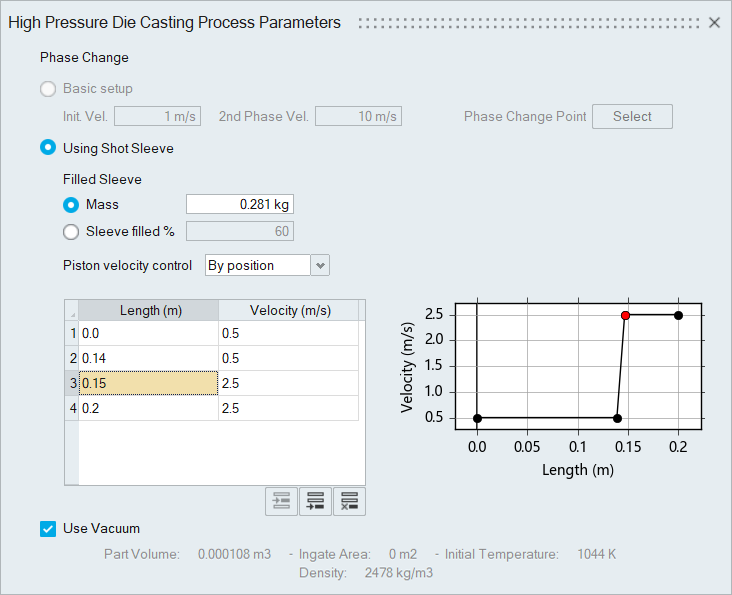
- Use Vacuum
- Enable to use a vacuum in the simulation.