Translate and Rotate Objects
Use the Move tool to translate and rotate selected objects.
-
From the Home tools, click the Move tool.

Figure 1.Or press M or T.
-
Click a graphical manipulator then do one of the following:
- Drag the graphical manipulator to translate or rotate objects in the selected direction(s).
- Enter a precise value in the microdialog and press Enter.
To Do This Translate along an axis Click the X, Y, or Z arrow. 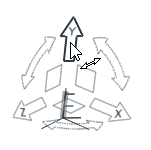
Figure 2.Translate along a plane Click the XY, XZ, or YX plane square. 
Figure 3.Translate freely in 3D space Click the origin of the Move tool. 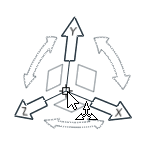
Figure 4.Tip: Use the icons in the microdialog to align the tool to a part or the global axes.Rotate around an axis Click a curved arrow. 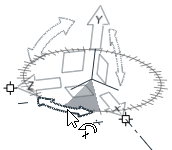
Figure 5.Rotate freely Click  at the tip
of the X, Y, or Z arrow and drag. An axis line
appears and the unresolved rotation is prompted on
release.
at the tip
of the X, Y, or Z arrow and drag. An axis line
appears and the unresolved rotation is prompted on
release.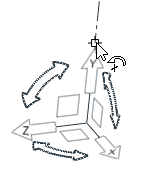
Figure 6.
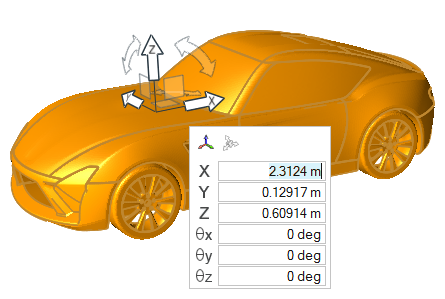
Figure 7.
Reposition the Move Tool
Reposition the Move tool along an axis, within a plane, or in 3D space to change the center of rotation.
-
From the Home tools, click the Move tool.
Figure 8.Or press M or T.
Align the Move Tool to a Feature
Align the x, y, or z axis of the Move tool to a point, an edge, or a face.
-
From the Home tools, click the Move tool.
Figure 9.Or press M or T.
-
Click
 at the tip of the X, Y, or Z
arrow on the Move tool then hold and drag as you move
your cursor to a point, face, edge, or hole center.
An axis line appears to help you align the tool.
at the tip of the X, Y, or Z
arrow on the Move tool then hold and drag as you move
your cursor to a point, face, edge, or hole center.
An axis line appears to help you align the tool.
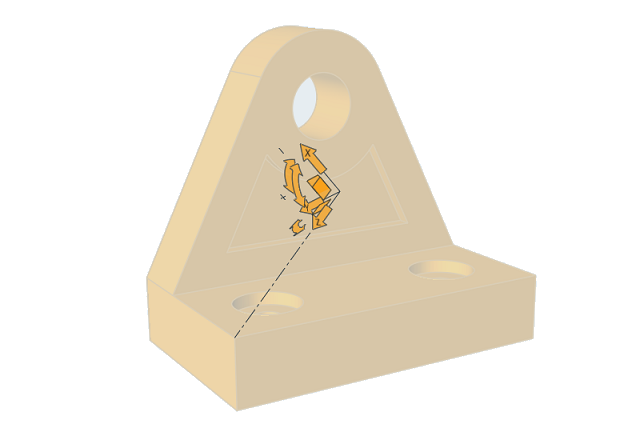
Figure 10. Move Tool Aligned to a Point

Figure 11. Move Tool Aligned to an Edge
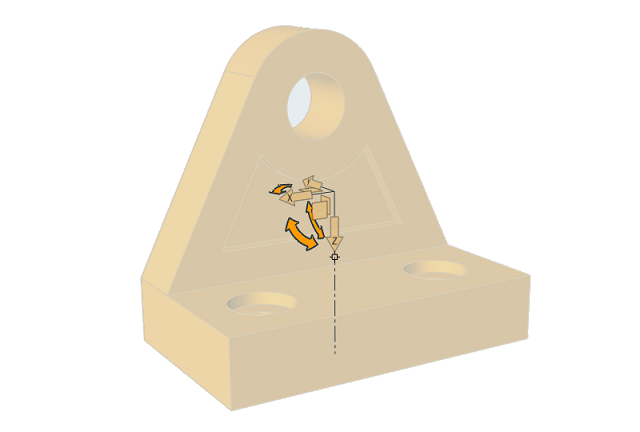
Figure 12. Move Tool Aligned to Face
Align Objects to Features
Align objects to features such as points, edges, faces, and holes using the Move tool.
-
From the Home tools, click the Move tool.
Figure 13.Or press M or T.
-
Click at the tip of the X, Y, or Z
arrow on the Move tool then hold and drag as you move
your cursor to a point, face, edge, or hole center.
An axis line appears to help you align the tool.Tip:
- Selecting a cylindrical hole will align the selected object to the axis of the hole.
- Click the origin of the Move tool then use the icons in the microdialog to align the tool to the selected object's local or global axes.
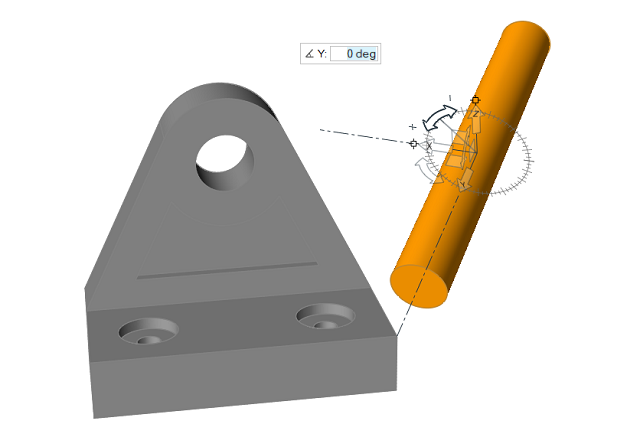
Figure 14. Object Aligned to a Point
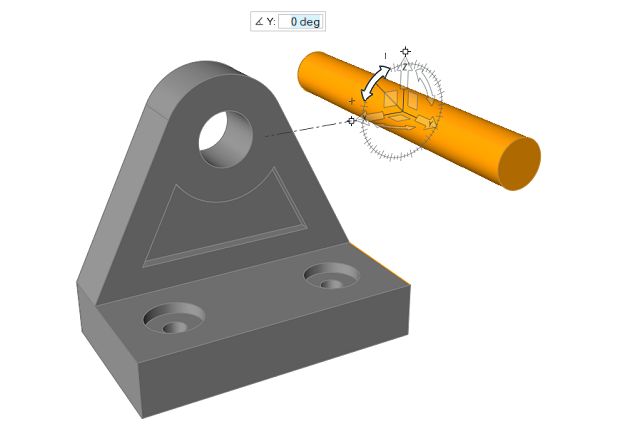
Figure 15. Object Aligned to an Edge
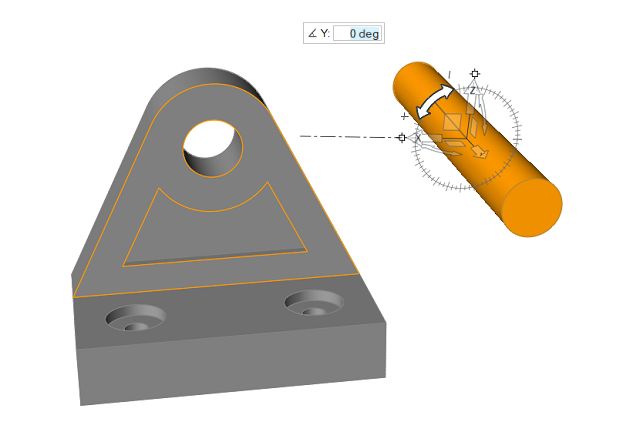
Figure 16. Object Aligned to a Face
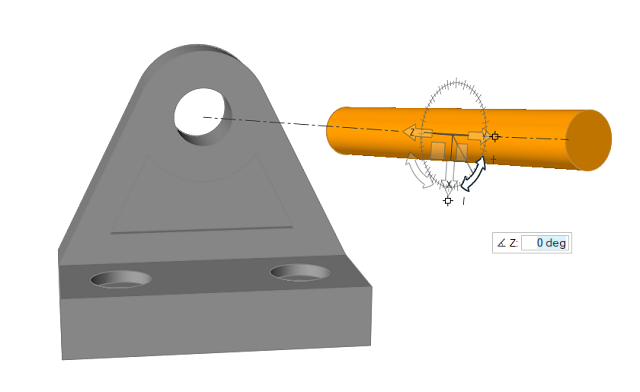
Figure 17. Object Aligned to a Hole
Microdialog Options

- Align the Move tool with the global axis.

- Align the Move tool along an edge or face. If the Move tool is being repositioned (highlighted orange), clicking this button will force the Move tool to be aligned automatically as you drag it around the model.