Arcs

Sketch and edit an arc.

Sketch an Arc

Sketch an arc by defining three points or the center and two points. Or sketch a tangent arc or a perpendicular arc by defining the direction and the angle.

Before you can sketch a tangent or perpendicular arc, you need to create a sketch curve.
  1. On the ribbon, click the Sketching tab.
  2. Click one of the Arcs icons.

  3. Set the sketch plane:
    • Click one of the default sketch planes: Top, Front, or Right.
    • Click the planar face of an object.
  4. Sketch an arc:
    To sketch this Do this Note
    Arc

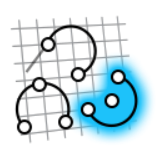
    • Click twice to define the center and the start point, and then click a third time to define the end point.
    • Drag to define the center and the start point, and then click to define the end point.
    After defining the center and the start point, move the mouse clockwise or counterclockwise to sketch an arc in either direction.
    Tangent Arc (or Perpendicular Arc)

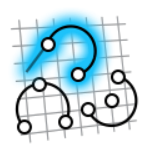
    1. Click a sketch curve to select it.
    2. Hover over one of the blue arcs around the end point to define the direction as Tangent or Perpendicular.
    3. Click to sketch the arc.
    • You can also use the Line tool to sketch a tangent or perpendicular arc.
    • You can easily choose the desired end point by clicking the sketch curve near the desired end point.
    Three Points Arc

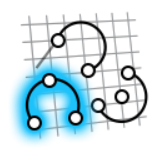
    • Click twice to define the start point and the end point, and then click a third time to define a point on the arc.
    • Drag to define the start point and the end point, and then click to define a point on the arc.
     
  5. Optional: See Edit a Dimensional Constraint.
  6. Right-click and mouse through the check mark to exit, or double-right-click.

Edit an Arc

Reposition, resize, or apply a sketch constraint.

  1. Double-click the arc to enter edit mode.
    Note: You can also edit an arc during the creation phase.
  2. Edit the arc:
    To Do this Note
    Reposition the center, start point, or end point
    • Drag the point.
    • Click the point, and then enter the X, Y, and Z coordinates.
    When you modify one end point, the other end point is temporarily locked in place.

    When you reposition the center, the start point is temporarily locked in place and the end point is repositioned with the center. If you apply the Fixed constraint to the end point, then the start point will be repositioned with the center.

    Change the radius Click the arc, and then enter a Radius.  
    Change the start or end angle
    • Click the arc, and then drag the Start Angle or End Angle arrow.
    • Click the arc, and then enter a Start Angle or an End Angle.
     
    Select the chain or endpoints
    1. Select one or more sketch curves.
    2. Right-click the selection, and then select Select the chain or Select the endpoints.
     
    Cut, copy, or paste the sketch curve
    1. Select one or more sketch curves.
    2. Right-click the selection, and then select Cut, Copy, Paste, or Paste without constraints.
     
    Apply a sketch constraint Click the sketch curve, and then select a sketch constraint on the microdialog. To hide constraints, right-click, and then deselect Show constraints.
    Convert a sketch curve into construction geometry Click the sketch curve, and then select Construction. Construction geometry is used as a reference to line up or define other geometry.

    To hide construction geometry, right-click, and then deselect Show construction geometry.

    Hide dimensions Right-click, and then deselect Show dimensions.  
  3. Right-click and mouse through the check mark to exit, or double-right-click.