Data Summary
The Data Summary dialog displays model data in a table that can be edited.
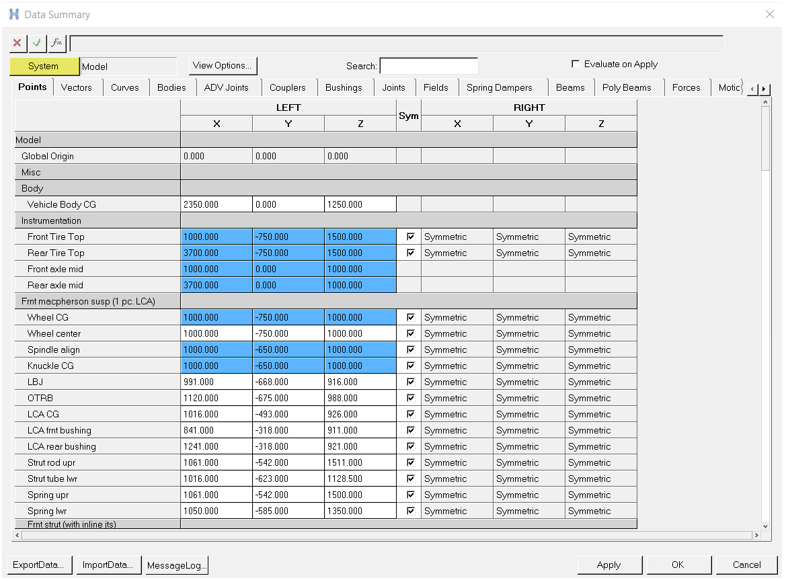
Figure 1.
A Search field is available to filter entries based on the input string. Multiple comma separated search strings can be provided that works similar to ‘OR’ condition.
Activate the Evaluate on Apply option to suspend the evaluation of the model until Apply is clicked. This is useful for very large models that take significant time for model evaluation that generally happens for every data field edit.
The data an be exported by clicking Export Data. The data can be exported as an Excel file or a text file.
The message log appears in the bottom half of the window and gives you information about your file. To display a data log, click Message Log (the button will remain in a depressed state). To clear the message log, click Clear. To remove the display of the data log, click the Message Log button again.
View Options
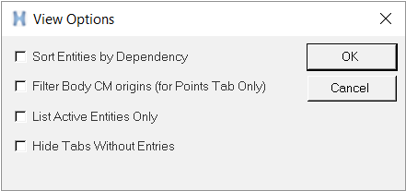
Figure 2.
| Sort Entities by Dependency | Groups entities based on dependency. Independent entities are listed at the top and entities with parametric relations are listed at the bottom within a system. |
| Filter Body CM origins (for Points Tab Only) | Filter Points that are used as Body CG. |
| List Active Entities Only | Show entities that are active only. |
| Hide Tabs Without Entries | Hide entity tabs that do not have any entries. |