Make Parametric Changes
Dimensions such as distance and angle can be changed easily in HyperMorph.
Translate/Rotate Handles
- From the Tools page, click HyperMorph.
- Click Morph.
- Select the Move Handles subpanel.
-
Translate the handles.
- Change the upper middle selector from move to node to translate.
- Use the handles selector to select handles.
- Select a vector and distance.
-
Rotate the handles.
-
Specify dimensions more precisely
-
Click morph.
HyperMorph moves the follower handles for node a as a group and the follower handles for node b as a group either towards each other or away from each other so that the new distance between node a and node b is equal to the specified distance. If the left selector is set to hold end a, node a will not move, same for node b. If the left selector is set to hold middle, both node a and node b will move the same distance.
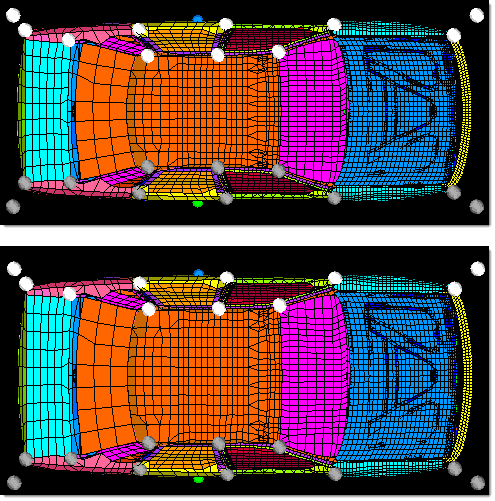
Figure 1. Morph by Altering Distance between Two Nodes. The width of the car is found by placing node a (green dot) on the right hand door and node b (blue dot) on the left hand door. The handles on the right side of the model are selected as followers for node a and the handles on the left side of the model are selected as followers for node b. The distance is changed and the model morphs.
-
Click morph.
Change Angles
-
Click morph.
HyperMorph moves the follower handles for each end in a way so that the new angle between node a, the vertex, and node b are the specified angle. If necessary, HyperMorph will iterate to achieve the desired angle, or at least get close. If node a and node b are selected coincident with one of the follower handles, iteratation is not necessary.
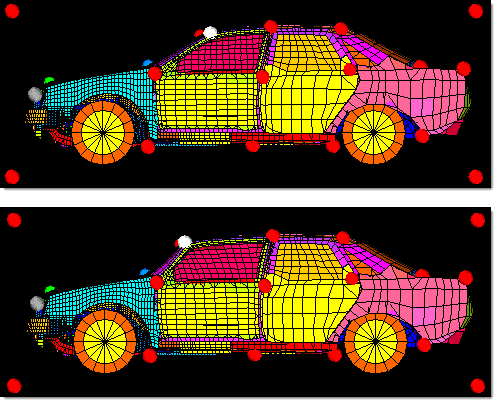
Figure 2. Morph by Altering Angle Formed by Three Nodes. The slope of the windshield is altered by defining an angle using three nodes, green, blue, and red, selecting two handles at the front of the car as followers for node a (green), and selecting two handles on either side of the windshield as followers for node b (red node). The angle is changed from 160 degrees to 150 degrees. Note that the handles on either side of the windshield were constrained to move along the x-axis (front to back) thus maintaining the height of the roof.