Support
Create, designate, and partition supports required for 3D printing.
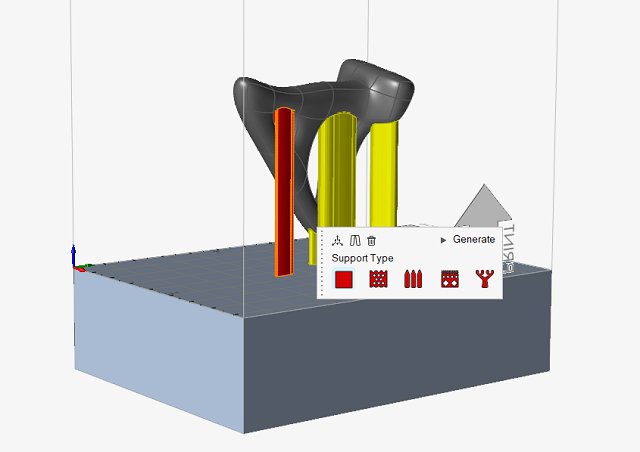
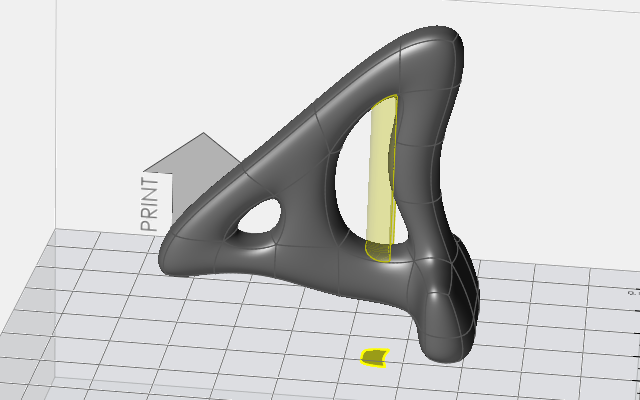
When 3D printing a part, surfaces on the part with angles of less than 45 degrees require support material to be added during the printing process. These areas are highlighted in yellow when the Orientation or Support tools are selected.
Use the Supports
![]() tool to:
tool to:
- Designate parts as supports
- Automatically generate and edit supports
- Move and partition supports so they are placed optimally for 3D printing
Automatically Generate Supports
Auto-generate support for the part with material that will be removed during post-processing.
Prerequisite: Prepare and orient the part for 3D
printing.
-
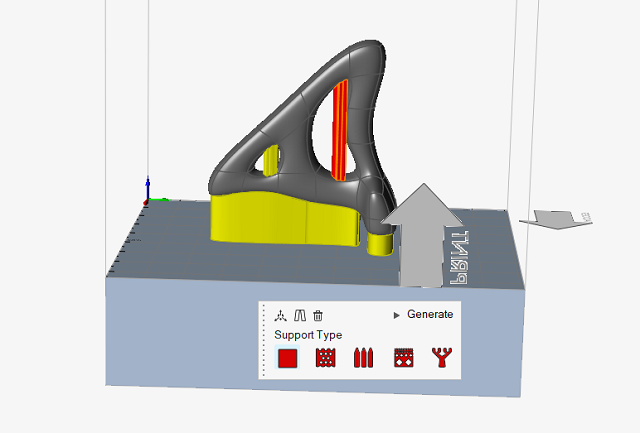
Select the Create Supports
 tool on the Support icon. Inspire auto-generates a support preview which must be
edited and configured before printing.
tool on the Support icon. Inspire auto-generates a support preview which must be
edited and configured before printing.
-
Select a support preview to edit it. The selected support appears highlighted
in red.
-
Select a support type and set the desired parameters to configure the support.
Type of Support Options for Configuration Block Configure the pattern, tip, and holes. 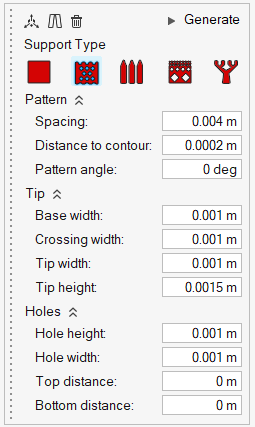
Rod Configure the pattern and tip. 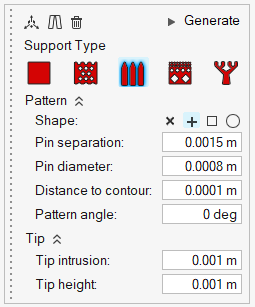
H-Cell Configure the pattern, cells, and tip. 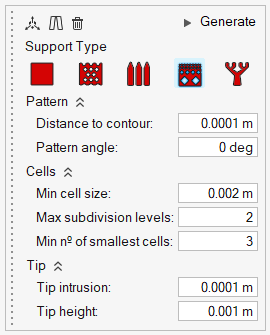
Tree Configure the pattern, branching, and tip. 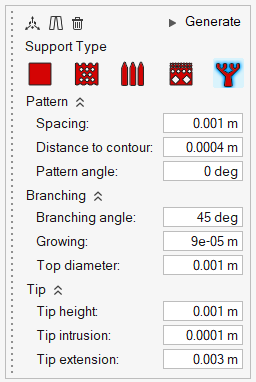
Tip:
- Hover over a parameter in the supports microdialog to view a tooltip that explains what the parameter does.
- Use the Minimum support area option in the Preferences to define the smallest area for which supports should be generated. Areas smaller than this will be assumed to be self-supporting due to their small size and will not display a support preview, even if one would generally be required due to the undercut angle.
Manually Create a Support
Create supports manually in any region of the part based on your specific requirements.
Prerequisite: Prepare and orient the part for 3D
printing.
-
Select the Manual Supports
 tool on the Support icon.
- Select a surface to generate a preview of a pin support.
- Select the support to edit it.
-
Use the icons in the microdialog to define the shape of the support. Options
are: cross-shaped, plus-shaped, square, and circle.

- Enter a Diameter.
- Click Generate.
Designate Parts as Supports
Designate existing parts as supports.
Prepare and orient the part for 3D printing.
-
Select the Designate Supports
 tool on the Support icon
- Select parts to designate them as supports.
Partition Supports
Split a support and move the partitions so they are in contact with the printing bed.
-
Click the Create Supports
tool on the Support icon.
-
Select the support you want to partition.
-
Click the Partition
 icon on the microdialog to view a projection of the
support onto the printer bed.
icon on the microdialog to view a projection of the
support onto the printer bed.
-
Use the Move
 tool on the microdialog to drag the partitioned
sections away from the part so they are in contact with the printing bed.
tool on the microdialog to drag the partitioned
sections away from the part so they are in contact with the printing bed.
