Using the Cluster API Inspector

This procedure will walk you through setting up and using the API inspector.
  1. Create the resource templates for the Core Edge Services described in Create a New Resource.
    Note: The ase-core-cloud service versions 0.0.35 and higher should leave MQTT connection details, the identifier and accountID blank when used with ase-core-management 0.0.30 or higher (SmartWorks cluster installations from 2021-06-07 onwards). In that case the details will be supplied by the management service.

    Using the HelmChart as a resource will take care of this automatically.

  2. Create a build configuration with all the resources listed before included. If needed, see Create an Edge Application.
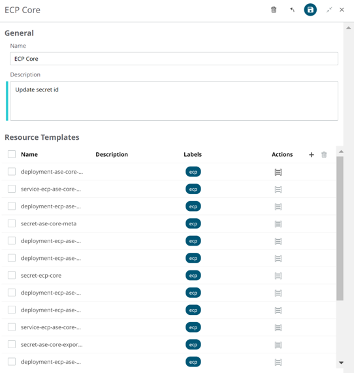
    Figure 1.
  3. On the Asset details panel, on the Configuration tab, choose the build configuration created and click the Apply button.
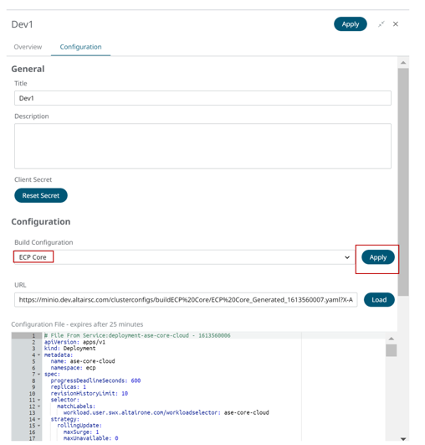
    Figure 2.
    You can check the progress of the installation using watch kubectl -n ecp get pods in the terminal of your cluster. Once it is all working, the status for each pod will say Running. Note that the message pod will take some time to initialize.
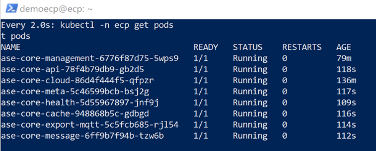
    Figure 3.
  4. To use the API client, the cluster schema needs to have an action and an event added. To edit the schema, click the Edit Schema button in the cluster configuration.
    Figure 4.
  5. Add the following action:
    "send-api": {
        "description": "Send an API request to the cluster.",
        "input": {
            "properties": {
                "correlationId": {
                    "type": "string"
                },
                "href": {
                    "type": "string"
                },
                "requestBody": {
                    "type": "string"
                },
                "requestMethod": {
                    "type": "string"
                }
            },
            "type": "object"
        },
        "title": "Send API"
    },
  6. Add the following event:
    "send-api": {
        "data": {
            "type": "object"
        },
        "description": "Final response of API request",
        "title": "API request is done"
    },
  7. Click Save and they will be created.
  8. The cluster’s overview pane will show details of the deployments and pods. Click on the arrow in front of the name to expand the item to show more details.
  9. To make the API calls click the API client button displayed on the cluster’s overview pane.
    Figure 5.