Add Line Vents
Add line vents to enable gases to travel along the part and escape from the parting line of the mold.
You must create or designate a mold for your model before
adding line vents.
-
Click the Line Vent icon.

-
Click and drag to sketch a line vent on the mold. Click again to end the
vent.
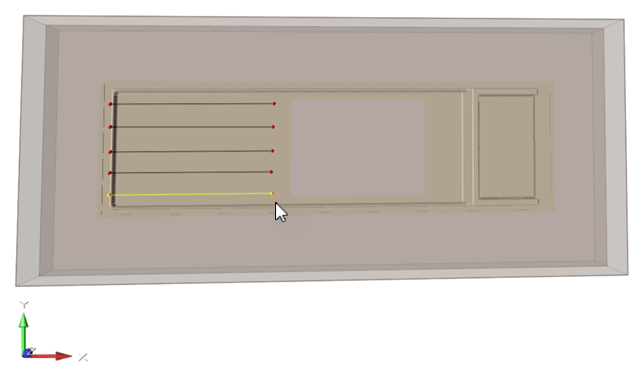
Figure 1. Example of Line Vents on a PolyFoam ModelIn a PolyFoam model, you sketch vent lines on the exterior faces of the mold for ease of use. The software projects the vents to the part and runs the simulation on the model as if the vents were located on the part.
In a physical model, line vents are placed along the part to move the air from the part to the partition line.
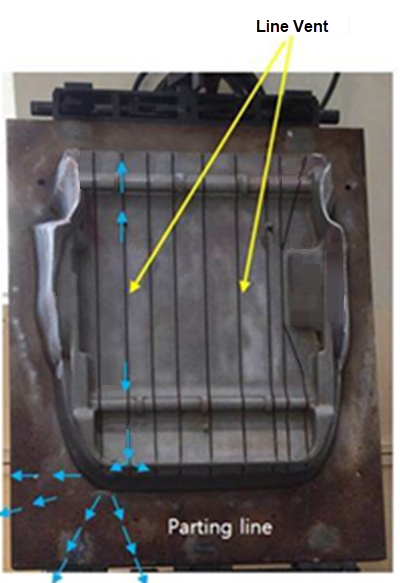
Figure 2. Example of Line Vents on a Physical Model -
Use the microdialog options to define the parameters of the line vent.
Parameter Description Note Move Line Vent 
Use the Move tool to change the location of the vent. Alternatively, enter the X, Y, and Z coordinates for the vent. Thickness The thickness accounts for the size of the gap that exists at the parting line of the mold. Enter the gap thickness value. Porosity The porosity value controls the vent opening that syphons gas away from the part. Enter a value between 0 and 1, where 0 means the vent is fully closed, and 1 means the vent is fully opened.