|
Verifying Workspaces
In Automator, results in a workspace can be verified so that users can stop, stop without error notifications, proceed, or proceed with notification. In the previous lessons, you learned about the basics of building a Visual Process. Here, let’s try creating a new Visual Process that involves a workspace and the new element “Verify Workspace.”
To try out the steps below, prepare a couple of input files and a workspace that we could work on. The goal is to understand the new Verify Workspace element and how it can help you generate high-quality results.
For this lesson, we will demonstrate how the Verify Workspace element works and what the results will be if set conditions are satisfied or not satisfied.
Steps
1. On the Navigation Tree, click Automator, click Visual Processes, and select Processes. Click the Add icon  .
.
2. Name the Visual Process (e.g., Verify Workspace).
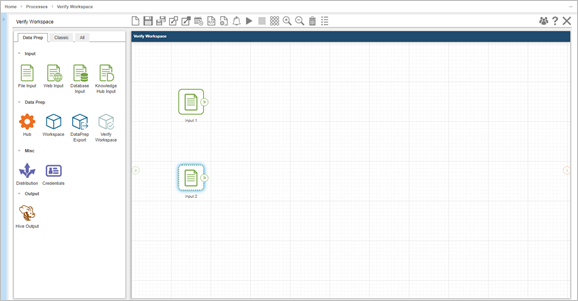
3. Add one or more input elements to the workspace. Similarly, provide a name for the elements, and supply the correct input path.
Click Apply and then click Ok.
4. Add a workspace element and connect to it the input elements you previously added. As usual, provide a workspace name, and supply the correct workspace path.
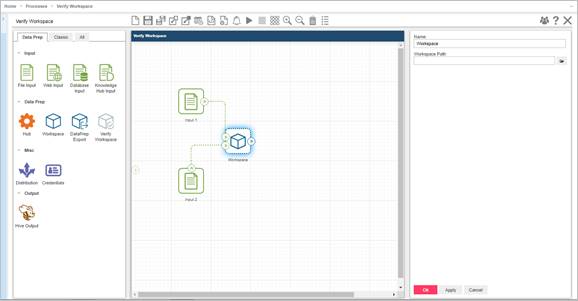
Click Apply and then click Ok.
5. As we are dealing with more than one input file, it is ideal to add a Hub element that could process the multiple input files individually or by group.
Add a Hub to the Visual Process and connect the workspace to it.
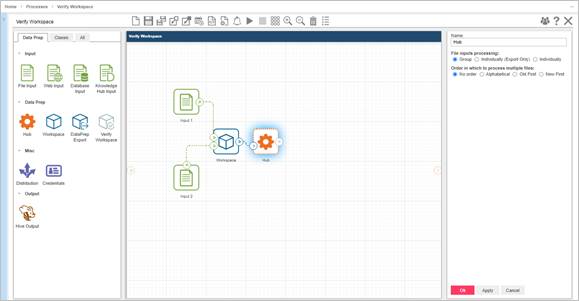
Rename the Hub element accordingly, and apply the settings appropriate for your Visual Process.
|
|
NOTES The following settings are available for the Hub element: q File inputs processing: · Group — all input files are processed in a group · Individually (Export Only) — each input file is processed separately by the following element types: Report Export, Table Export, Summary Export, DataPrep Export, Verify Model, and Verify Workspace. · Individually — each input file is processed by all elements after the Hub separately q Order in which to process multiple files: · No order — input files are processed in random order · Alphabetical — input files are processed alphabetically according to their names · Old First — input files are processed in chronological order, i.e., from oldest files to newest ones · New First — input files are processed in reverse chronological order, i.e., from newest files to oldest ones. |
|
|
|
|
|

Click Apply and then click Ok.
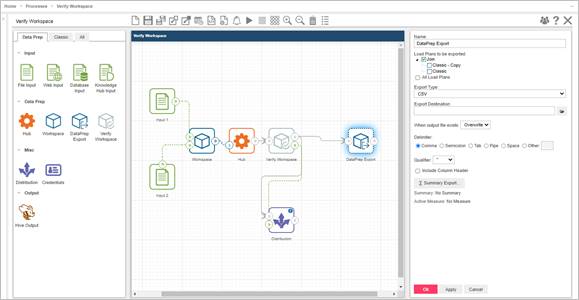
6. Add the Verify Workspace element and connect to it the Hub element.

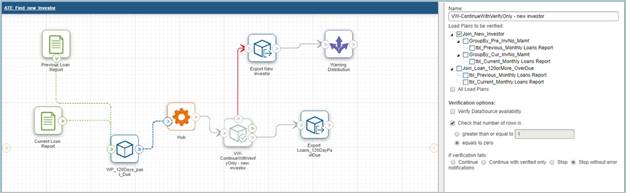
In the Property panel, apply the necessary settings (i.e., Name, Load Plans to be verified, Verification options, and If verification fails settings).
|
|
NOTES The following settings are available for the Verify Workspace element: · Name — name of the graphic element. · Load Plans to be verified — select the load plan/s for verification. You can select several load plans by ticking their corresponding checkboxes. To export all load plans, select the All Load Plans checkbox. Verification options — choose the verification to be done: · Verify DataSource availability – select this option to check whether the data source specified is available. · Check that number of rows is – select this option to check if the number of rows meets the specified value: ¨ Greater than: set the minimum number of rows for verification ¨ Equals to zero: set the number of rows for verification to zero If verification fails · Continue. Automator will continue processing the associated actions for the workspace even if a verification failure of the specified kind is encountered. · Continue with verified only. Automator will continue processing the associated actions for the workspace only if it was verified successfully. · Stop. The first failed verification causes the Verify Workspace to immediately fail. · Stop without error notifications. The job is stopped, but no email alert is sent. |
|
|
|
|
|
For this Tutorial, let’s try the following settings:
· Load Plans to be verified: Set to All Load Plans.
· Verification options: Set to Check that number of rows is and greater than, and then input “150.”
· If verification fails: Set to Stop.
Click Apply and then click Ok.
7. Add a Distribution element to the workspace, and connect the Verify Workspace element to it. As we have two input elements in our example, make two connecting lines. Apply the necessary settings in the Property panel as usual.
|
|
NOTES The Connected Sources field should show the Verify Workspace element. The Available Sources field in the Property panel should show the input files you used. |
|
|
|
|
|
Let’s try selecting the Log option to see how our workspace is verified after the process is run.
Click Apply and then click Ok.
8. To export our workspace should the verification be successful, let’s add a DataPrep Export element, and connect to it the Verify Workspace element. Make the necessary changes in the Property panel.
Click Apply and then click Ok.
9. At this point, we can save the process and then run it.
In Step 6, we modified the settings of the Verify Workspace element. In this scenario, all load plans, i.e., the workspace and the input files, will be checked as to whether the number of rows exceed 150, which is the number we assigned in the Property panel.
· If the number of rows in any of the load plans is less than 150, the process stops, i.e., the Verify Workspace fails, because we set the If verification fails option to Stop. See the Log Mode below.


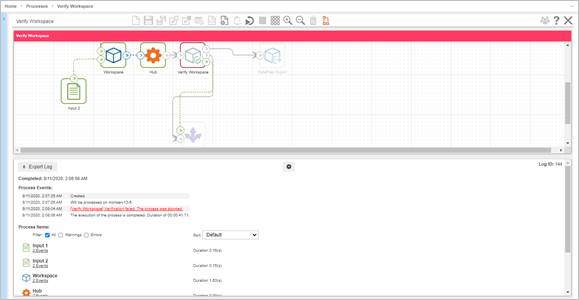
A closer look at the Log Mode shows this:
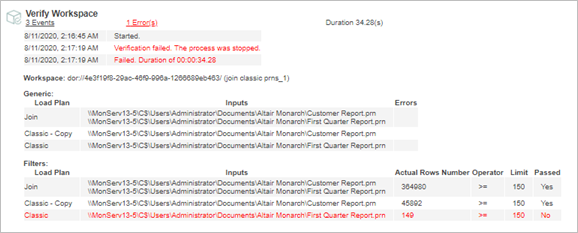
The verification process failed because one of the input files had less than 150 rows, which was the number we set in Step 6.
In another case in which the conditions are satisfied, the process should run successfully without errors.
Below is a set of examples showing the flow of a Visual Process in which the selected load plan generates one or more rows and the number of rows for verification is set to 0. Take note of the red arrows in each image.
· If verification fails, continue: The process continues even if the workspace fails to meet the verification setting.


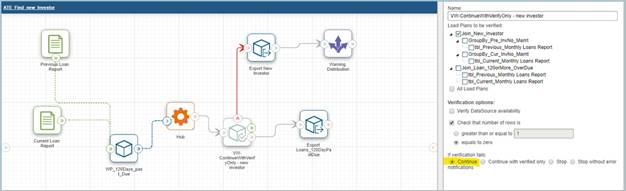
· If verification fails, continue with verified only: The process continues with the two export actions, but a warning indicates that some inputs were not verified.


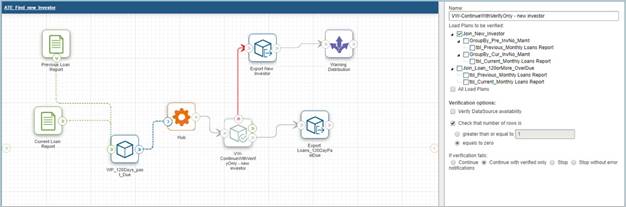
· If verification fails, stop: The process continues for one export but stops for the other that involves unverified inputs. For the former, the export proceeds, but a warning indicates that some inputs were not verified.
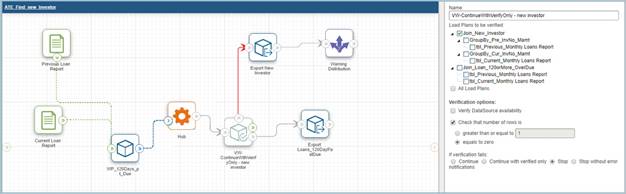
· If verification fails, stop without error notifications: The process stops, and no warning is issued.