


|
Assigning a Model to a Project File
Now we need to assign a model file to specify what data will be extracted from the input file. Models, which are created within Monarch Complete, contain all of the definitions created during a Monarch Complete session, such as data extraction templates, field properties, filter, sort and calculated field definitions, and so on. Models save work by allowing you to apply the same settings to a periodic report each time it is generated.
|
|
NOTES When selecting a model file, be sure to select a model that successfully traps the data you want to extract from the input file. |
|
|
|
|
|

Steps
1. On the Model and Verifications tab of the Project Editor, click the Browse button next to the Location field to select the desired model.
2. In the displayed window, from the data source type drop-down list, select Local.
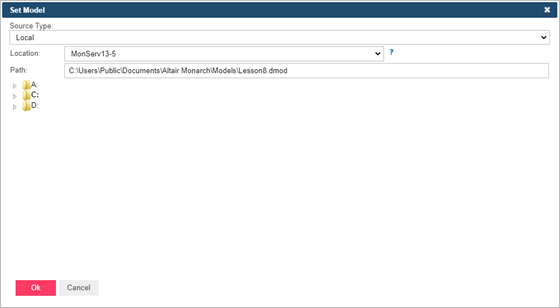
3. In the Location field, select the location type.
|
|
NOTES If the required server is not on the list, you need to create it. For information about adding a new location, refer to the Locations Management topic in the web help.
In case of a single server configuration, refer to Monarch Server Configurator Guide to change location settings. |
|
|
|
|
|
4. In the Path field, enter the file path of your target model, e.g., C:\Users\Public\Documents\Altair Monarch\Models\Lesson8.dmod.
5. Click OK. The model file path is displayed in the Location text field.
|
|
NOTES Model files in compressed archive format (e.g., zip and gzip) can be used and specified in the Project Editor. |
|
|
|
|
|
The next step in creating a project file is to specify input settings for it.