


|
Using the Regular Expression Trap Type
Recall that in Chapter 7, we attempted to trap the Ship Date line but also picked up unwanted data as well, i.e., the Return Authorization and Received fields. We rectified this issue by creating an exact trap. We then showed how we can avoid this issue by using an exclusion trap. We could also have created a regular expression trap. Regular expression traps allow sophisticated Monarch users a high level flexibility when creating templates because this type of trap automatically considers variable spaces between fields of interest. Thus, this trap can be very useful when field positions change on a page or when field positions change with respect to other fields.
All of the traps we have described thus far may be translated into a regular expression trap, and the first step of creating such a trap involves selecting a line with fields we want to trap. Similar to all of the previous traps/templates we created, a detail trap must be created before append, header, or footer traps.
Let’s trap the Customer line of Classic.prn using a regular expression trap.
Steps:
1. Open Classic.prn and Lesson1.dmod in Monarch.
2. Select Report Design, choose the line containing the text CUSTOMER as the sample text, and then select New Template > Append.
3. Rename this template as Customer.
4. From the Trap Type Selector, select Regular Expression Trap.
5. Select Ignore Case from the Options drop-down that displays on the Action toolbar when the regular expression trap type is selected.
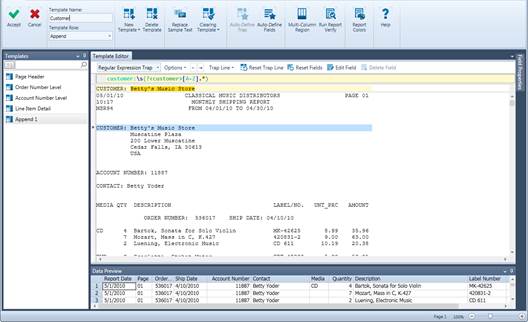
Figure 9-41. Creating a Regular Expression trap.
6. In the trap line, type in the following: customer:\s*(?<customer>[A-Z].*)
The trap we have just created instructs Monarch to look for a line marked “customer:” ignoring case and with any number of spaces following it and then select all of the text following this marker provided that the first character of the text to be captured begins with any character from A to Z.
Note that Betty’s Music Store is highlighted as though we have selected it as a field.
7. Right-click on Betty’s Music Store in the sample text line and select Create a field from this capture > customer.
The Customer field is created
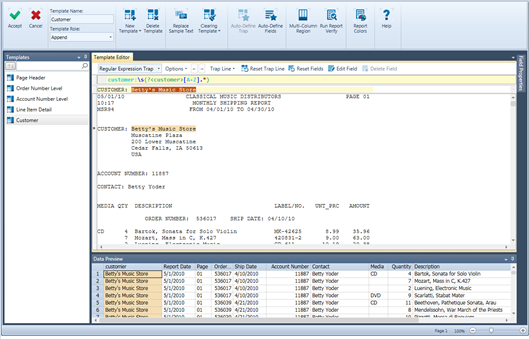
Figure 9-42. Data preview of the newly created Customer field.
Note that regardless of the length of the customer name, the field is always captured correctly.
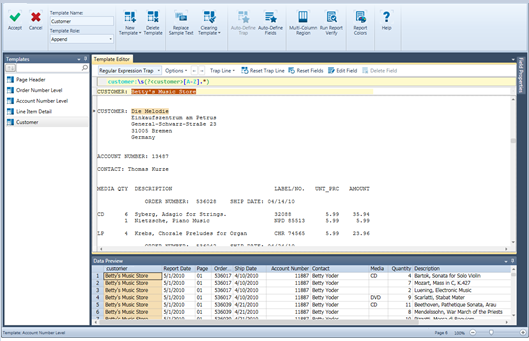
Figure 9-43. The customer name “Die Melodie” is captured correctly even though we did not specify how large the field length should be.