


|
Trapping the Ship Date Lines
We’ll use an exact match trap to capture all lines representing the order number level. An exact match trap looks for an exact match of a character or series of characters.
Steps:
1. Continuing from the previous exercise, click in the Trap line above the colon following ORDER NUMBER in the sample line.
2. Type a colon (:) in the Trap line directly above the first colon in the Sample Text box.
3. Type another colon (:) directly above the second colon in the Sample Text box.
4. Highlight the fields marked by 536017 and 04/10/10 in the Sample Text box as shown in Figure7-17.
|
|
NOTE Remember that your Date Format setting must be set to M/D/Y to properly capture date inputs in the sample reports we’ll be using for this guide. |
|

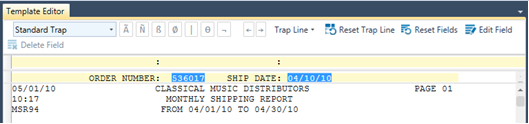
Figure 8-17. Highlighting the ORDER NUMBER and SHIP DATE fields.
5. Scroll through the report to see the results. Note that on the fourth page of the report the “RETURN AUTHORIZATION” and “RECEIVED” fields have been highlighted (see Figure 8-18). We don’t want to capture these fields, so we need to edit our template definition.
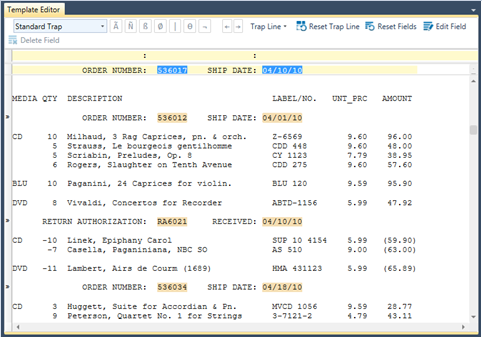
Figure 8-18. Viewing the result of highlighting fields.
6. In the Trap line, place the cursor directly
above the “5” that begins the order number (536017) in the
sample line, click the Numeric trap  button,
and then check the highlighted fields once more.
button,
and then check the highlighted fields once more.
The “RETURN AUTHORIZATION” and “RECEIVED” fields are no longer highlighted on Page 4 of the report.
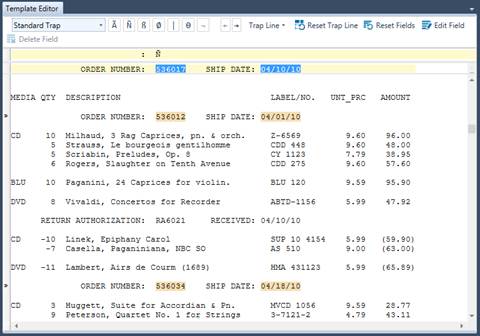
Figure 8-19. Viewing the result of highlighting fields.
7. Replace Append 1 with Order Number Level in the Template Name field of the Template Editor.
The fields trapped by the append template we just created can be easily distinguished from those trapped by the detail template due to the different colors that Monarch assigns them.
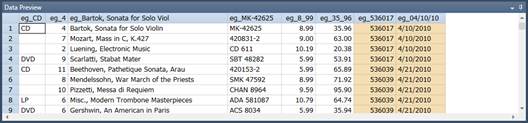
Figure 8-20. Viewing the result of highlighting fields.
8. Select Accept  to
accept your changes and close the Template Editor. You will be returned
to Report view when you do so.
to
accept your changes and close the Template Editor. You will be returned
to Report view when you do so.