|
PDF/XPS Import Options Window
When importing a PDF or XPS file into Monarch Classic, use this window to adjust the PDF or XPS import options, which determine how the PDF file will appear in the Monarch Classic Report window (e.g., the amount of spacing in it, etc).
This dialog displays when:
-
You select File tab, Open, then select a PDF or XPS file to open.
-
You select PDF/XPS Options from the Report View ribbon, while a PDF or XPS file is open.
Note: See Customizing PDF or XPS Import Options for more detailed information on utilizing this dialog.
options
|
Field |
PDF/XPS Engine |
Description |
|
Snap Text Left |
PDF Engine v4.5 |
Select this option to align the text to the left of the imputed PDF grid. |
|
Snap Text Up |
PDF Engine v4.5 |
Select this option to align the text to the top of the imputed PDF grid |
|
Always Align Left |
PDF Engine v4.5 |
Select this option to always align text to the left of the imputed PDF grid |
|
Monospaced |
PDF Engines v4.4 and below; XPS Engine v3.0 |
Specifies that a monospaced font (i.e., a fixed-width or non-proportional one) was used in the PDF/XPS file. |
|
Freeform |
PDF Engines v4.4 and below; XPS Engine v3.0 |
Specifies that the selected PDF/XPS file contains primarily freeform text. |
|
Suppress Left Whitespaces |
PDF Engines v4.2–4.5 |
Instructs Monarch Classic to remove all left-side white spaces when displaying the report in the Import Options dialog. |
|
Stretch |
This option lets you specify how much spacing is used during the PDF/XPS conversion process. By default, Monarch Classic uses a larger amount of spacing (i.e., a higher stretch value) than in the original document. This will make the report look like it is stretched width-wise, but Monarch Classic errs on the side of caution so that columns won’t run into each other. This also creates a buffer in case a later iteration of the report contains wider data values. To specify a stretch value, move the Stretch slider to the right or left:
|
|
|
Crop |
Crops extra spaces in the PDF page.
|
|
|
Zoom
|
|
Drag the slider at the bottom right of the PDF/XPS Import Options window to the right or to the left to zoom in on the sample data:
|
|
Auto Adjust |
|
Select this button to have Monarch Classic automatically select the optimum settings for the displayed sample page. Note If you have changed any of the import options settings, clicking this will likely restore the original settings. |
|
Show these options automatically |
|
When selected, this option specifies that whenever you attempt to import a PDF or XPS file into Monarch Classic, this window will appear, displaying a sample page of the PDF or XPS file. If you clear this option, this window will not appear the next time you open a PDF or XPS file in Monarch Classic (or any subsequent time, for that matter, unless you choose to select this option). Note Even if this option is enabled, you can still access the window by selecting PDF/XPS Options from the Report View ribbon. |
|
Use Engine Version |
|
Select to PDF/XPS engine to use. If you are using the latest engine, try select an older one in cases where you experience alignment issues. Note The legacy engine is not capable of working with PDF files that contain Eastern characters. . |
|
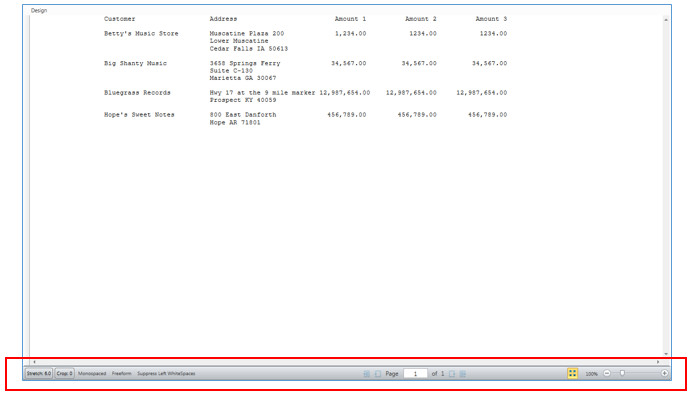
Toggle Maximized Mode |
|
Switches the view to maximized mode to enable viewing of wide documents. In this case, all of the tools located on top of the window move to the bottom of the screen.
|
|
Sample Page |
|
Displays a sample page of the report as it appears with the current PDF/XPS import options applied to it. |
|
Page Number |
|
Displays the current being viewed. |
|
First Page |
|
Displays the first page of the PDF or XPS file in the Sample Page field. |
|
Previous Page |
|
Displays the previous page (if any) of the PDF or XPS file in the Sample Page field. |
|
Next Page |
|
Displays the next page (if any) of the PDF or XPS file in the Sample Page field. |
|
Last Page |
|
Displays the last page of the PDF or XPS file in the Sample Page field. |


CONTEXT MENU OPTIONS
Besides all the options described above, these options display when you right-click on your mouse in an open report in the PDF/XPS Import Options window.
|
Field |
Description |
|
Add Static Guide |
Adds a static guide to the report. Static guides track alignment while ignoring changes in stretch factor. To apply, click on a specific point in a single line to specify where the guide should begin and then drag your mouse until the entire area to be tracked is highlighted. Right-click on your mouse and then select "Add Static Guide." |
|
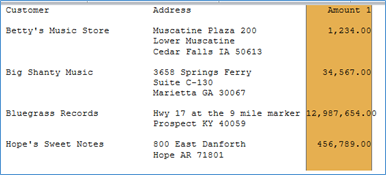
Add Dynamic Guide |
Adds a dynamic guide to the report. Dynamic guides help track alignment while reviewing the report and altering the stretch factor. To apply, click on a specific point in a single line to specify where the guide should begin and then drag your mouse until the entire area to be tracked is highlighted. Right-click on your mouse and then select "Add Dynamic Guide." In the figure below, for example, the dynamic guide clearly indicates an alignment issue in the report.
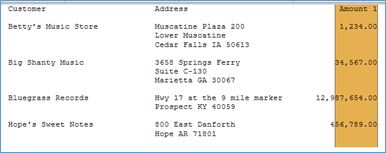
The figure below displays when the correct stretch factor has been applied.
|
|
Edit Guide |
Available only when a guide has been added to a report, allows you to widen the span of a guide. |
|
Delete Guide |
Deletes the selected guide from the report. |
|
Delete All Guides |
Deletes all static and dynamic guides added to the report. |