


|
Customizing XPS Import Options
When you import an XPS file into Monarch Classic, Monarch Classic performs an analysis of the file to try and determine the optimum method for transforming the data accurately. In most cases, Monarch Classic’s auto-detection routines will produce the best results, but under certain conditions, adjustments to the XPS import options may be necessary. For example, the following conditions may require the XPS import options to be adjusted:
-
The XPS file contains tables with tightly compacted columns.
-
The XPS file contains multiple font sizes, and the data of interest is in a smaller font than most of the other text in the XPS. This causes the auto-calculated font size to become too large.
-
Mixed mono- and variable-spaced fonts exist in the XPS file while the data of interest uses monospaced fonts.
-
Mixed free-form and tabular data exist in the XPS file.
Steps:
-
On the File tab, select Open, then Report.
-
From the Files of Type drop-down list, select XPS files (*.xps), and then navigate to the location of the XPS file you want to open.
-
Select the XPS file, then click the Open button. Monarch Classic opens the PDF/XPS Options window, which displays a sample of the XPS file’s data. If you want to enlarge the dialog so that you can view more of the file’s data, click and drag on any of the dialog’s edges or corners.
-
Specify the desired settings for the following options:
-
Auto-adjust
-
Monospaced
-
Freeform
-
Stretch
-
Crop
-
Show these options automatically
-
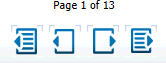
If you want to view how a particular page in the XPS file has been affected, you can click the Go to Page buttons, at the bottom of the window:
-
When you have finished selecting the desired settings, click Accept to save and apply them to the XPS file.
Note: If you are already viewing an XPS file in the Report window, you can access the PDF/XPS Options window by selecting PDF/XPS Options from Report View ribbon.
Select this button to have Monarch Classic automatically select the optimum settings for the displayed sample page.
Note If you have changed any of the import options settings, clicking this will likely restore the original settings.
This setting specifies that a monospaced font (i.e., a fixed-width or non-proportional one) was used in the XPS file. The Monarch Classic report window uses monospaced fonts, which are fonts in which each character has the same width. For example, in a monospaced font, the "o" and "i" characters would have the same width, i.e., they would take up the same amount of horizontal space on a line. Other terms for monospaced are fixed-width and non-proportional. The opposite of monospacing is proportional spacing, in which different characters have different widths. For example, in a proportionally spaced font, the letter "o" would be wider than the letter "i".
When you import an XPS file into Monarch Classic, Monarch Classic tries to detect when monospaced fonts are used and optimizes the conversion accordingly. In some cases, Monarch Classic may not detect that monospaced fonts were used for the XPS file. When this happens, it is usually due to a mix of monospaced and proportional fonts existing in the same XPS file. If you know that the XPS file uses monospaced fonts, and the Input is Monospaced option is not selected during the import analysis, you can select this setting to force Monarch Classic to optimize for monospaced fonts. While proportionally spaced fonts look more appealing, monospaced fonts are superior for tabular data because the uniform width of each character makes the alignment of columns easier.
Note: In general, XPS files generated using monospaced fonts will convert more successfully, so if you are trying to optimize your XPS-producing application for Monarch Classic, then use monospaced fonts. Some of the more common ones are: Andale Mono, Anonymous, Crystal, Bitstream Vera Sans Mono, Courier, Courier New, Elronet Monospace, Everson Mono Latin 6, Fixedsys, Lucida Sans Typewriter, Lucida Console, and PrestigeFixed.
This option tries to optimize text that is more free-form than columnar or grouped columnar text. A columnar document shows a simple table format, while a grouped columnar one might look similar to one of the Monarch Classic sample reports, such as Betty’s Music Store (classic.pdf). A typical document that might benefit from using this setting would be an academic report that is 95% text, but which also contains a few tables that you want to extract. This setting will sometimes work effectively on columnar documents when the default settings do not produce good results.
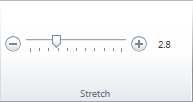
This option lets you specify how much spacing is used during the XPS conversion process. By default, Monarch Classic uses a larger amount of spacing (i.e., a higher stretch value) than the original document. This will make the report look like it is stretched width-wise, but Monarch Classic errs on the side of caution so that columns don’t run into each other. This also creates a buffer in case a later iteration of the report contains wider data values.
To specify a stretch value, move the Stretch slider to the right or left:
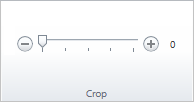
The crop feature allows you to crop the outer edges of a document. For example, you may have a document printed from a website that has graphics or other non-tabular information around the edges that are unnecessary. Using the crop feature to discard the undesired information will not only reduce the amount of data you need to import, but also assist in the parsing of the data, ensuring the best possible alignment.
To specify a crop value, move the Crop slider to the right or left:
This option is used to specify that whenever you attempt to import an XPS file into Monarch Classic, the PDF/XPS Options window, displaying a sample page of the XPS file. If you clear this option, the PDF/XPS Options window will not appear the next time you open an XPS file in Monarch Classic (or any subsequent time, for that matter, unless you reselect this option).
Monarch Classic imports the XPS file using the import options you specified, and displays the results in the Report window.
Refer to PDF/XPS Options Window for more details on XPS options.