


|
Appending Tables Using the Edit Append Dialog
The Edit Append Dialog can help you customize an Append more easily.
The dialog provides a visual approach and offers the most flexibility. Unlike other append methods, you can "force" Monarch Data Prep Studio to match columns even if they do not have the same location, name, and/or data type.
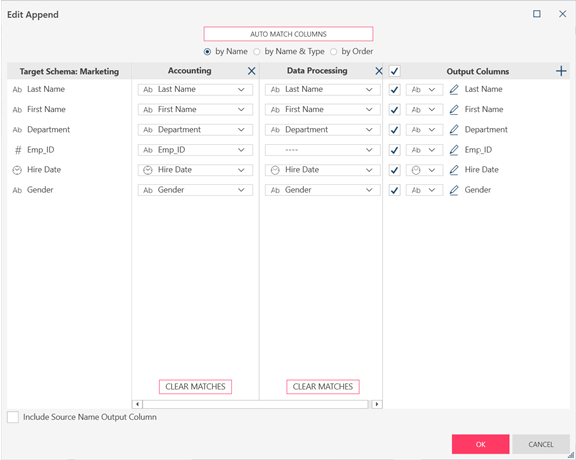
A sample dialog box looks like this:
Notes:
-
Auto Match Columns will help you define your append by matching the columns using the criteria you select (by Name, Name and Type, or Order). Examples for these matching types are here.
-
Target Schema is the table whose column name, type, and/or order will be followed and matched against. This is usually the first table you select.
-
Tables to the right of the target are the tables you want to append. Beside each column is a drop-down list. You can select a different column to match from this list.
-
The Output Columns list to the far right displays the output properties of the append operation. On this panel:
-
-
Check/uncheck a box to hide or display a column
-
Set the data type by selecting from the drop-down list.
-
Modify the column name by selecting the edit (pen) icon.
-
Appending Tables Using Auto Matching
When you auto match Monarch Data Prep Studio makes the best guess using the auto-match criteria you have selected.
You can auto match on Name, Name and Data Type, or Column Order. Examples for these matching types are here.
STEPS:
-
In the Prepare window table list, select the tables ((you can use Ctrl+Click) you want to append.
-
Right+Click and select Create New Append from the context menu that displays. The Edit Append dialog displays:
-
If you wish to auto match columns, use the radio buttons located near the top of the dialog to select how to match columns and then click Auto Match Columns.
-
Name: This options matches all columns in both tables that have the same name (regardless of order). The output excludes columns that do not match. The schema adopted is that of the first table selected.
-
Name and Type : This option matches all columns in both tables that have the same name and type (regardless of order). The output excludes columns that do not match. The schema adopted is that of the first table selected.
-
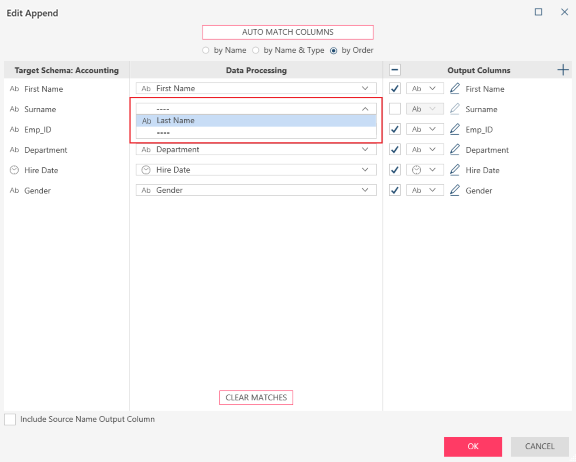
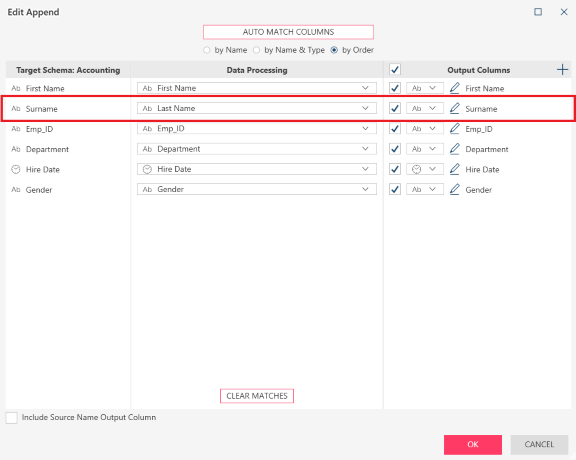
By Order: This option matches all columns in both tables according to their order, regardless of name or type. The schema adopted is that of the first table selected.
-
Appending Tables using Manual Selection
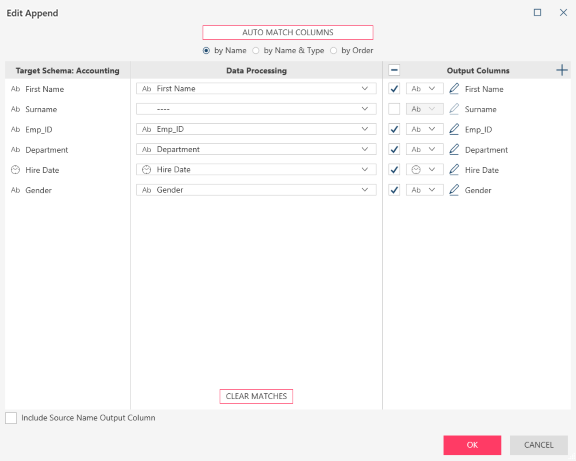
You can also append tables from the Edit Append dialog box by selecting the matching columns yourself. Use the drop-down lists beside each column to select the column to match.
STEPS
-
In the Prepare window table list, select the tables you want to append via the command Ctrl+Click.
-
Right click and select Create New Append from the context menu that displays. The Edit Append dialog displays:
-
To match two columns with different names, use the drop-down icon to the right of the non-matching column of the corresponding table to locate the correct column to match. When the column is selected, the match is made.
-
The Output Columns panel displays which columns are displayed in the output table. By default, all automatic matches will be displayed. To add a manually matched column to the output table, tick to box corresponding to this column. You can change the data type by choosing a new data type from the data type drop-down. You can change the column name by clicking the Edit Name icon and then entering a new name into the activated name column.
Note that complete matches cannot be made if the data types of the columns being matched are different (e.g., Gender column in the figures above). In this case, ensure that the data types are identical in the Prepare window and then relaunch the Edit Append Dialog to match the columns.
Related Links