Workspace
The Inspire workspace includes the ribbon, modeling window, legend, and status bar.
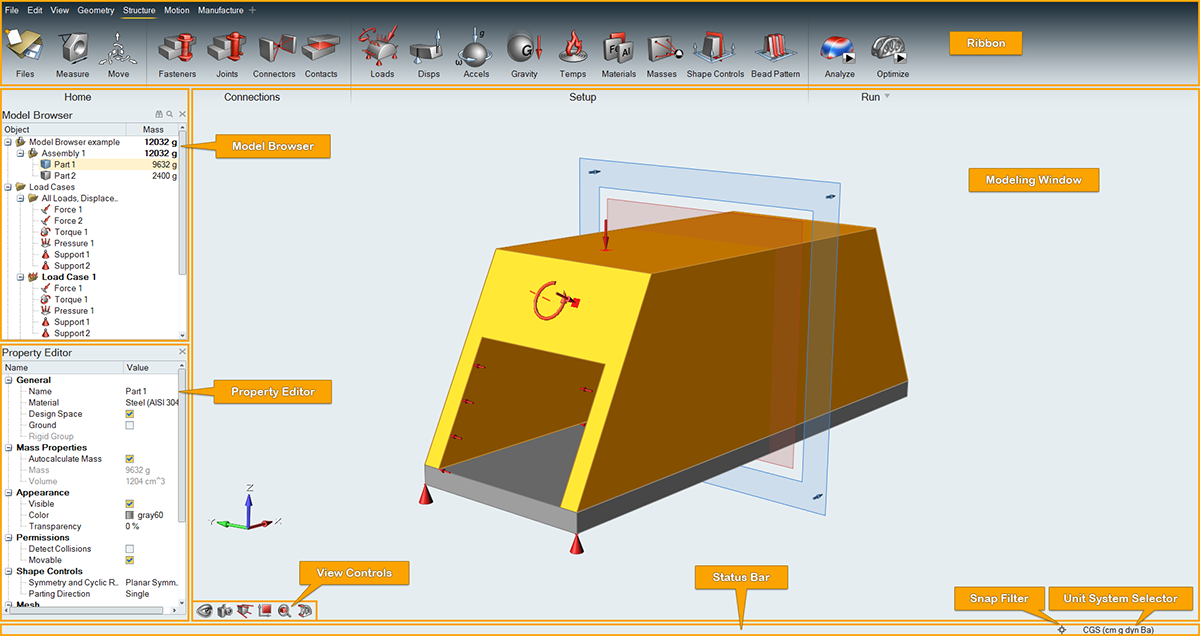
The Inspire workspace is organized into the following areas:
- The ribbon includes both menus and ribbon tabs with icon groups.
- The modeling window is where you interact with your model, and includes the view controls in the lower left corner.
- The legend displays parts by color-coded categories and allows you to hide and isolate them.
- The model browser (F2) shows all of the objects in your model in a tree structure.
- The property editor (F3) shows all of the properties of a selected object and allows you to edit them.
- The demo brower (F7) displays a list of demo models packaged with the software. Double-click a model to load it in the modeling window.
- The status bar displays model status information and includes the snaps filter and unit system selector.
Customize the Workspace
Change the appearance of the workspace including the color scheme, language, and various elements of the user interface.
- Select the File menu.
- Click the Preferences button.
- Select Workspace and change the settings as desired.
- Click OK.
Customize the Ribbon
Create one or more custom tabs on the ribbon and populate them with your favorite tools.
-
Click the
 icon on the ribbon to create a custom tab.
Customize Keyboard Shortcuts
Assign custom keyboard shortcuts to specific functions in the Preferences.
- Select the File menu.
- Click the Preferences button to open the Preferences window.
- Select Keyboard Shortcuts.
- Click on the value for a command to change the assigned keyboard shortcut.
- Click OK.