The HyperXtrude interface in Manufacturing Solutions includes a built-in material database that contains over 70 materials in five different categories. It also includes an easy-to-use editor for modifying and creating new materials. You can use the Material Database Editor to select materials for the model, assign materials to appropriate components, set deformation types for selected tool materials, add new materials to the database, and edit existing materials in the database.
| Note: | Before you use the material database, set the HX_USER_MTL_DB environment variable to the directory in which your proprietary materials are stored. This is needed only if you have materials in your user area. |
Click Material Database on the HyperXtrude Utility menu to open the following dialog:
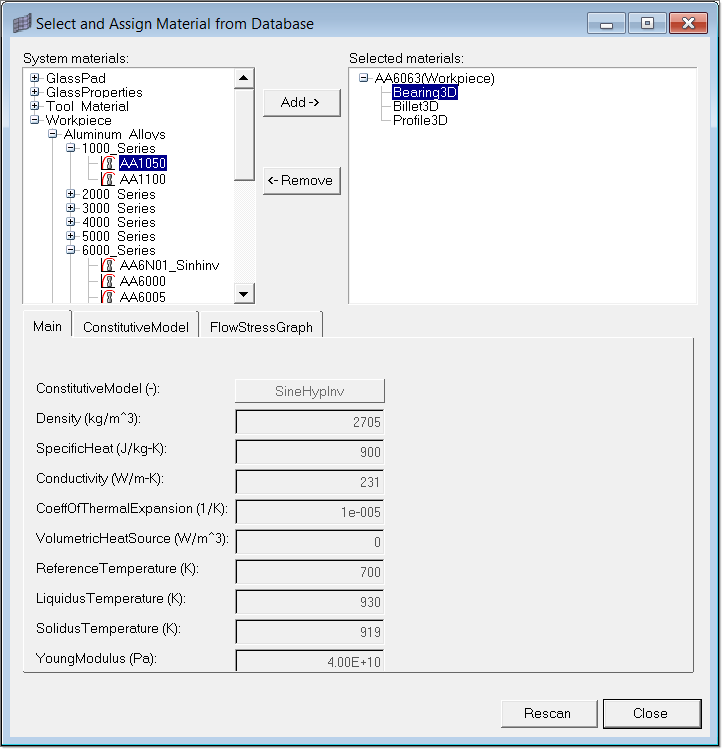
The dialog contains three panels:
| • | Top left panel that shows the system and user material databases in a tree view (the user material tree only appears if the HX_USER_MTL_DB environment variable is set) |
| • | Top right panel that shows the materials that are selected in the top left panel |
| • | Bottom panel that contains tabs for displaying material data and material curves that correspond to the currently-selected materials |
Right click on a tree item to display relevant options based on whether the item is a directory or material. For directories, the following options are available:
Field
|
Description
|
New Material
|
Launch a step-by-step wizard to create a new material.
|
Fit Material
|
Create a new material from extrudability number or curve data and add it to the material database.
|
New Dir
|
Create a new directory.
|
Rename
|
Rename the current selection.
|
Delete
|
Delete the current selection. It should be empty before it is deleted.
|
For materials, the following options are available:
Field
|
Description
|
Select
|
Load the material into the HyperMesh database.
|
Edit
|
Edit the current selection. Makes the material property fields editable. Click Edit to save the changes.
|
Rename
|
Rename the current selection. Click Rename to save the new name.
|
Delete
|
Delete the current selection.
|
How Do I…
| 1. | From the HyperXtrude Utility menu, click Material Database. The Select and Assign Material from Database dialog is displayed. |
| 2. | Using the tree in the upper left portion of the dialog, expand the material categories to find the material you want to select. |
| 3. | Click Add. The material will appear in the Selected Materials list on the right. This action adds the material to the HyperMesh database. |
|
| 1. | From the HyperXtrude Utility menu, click Material Database. The Select and Assign Material from Database dialog is displayed. |
| 2. | If necessary, select a material from the tree. |
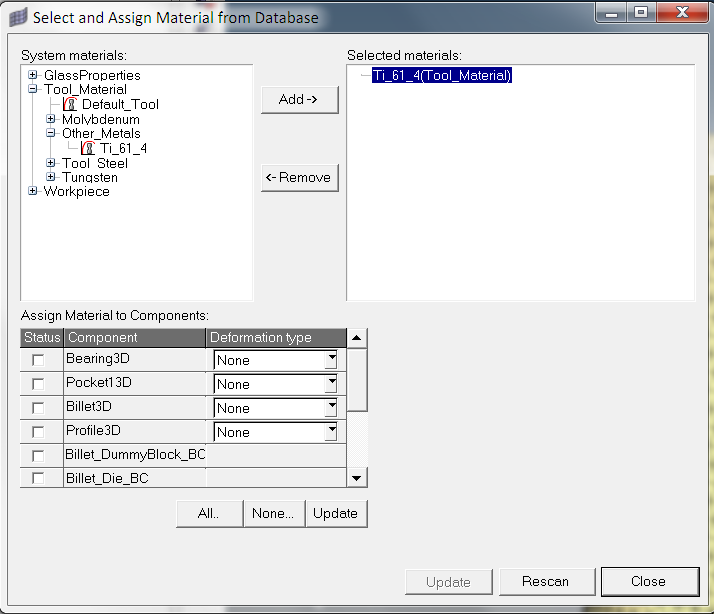
| 3. | Right-click the material in the Selected Materials list and select Assign Material. A table appears in the bottom panel of the Material Database Editor. |
| 4. | Select the check box of the components to which you want to apply the material. Click All to select all the listed components or click None to clear all listed components. |
| 5. | For tool materials, you can also specify a deformation type. For each selected component, choose a deformation type from the Deformation type drop-down list. |
| 6. | Material can be assigned to components having solid elements and BC components as well. |
| 7. | Click Update. The material now shows a tree view in the Select Materials list. When the material item is expanded, the components that use the material are listed. |
| 8. | Click Close to close the Select and Assign Material from Database dialog. |
|
| 1. | From the HyperXtrude Utility menu, click Material Database. The Select and Assign Material from Database dialog is displayed. |
| 2. | Right click on a material directory in the top left panel and select New Material. New fields appear in the bottom panel. |
| 3. | Type a name for the new material in the Material name: field and select the type of material in the Material class: drop-down list. |
| 5. | Select the constitutive model type and click Next. |
Depending on the type of constitutive model you select, you may also need to select a temperature dependence value formula in a field that appears.
| 6. | Type values for the various material properties in the fields that appear and click Create. |
|
| 1. | From the HyperXtrude Utility menu, click Material Database. The Select and Assign Material from Database dialog is displayed. |
| 2. | Right-click on a material directory in the top left panel and select Fit Material > By File or Enter Data |
| • | By File: A file browser to specify the input file opens up. |
| • | Enter Data: New fields appear in the bottom panel. Click OK. This option is available only for Workpiece materials. |
| 3. | Select the input file. A new material is added. |
| 4. | Edit the values and click Update to complete the fitting of the material. |
|
| 1. | From the HyperXtrude Utility menu, click Material Database. |
The Select and Assign Material from Database dialog is displayed.
| 2. | Right click on a material directory in the top left panel and select New Dir. New fields appear in the bottom panel. |
| 3. | Type a name for the new directory in the Directory name field and click Create. A new sub-directory of the specified name is created in the directory shown in the Directory Location field. |
|
See Also:
HyperXtrude Users Guide


