Realistic Rendering is a new graphics mode that is based off of the physically based
rendering model approach that allows for the flow of light to be rendered more accurately as it
would be in the real world.
There are now three types of rending modes available for your
HyperView session.
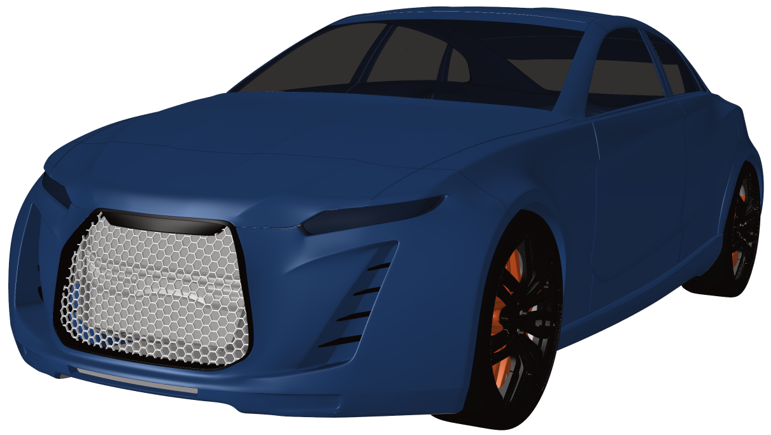
Regular Mode
The standard graphics rendering mode. Figure 1.
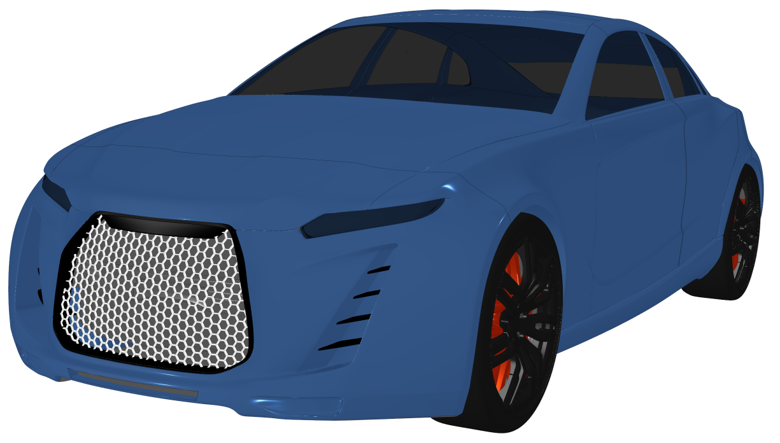
Realistic Rendering Mode
This mode uses the physically based lighting approach. Figure 2.
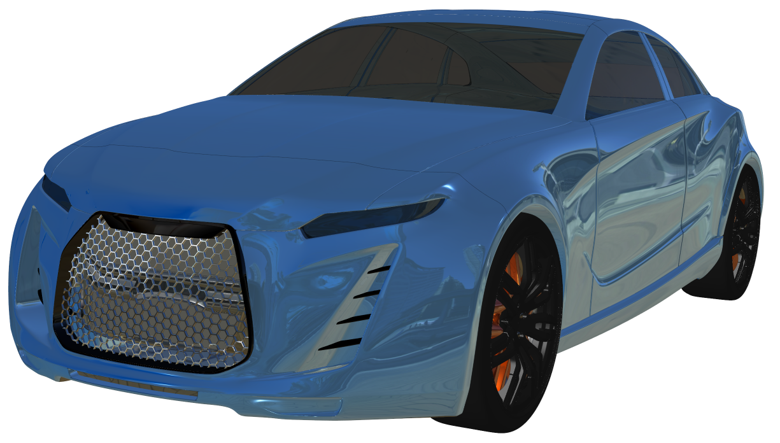
Realistic Rendering Mode + Environment Map
This mode uses the physically based lighting approach with an environment cube map
reflection.
Attention: This is the preferred mode to view the Realistic
Rendering Mode.
Figure 3.
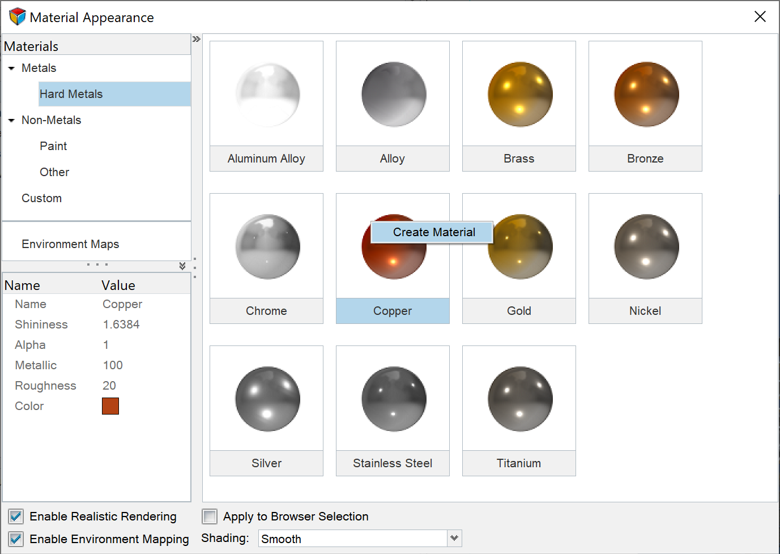
Added to the Realistic Rendering mode is the set of material library consisting of
metals and non-metals. Metals contain a list of hard metals and non-metals consist of a
paint and other categories. These items are a non-editable predefined list of materials.
However, custom materials based off of these predefined material attributes can be
created. These attributes are defined as:
Shininess
Used to control the specular light settings. Values between 0-128 can be
used.
Alpha
Used to control the transparency level. 0 is fully transparent and 1 is fully
opaque.
Metallic
Used to measure if something is a metal or non-metal. The metallic attribute is
binary, meaning 0 is a non-metal and 100 means it is a metal. The values can range
from 0-100 for a smoother transition from metal to non-metal.
Roughness
Used to diffuse light from a reflected environment source to create the
appearance of a rough and smooth surface. This is used with the environment map.
Values range from 0-100, where 0 is smooth and 100 is rough.
RGB
The RGB color used for that material appearance.
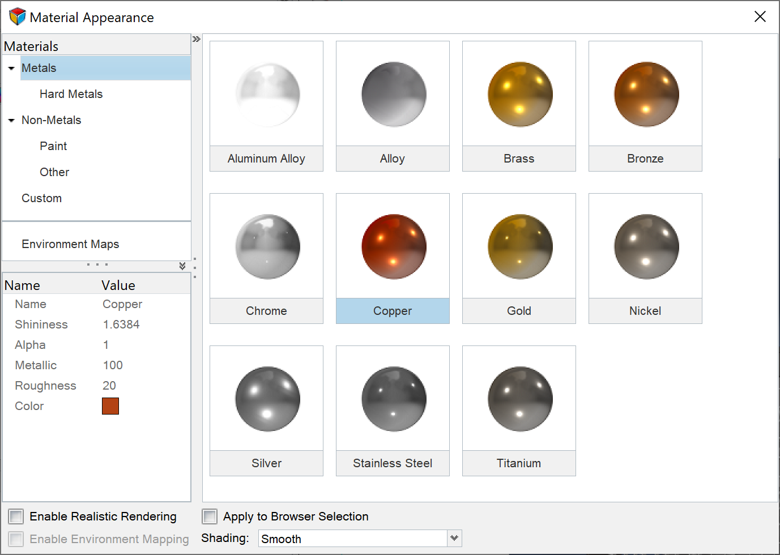
From the Rendering tools, click the Material
Appearance tool. Figure 4.
Figure 5.
This dialog shows the list of materials and their associate icon (sphere) of the
predefined set of materials. The left-hand column shows the Metals, Non-Metals and
Custom Materials categories along with the Environment Maps section. Selecting the
material will populate the left bottom half of the column with the material name and its
associated values for its attributes. These cannot be changed for the predefined
materials, however they can be copied to create a custom material.
Enable Realistic Rendering
Sets the rendering mode to the new physically based lighting mode.
Enable Environment Mapping
Sets the cube map used in the physically based rendering mode.
Note: This is only
active if the Enable Realistic Rendering mode is active.
Apply to Browser Selection
This option allows for this dialog to interact directly with the Results Browser. This will allow for advanced searches and bulk
changes to be made with ease.
Shading
Allows for the lighting to be changed from flat light shading to smooth light
shading. Smooth lighting is preferred when using the Realistic Rendering
mode.
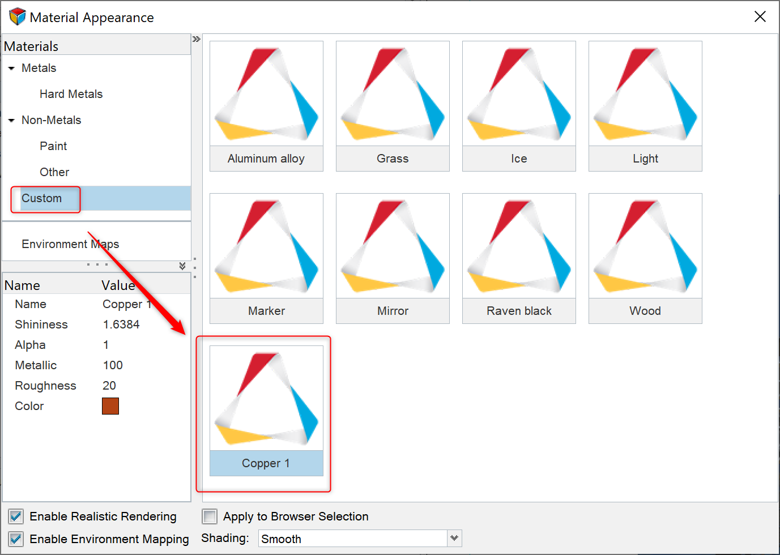
To create a custom material from the base attributes of a predefined material, simply
right-click on one of the materials and select Create
Material. Figure 6.
This will create a Custom category material named the material that you
selected with an iterated number. For example, if Copper was selected to create a
material, Copper 1 will now appear under Custom with the base values of the Copper
predefined material. Figure 7.