HM-8030: Create a Macro to Create Constraints
In this step you will create a Utility menu macro to create constraints on a plane.
- Determine the commands to create constraints on a plane
- Create a Utility menu macro to execute the commands
- Create a new button on the User page of the Utility menu to run the macro
In order to execute command file commands or Tcl scripts from a button on any of the HyperMesh Utility menu pages, a Utility menu macro must first be defined. A Utility menu macro contains valid command file or templex commands that execute the appropriate operations, and is defined using the *beginmacro and *endmacro commands. Macros may accept data passed to them using the arguments $1, $2, and so on. Each argument specifies where the values should be substituted. These macros are defined within the .mac files, including the userpage.mac file.
*beginmacro(macroname)
            command statements go here
        *endmacro()
Utility menu macros consist of HyperMesh Tcl modify commands.
Load collectors can be created and edited using the Model Browser. Simply right-click in the Model Browser and select to create one. To edit the name, color, or card image of a load collector, right click on the load collector name in the Model Browser and select Edit.
The Constraints panel can be accessed from the menu bar by selecting .
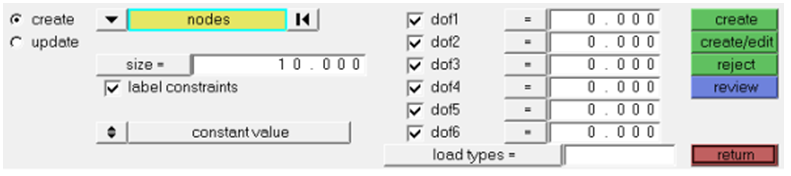
Figure 1.
Define the Task
In this step you will define the task.
The first step in creating a macro is to define the process you want to automate and recognize the individual tasks to reach the desired conclusion. Here, you want to create a one-button macro to automatically create constraints on certain nodes.
The following step list is an overview of what you will accomplish in Step 3 of this tutorial.
- Create a load collector for the constraints.
- Enter the Constraints panel.
- Apply constraints to the nodes on the end of the beam lying in the YZ plane.
Delete the Existing Command File
In this step you will delete the existing command file.
- Locate the existing command.tcl file in the working directory.
- Delete the file.
Perform Operations
In this step you will perform the operations in HyperMesh.
Every command issued in HyperMesh appears in the order executed and is reflected in the command file.
Extract Commands
In this step you will extract the commands from the command file.
Add Commands
In this step you will add the commands to the userpage.mac file.
- Open the userpage.mac file using any text editor.
- Paste the commands copied from the command file inside the userpage.mac file.
Modify Commands
In this step you will modify commands and add Utility menu macro wrapper commands.
Add the Macro Button
In this step you will add the macro button to the User page.
Reload the File
In this step you will reload the current .mac file into HyperMesh to load the modified userpage.mac.
Test the Macro
In this step you will test the macro.