PostgreSQL Installation and Configuration
Also referred to as Postgres, PostgreSQL is an object-relational database management system with emphasis on extensibility and standards compliance.
PostgreSQL can handle workloads ranging from small single-machine applications to large Internet-facing applications, or for data warehousing, with many concurrent users. PostgreSQL is ACID-compliant and transactional. PostgreSQL has updatable views and materialized views, triggers, foreign keys, supports functions and stored procedures, and offers other expandability.
PostgreSQL is developed by the PostgreSQL Global Development Group, a diverse group of many companies and individual contributors. It is free and open-source, released under the terms of the PostgreSQL License, a permissive software license. For more information, visit https://www.postgresql.org/.
Prerequisites
System Requirements
| Platform | 64 Bit | 32 Bit |
|---|---|---|
| Windows Version | 2016; 2012 R2 and R1; 2008 R2, 7, 8, and 10 | 2008 R1, 7, 8, and 10 |
PostgreSQL Installer
Use the following installer to set up PostgreSQL: postgresql-10.1-2-windows-x64.exe or later version. The PostgreSQL executable is installed as part of the HyperMesh software installation. You will see another installer along with HyperWorks products for installing PostGresDB.
Install PostgreSQL
In this section you will learn how to install PostgreSQL.
It is recommended to perform the installation using the default values and options. Also, when prompted for a Windows admin password, you can use your Windows password.
-
Launch the pgAdmin 4 tool (included with the installation), and add one user
with full rights:
-
Expand the Servers node until you have exposed
the Login/Group Roles node, as in the following image.
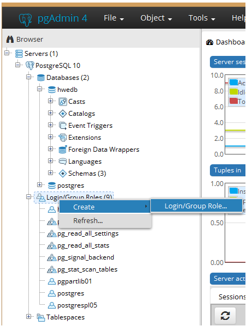
Figure 1. -
Click on the Privileges tab and set all fields
to Yes.
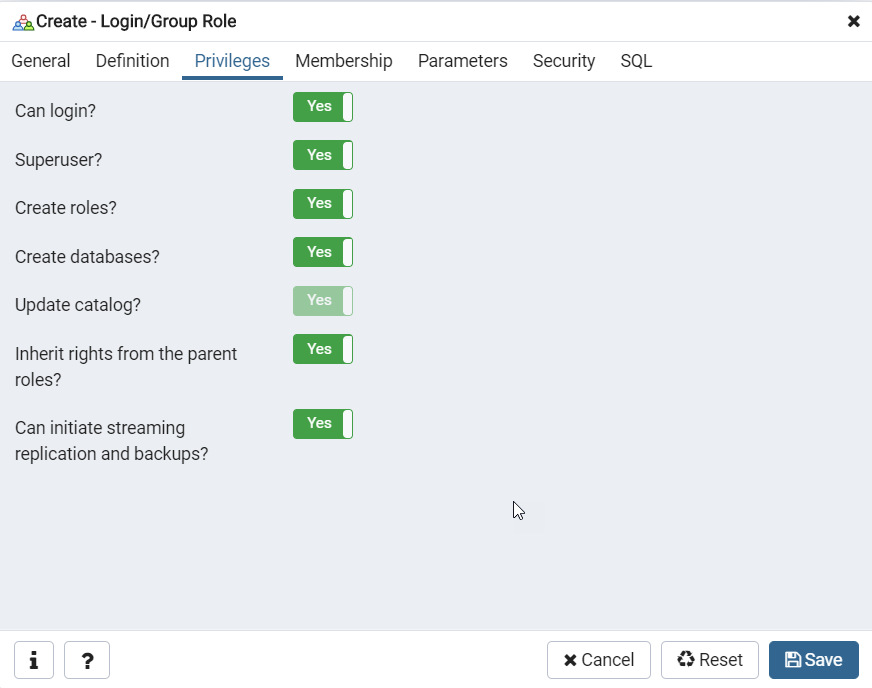
Figure 2.
-
Expand the Servers node until you have exposed
the Login/Group Roles node, as in the following image.
-
Restart the postgresql-x64 service by right-clicking on the service name and
selecting Restart from the context menu.
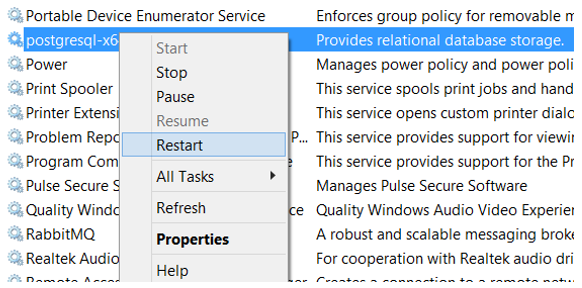
Figure 3.Note: This allows all users to connect without authentication. - Optional:
If you need to locate the port number for the server connection, click on the
name of the server and then click the Properties
tab.
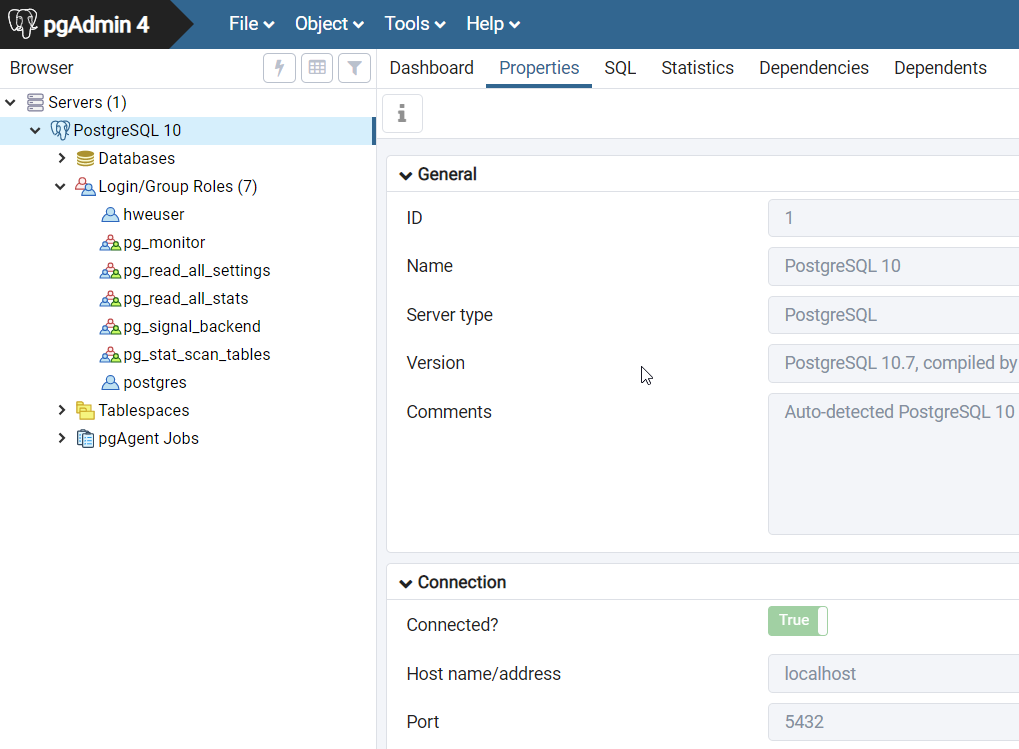
Figure 4.The Port number is listed under Connection, as displayed in the image above. Knowing the Port number allows you to share the connection with other users.
Connect to Shared Library
In this task you will learn how to connect to the PostgreSQL Shared Library.
-
To create a shared library:
-
To add an existing library: