|
»Click here to display Table of Contents«
|

Balancing |

|

|

|

|
|
Balancing |
|
|
|

|
|
»Click here to display Table of Contents«
|
Balancing |
|
|
|
|
|
Balancing |
|
|
|
|
The graphic user interface of Mass Balancing has been redesigned. Applying mass balancing on a selection of parts and defining an arbitrary orientation for a car alignment is now available.
Mass Balancing for RADIOSS is more accurate particularly for cases where mass was removed as a result of the balancing.
| 1. | From the Menu Bar, select Mass > Balancing. |
The Balancing tab opens.
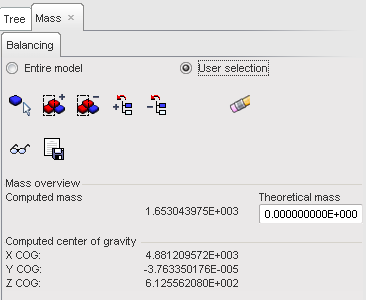
| 2. | Select either the Entire model or User selection radio button. |
| 3. | Update the Theoretical mass field. |
| 4. | Select the entities for balancing by picking (if the option is available). you may exclude barrier and dummies from mass balancing. |
Button |
Behavior |
|
pick parts in the graphic window. |
|
add selected parts by box (the default box is rectangular — use the SHIFT key to define a polygon box). |
|
remove selected parts by box (the default box is rectangular — use the SHIFT key to define a polygon box) |
|
add the parts selected in the tree. |
|
remove the parts selected in the tree. |
| 5. | Click |
| 6. | Click |
| • | Enter the name of the file in the Selection field. |
| • | Click OK to save the file. |
| • | Click Cancel to cancel this function. |
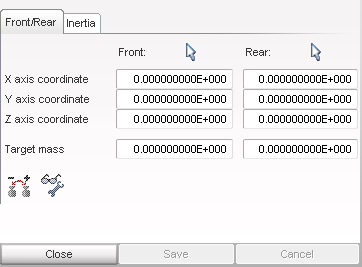
| 7. | Click the Front/Rear tab. |
| 8. | Click |
| 9. | Click |
| 10. | Click |
| 11. | Click the Inertia tab, the inertia of the model is displayed. |
The front and rear axle location can be defined, as needed.
| 12. | Enter the inertia values for each field and validate with the ENTER key. |
| 13. | Click |
| 14. | Click Save to save the modifications; or |
Click Cancel to cancel the modifications.
| 15. | Click Close to close the window. |