|
»Click here to display Table of Contents«
|

Importing Files |

|

|

|

|
|
Importing Files |
|
|
|

|
|
»Click here to display Table of Contents«
|
Importing Files |
|
|
|
|
|
Importing Files |
|
|
|
|
Multiple files can be imported at the same time. The files are read in the order they are selected and import one after the other.
To import a file to use with an already loaded model:
| 1. | From the menu bar, select File > Import. |
| 2. | Select the file format to import. |
RADIOSS |
RADIOSS input deck (from version 3.1) |
Nastran for Crash |
Nastran bulk format with automatic translation for crash analysis |
Nastran for Nastran |
Nastran bulk format |
Mesh |
Specific HyperCrash file format |
.UNV File |
Universal file format (compatible with IDEAS file format) |
.CDB File |
Ansys format |
LS-DYNA |
LS-DYNA keyword format (from version 950) |
PAM2G |
PAM-CRASH 2G format (from version 2002) |
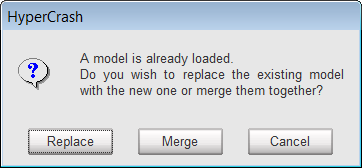
| 3. | If a model is already loaded, HyperCrash asks for confirmation to load a new file. |
| 4. | In the new sub-window, select the directory where the desired file is located (left area part). |
| 5. | Double-click the file name in the right area to load the file. |
or
Click the file name in the right area and select OK to load the model or Cancel to cancel the load.
| Note: | To choose your directory to import from, type in the first few letters of the directory you wish to import from and press TAB. HyperCrash will display a list of all directories whose names begin with those letters. Click the name of the appropriate directory in the list. |
You also may choose to copy and paste the file directory path. After copying the path, right-click in the Selection field, and choose Paste. Then, press TAB on the keyboard to navigate to the correct path.
You may import the file from an external directory, such as a mapped drive, if you wish. Enter the path (including the final \), and press TAB, or else copy and paste the path into the Selection field.
| 1. | With an already loaded file open, select File > Import, and then choose your model type. |
The following dialog box opens asking you to Replace the already loaded file with a new file, choose to Merge the files, or Cancel.
| 2. | Select Merge. |
| 3. | Select the location of the file to merge. |
| 4. | In the Merge panel, set Apply offset to: to either Incoming file or Existing model. |
| 5. | Enter values as appropriate in the panel and click Merge. |
In the new sub-window, Material translation choice, whole materials of the model are displayed.
If the imported material name is the same as a material file name of the default database, the status Available will be displayed in the Data Base column. Otherwise, the status Unavailable will be displayed. The status Yes is displayed for all materials in the Translation column.
| 1. | Select a material or several materials from the list. |
| 2. | With the pop-up menu (right button of the mouse), select: |
Select all Materials |
to select all materials in the list. |
Affect DB Material File |
to affect the material from the database to the materials which have the status Available. The status No will be displayed in the Translation column and the status Selected will be displayed in the Data Base column. |
Affect translated Material |
to translate the selected materials. The status Yes will be displayed in the Translation column. |
Choose Material from DB |
to select and apply a material from the Data Base to the selected material. |
| 3. | Click Ok to validate the different material choice. |
| 4. | Click Cancel to cancel the model loading and close the window. |