Standard and Preset Views
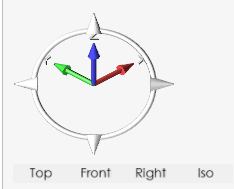
Rotate your model to a standard view, an isometric view, to the closest principal axis, or so that the sketch plane is normal to the grid.
-
To access the standard and isometric views, move the mouse cursor over the View
Rotator so the standard view buttons appear.
-
Choose one of the following options:
Option Description Note Top (Bottom) - Left-click for the top view.
- Right-click for the bottom view.
Front (Back) - Left-click for the front view.
- Right-click for the back view.
Right (Left) - Left-click for the right view.
- Right-click for the left view.
Iso - Left-click for the isometric view where the z-axis is straight up, the x-axis extends diagonally up and right, and the y-axis extends diagonally up and left.
- To cycle through all isometric views, right-click.
Several isometric views are available. Isometric views represent three-dimensional objects in two dimensions using an axonometric projection where the three coordinate axes appear equally foreshortened and the angle between them is 120 degrees. Tip:- Click
 in the view controls to rotate the
model to the closest principal axes.
in the view controls to rotate the
model to the closest principal axes. - When sketching, click
 in the view controls to rotate the
model so that the sketch plane is normal to the grid.
in the view controls to rotate the
model so that the sketch plane is normal to the grid. - Click the
 icon in the view controls to save and
recall a custom view.
icon in the view controls to save and
recall a custom view.
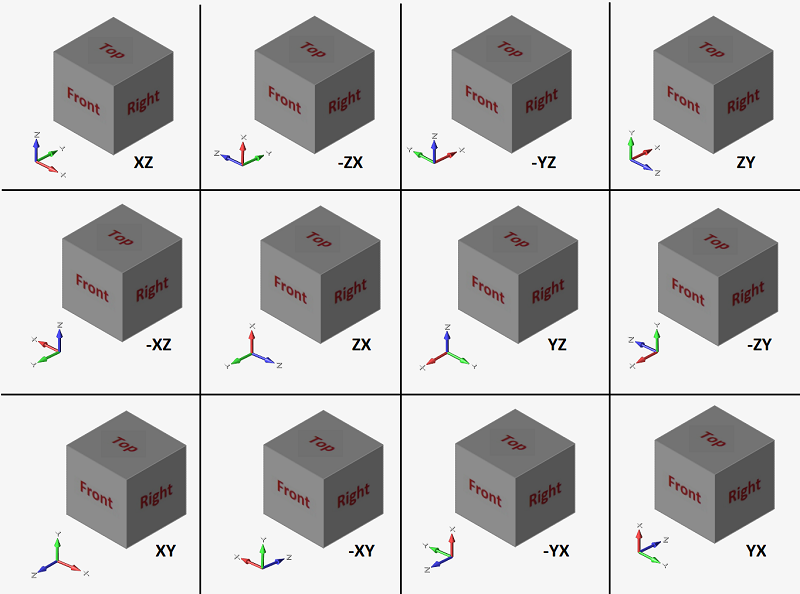
Customize the Front View
Customize the orientation of the standard Front view using the Preferences.
- Select .
- Under , select Front View and choose an orientation.
Note: The two letters, for example "XY", denote the horizontal and vertical axis of the
plane that defines the Front view. The normal to the Front view may be aligned along
any of the three main axes (X, Y, Z), and rotated around that axis in four possible
orientations, so there are twelve possible orientations: