Organizing Tool Components
Organizing tool components is an important step and can be performed anytime while setting up the model, but would ideally be organized immediately after cleaning the geometry.
The Tool Deflection module does not support components having identical names and spaces/special characters in the part names. Organizing tool components will automatically overcome this issue. However, if you do not organize the components, all the components in the model will considered as tool components for the purpose of analysis.
Your model may contain workpiece components. However, they have to be organized with standard names as in the extrusion tab. If the model contains billet, it will be used to automatically determine where the billet touches the tool and apply pressure loads there.
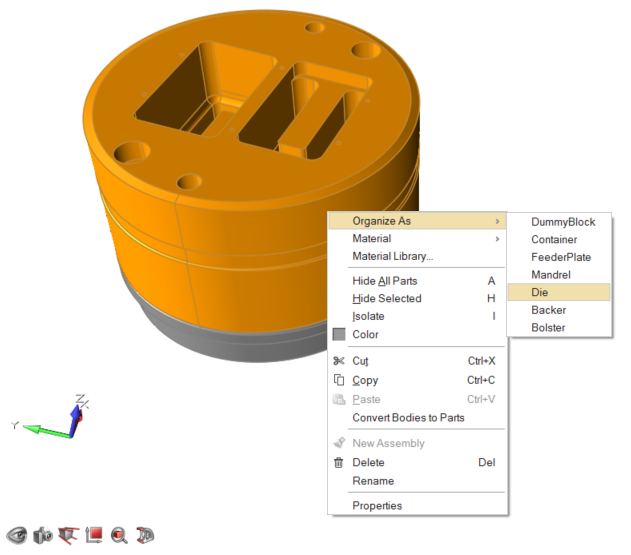
Solids can be organized in two ways:
- By right clicking the solid in the modeling window.
- From the Model Browser.
Organizing Tool Components using the Model Browser
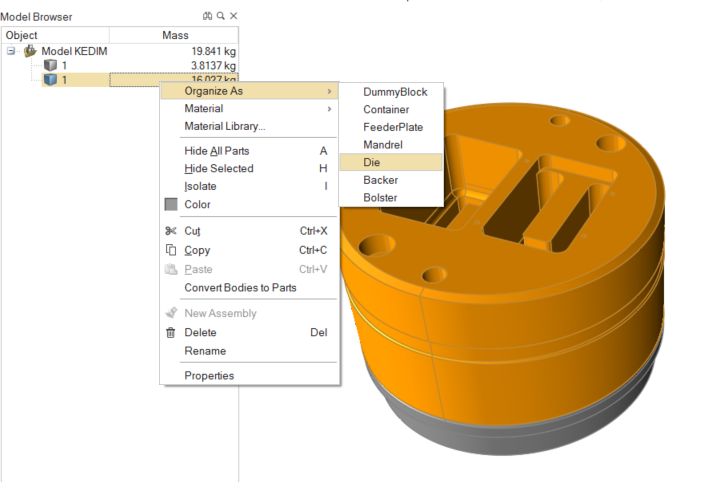
Figure 1.
Organizing Tool Components using the Context Menu