Component Table

The OptiStruct Component Table displays components and their associated attributes in an interactive table.
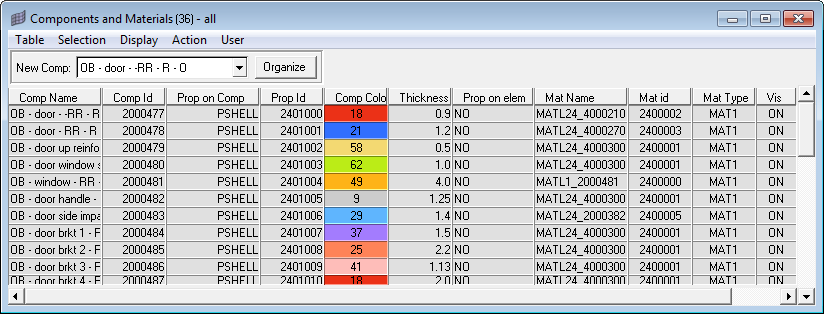
The information displayed in the table may be configured.


Figure 1.

This utility also allows you to create components, assign materials to components, change component colors, and change component visualization modes. Most actions are available either from shortcut (right-click) menus or from the pull-down menus.

Before performing actions, such as changing the values of component data, you must select Editable from the Table menu. Once the table is editable, you can modify the values of existing components. The following sections describe how to use the component table in both read-only mode and editable mode.

Use the Component Table in Read-Only Mode

When you open the Component Table displayed components are listed in a table using a default configuration. This configuration displays the name, ID number, type, thickness, material name, material ID, material type, color, and visibility (display) for each displayed component.

The table may be adjusted to display information for all components by selecting Table > Configure > Components > All.

The display of the Component Table can be customized according to your preferences. You can:
  • Change which columns are displayed
  • Sort the components by column data, ascending or descending
  • Filter which components are displayed based on column data values (see below)

You can save your settings by creating a configuration file. From the Table menu, open the Configure sub-menu and select Save CFG-File. This configuration file saves the set of table configuration options so you can use them again. By default, a configuration file (comptable.cfg) is saved in the working directory for each component table session and settings from this file are applied each time the table is built.

Use the Component Table in Editable Mode

When you switch the Component Table from the default read-only mode to editable mode by selecting Editable from the Table menu, you can perform all the actions described in the section above, plus edit the attributes of the components listed in the table. To change the value of an attribute, select the attribute in the Assign Values drop-down, type the new value in the adjacent field, and click Set.