Drawing a Floor
Define the floor of the building. The concrete floor should be large enough to be underneath the entire building, and includes an outdoor sitting area.
-
Confirm that the third coordinate (Z value) is at 0 m using one of the
following workflows:
- On the View toolbar, click the
 3rd Coordinate Settings icon.
 - On the Display menu, click
Show 3rd Coord Dialog.
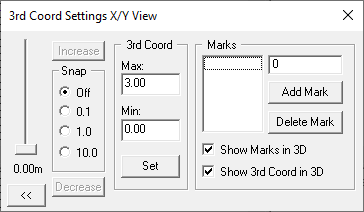
Figure 1. The 3rd Coord Settings X/Y View dialog.
- On the View toolbar, click the
-
Create the floor in the X/Y window using one of the following workflows:
- On the Objects menu, click .
- On the Objects toolbar, click the
 Add Rectangular Objects icon.
 - Press F8 to use the keyboard shortcut.
-
Exit the draw mode using one of the following workflows:
- On the Objects menu, click .
- On the Objects toolbar, click
the
 Select Object icon.
 - Press F10 to use the keyboard shortcut.