Drawing Wooden Doors
Define the wooden doors in the building.
-
Verify that the X/Y window is active, or activate it by
clicking in it.
The X/Y symbol in the top-left of the window is red when the window is active.
- On the Edit menu, click Default Values.
-
Specify the height of the doors.
- Under Geometrical Parameters for Orthogonal Drawing Mode, select Upper and lower coordinate defined individually (and absolute) field.
- In the Min. Coord field, enter a value of 0.
- In the Max. Coord field, enter a value of 2.5.
-
Specify the material properties for the doors.
-
Under Material Properties, from the
Material Properties of new Subdivisions
drop-down list, confirm that the material properties
are set to Wood (Fir); thickness: 5 cm.
Note: The default material properties for new sub divisions were set in Specifying Default Values for New Objects.
-
Under Material Properties, from the
Material Properties of new Subdivisions
drop-down list, confirm that the material properties
are set to Wood (Fir); thickness: 5 cm.
- Click OK to close the Default Values for New Objects dialog.
-
Create a door in the X/Y window.
Note: Create several doors. An exact layout is not important for this example.
-
On the Objects toolbar, click
the
Add Objects Orthogonal icon.
- Click twice in the X/Y window to specify the start point of the door.
- Click again to specify the end point of the door.
The Insert Subdivision dialog is displayed.
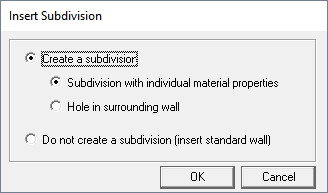
Figure 1. The Insert Subdivision dialog. -
On the Objects toolbar, click
the
- Click OK to insert the door and to close the dialog.

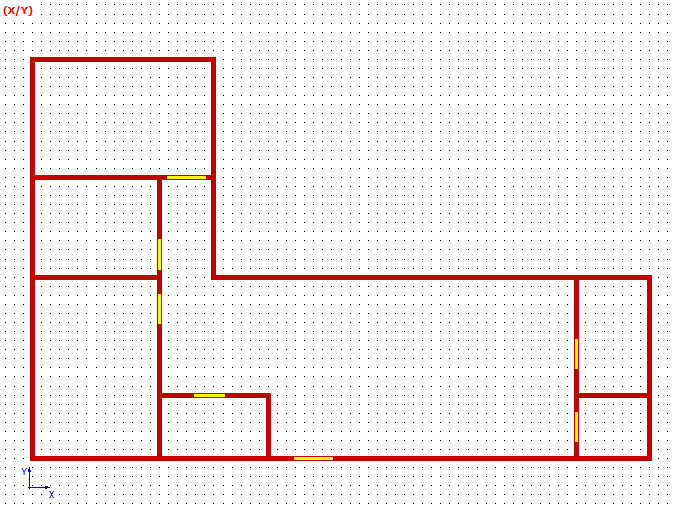
Figure 2. View of the model in the XY plane (top view) showing the outer and interior walls. The wooden doors are indicated in yellow.