Show Analysis Results
Display and review the results of an analysis.
You can review results from the analyses that are available in the Run History dialog.
- Click Show Analysis Results on the Analysis
icon.

-
Select a Run, Stage, and
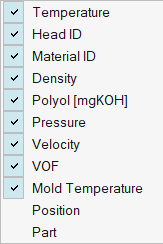
Result Type in the Analysis Explorer.
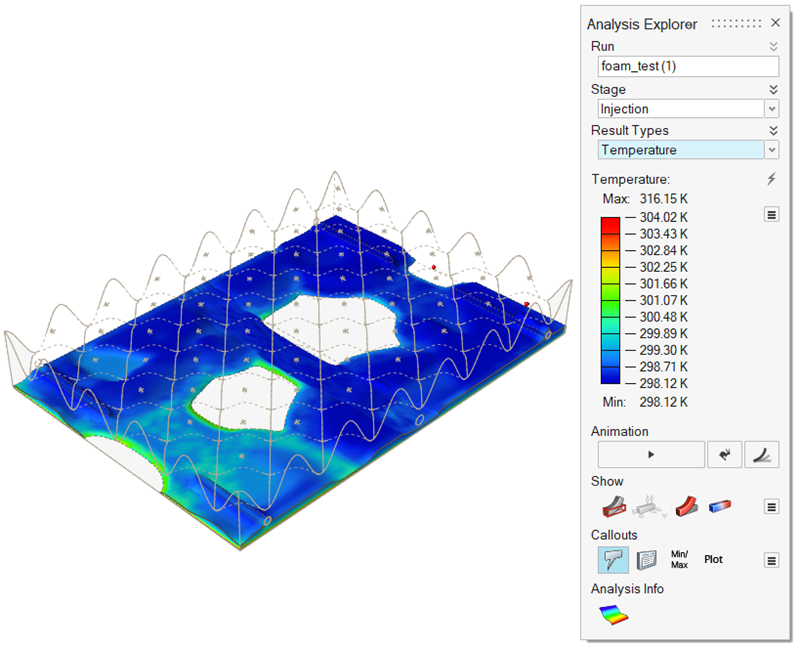
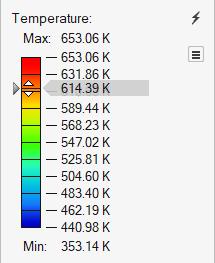
- Analyze the run.Tip: To see what areas on your model are under the greatest stress, select and drag the results slider. To restore the result slider's default values, click
 .
. 
Show Options
Determine what is made visible in the modeling window when viewing analysis results. You can show or hide the initial shape, loads and supports, deformation, and/or contours.
| Option | Description | Note | |
|---|---|---|---|
| Show/Hide Initial Shape | Show/hide the initial shape as a reference. | ||
| Show/Hide All Loads and Supports | Show/hide loads and supports. You can also show only the current loads and supports. | ||
| Show/Hide Deformed State | Show/hide the deformed shape as a reference. | ||
| Show/Hide Contours | Show/hide contours. | ||
| Options |
|
||
| Show/Hide Elements | Show/hide the element edges. | This icon appears under the view controls in the lower left of the modeling window, but only when the Analysis Explorer is active. | |
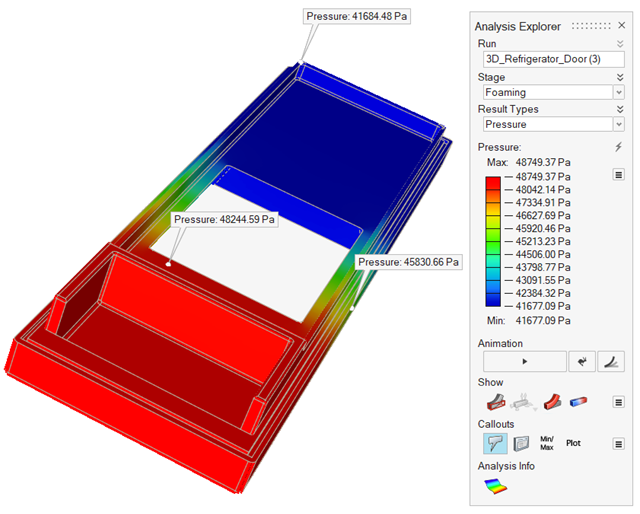
Add Callouts to the Results
Call out and review values for a selected result type at points of interest on your model using the callout icons in the Analysis Explorer.
-
To create a callout at a point of interest, click
 in the Analysis Explorer, select a
Result Type, and then click a point on your model.
Box-select to see the maximum value in an area.
Note: The callout value applies to the currently selected run.
in the Analysis Explorer, select a
Result Type, and then click a point on your model.
Box-select to see the maximum value in an area.
Note: The callout value applies to the currently selected run. -
To automatically create callouts showing where the minimum and maximum values
occur for a result type, select a Result Type, and then
click
 .
.
- Optional:
To display callouts in a table, click
 in the Analysis Explorer.

- Selecting a row in the table also selects the callout in the modeling window.
- To show or hide a single callout, in the Callouts table, Name column,
click
 .
. - To show or hide all callouts, in the Analysis Explorer, click .
- To sort the order of a column in the table, click the column header. Or
you can click
 or
or  to select Sort
Ascending or Sort Descending.
to select Sort
Ascending or Sort Descending.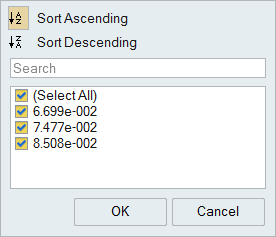
- To add or delete columns on the table, right-click a column header, and
then select or deselect a property.
-
To display specimens in a table, click
 in the Analysis Explorer.
Callout Options
Add visual callouts to show points of interest on your analysis results.
| Callout Icon | Description | Note |
|---|---|---|
| Create, Show, and Hide Callouts |
Select to create callouts; select to show and hide callouts. |
|
| List Callouts |
Display in a table all of the callouts that have been created, with
the result types and values. Each callout is specific to the selected
run . |
|
| Min/Max Callouts |
Create a callout showing where the minimum/maximum value occurs for
the selected result type. Note: When factor of safety is selected, the
minimum value is shown.
|
|
| Plot | Display time history plots for callouts defined for structural analysis. Changes made to the Result Types option are synchronized with the setting on the Analysis Explorer. Using this option allows you to put multiple plots of mixed types on a single page. | This option is only available for motion part analysis results. |
| Dynamic Callouts |
Display the results of various result types in existing callouts.
Note: If you enable the Compare Results feature in a callout, the
callout becomes static.
|
After creating a callout for a particular result type, click the
|
Animate and Record Results
Use the Animation Toolbar that appears at the bottom of the modeling window to animate and record results.
Animation Options
The animation options on the Analysis Explorer allow you to start and stop the animation and adjust basic settings.
| Option | Description | |
|---|---|---|
| Play/Stop Animation |  |
Animate the selected result. |
| Animation Speed | Change the speed of the animation. | |
Animation Toolbar
Use the animation toolbar to play, record, and configure the animation.

Figure 1. Animation Toolbar
- Animation Settings
- Click to open the Animation Settings.
- Play and Record/Stop Recording
- Click the button to begin recording the results; the icon changes to red to indicate that it is recording. Click the icon again to stop recording.
- Start Animation/Pause Animation
- Click the button to start or pause the animation. Use the arrow buttons to jump the first or last frame in the animation.
- Move to First/Previous/Next/Last Step
- These buttons allow you to step through the animation frame-by-frame. If you hold down the Previous or Next button, it will auto-repeat. If you want to skip frames, use the Increment By feature in the Animation Settings; hold Ctrl to temporarily override this behavior.
- Slider
- Drag the slider on the toolbar to view a particular point during the analysis; use the arrow keys to move frame-by-frame through the animation.
- Current Step
- Displays the current time or frame. You can also enter a value to go to the nearest time/frame.
Animation Settings
Modify the animation settings from the animation toolbar.
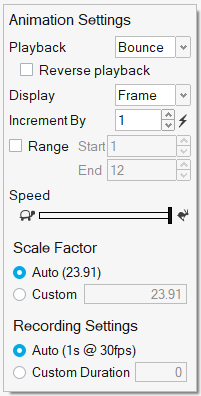
Figure 2. Animation Settings
- Playback
- Select whether to play the animation on a continuous Loop, Once, or Bounce (between forwards and backwards). Select the check box to Reverse Playback.
- Display
- Set the units for the slider to either Time or Frame.
- Increment By
- Increase the value in the counter to skip frames during playback. The reset button restores the default value of 1.
- Speed
- Drag the slider to change the speed of the animation.
- Range
- Select the Range checkbox to define and starting and ending frame for the
animation. This allows you to limit the playback range to just a portion of
the animation, making it easier to study behaviors in more detail. You can
use the Ctrl key while clicking on the Start or End icons to jump to Range
Start and Range End, respectively. Note: For motion models, you can fit plots for the selected range by using the Ctrl key while double-clicking. Also, the paths of tracers will be trimmed to honor the specified range.
- Scale Factor
- Enter a custom value to change the scale of the animation. Generally the scale of a displacement is too small to see clearly, so auto scaling is enabled by default.
- Recording Settings
- The default Auto setting gives you an estimate of the duration of the recording at 30 frames per second. If your video plays back faster than you want, select Custom Duration to change the length of the video; this will adjust the frame rate to try to achieve the specified duration. The Custom Duration has a minimum value of 1 second, and maximum value of 30 seconds.
Animation Shortcuts
| To | Do this |
|---|---|
| Play and pause | If the Play button is active, press the Spacebar. |
| Increment the slider |
Use the arrow keys to move frame-by-frame through the animation, or position the cursor over the slider and use the scroll wheel. |
| Exit tool | Right-click and mouse through the check mark to exit, or double-right-click. |