Tutorial: Billet Skin and Backend Defects
Use billet skin tracking analysis to determine when the billet skin enters the extrusion product and prevent impurities and defects.
During the extrusion process, it is important to prevent the impurities in the billet skin from entering the product. Billet skin tracking analysis can used to determine when the billet skin enters the extrusion product.
In Inspire Extrude, skin tracking analysis can be set up as a transient moving boundary analysis where the the movement of the dummy block and billet are simulated.
Load Model
Create the Billet
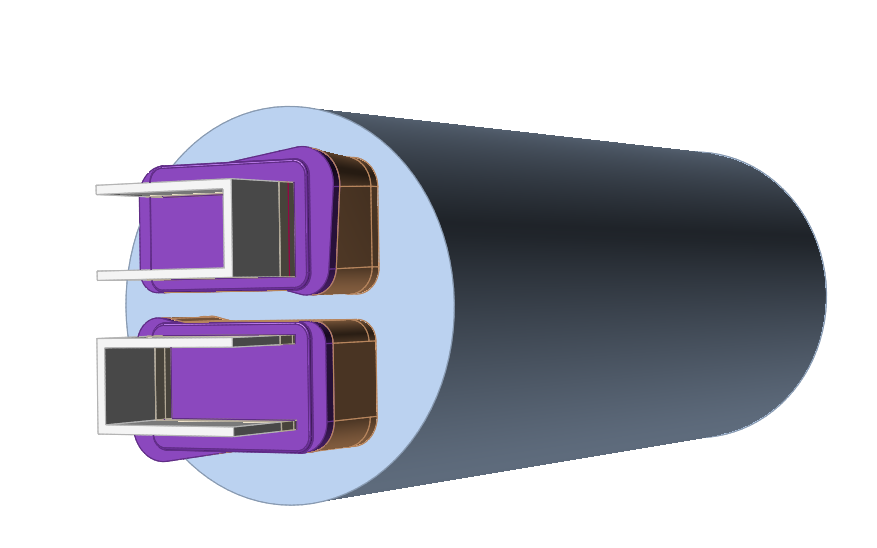
We will specify the geometry to create the billet.
-
Click the Create Billet icon.

-
In the small window that pops up, specify billet and container dimensions ,
select Skin Thickness, and click
Enter.
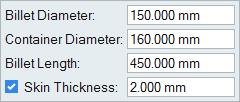
Note: The billet skin is needed to perform billet skin tracking analysis which is used for determining backend defects. Specifying Skin Thickness creates the billet skin solid.
Select the Material
-
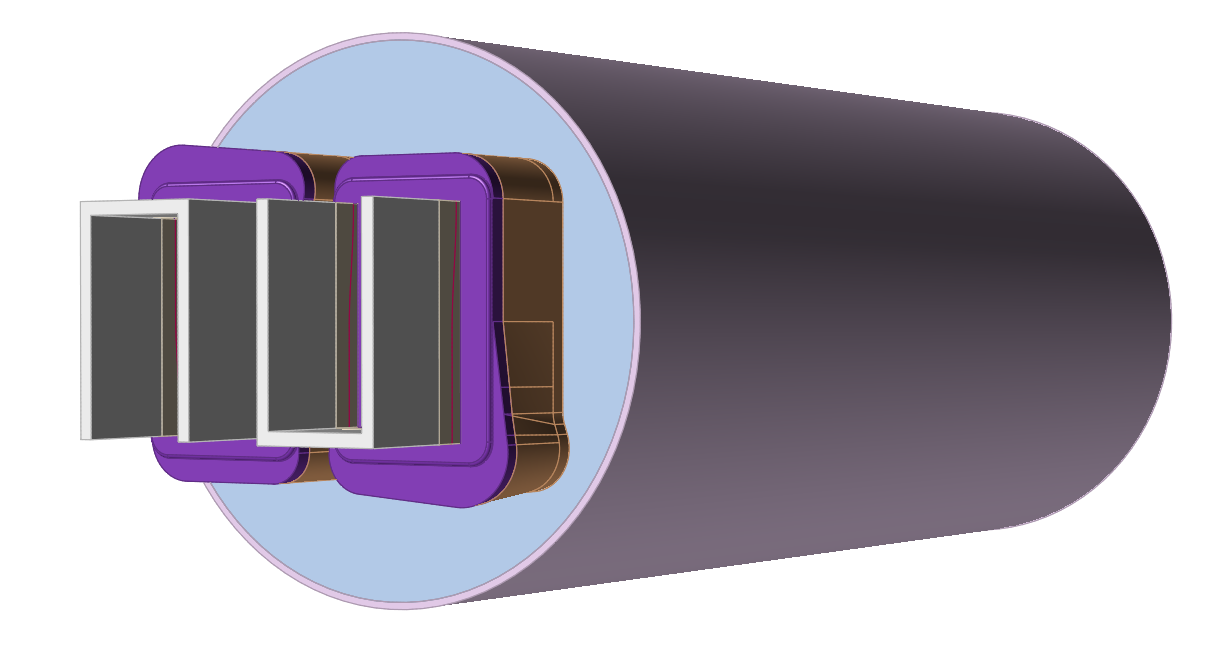
Click the Materials icon.

-
Select the Workpiece alloy
Note:You can search directly for the material by clicking the search box and typing the name of the alloy.
-
Right-click on the alloy name, and click Select.
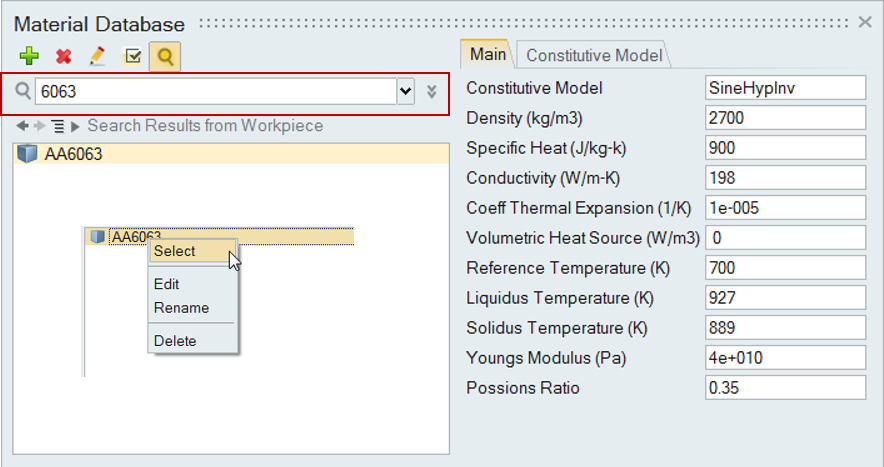
The chosen alloy is added to the Selected Materials pane.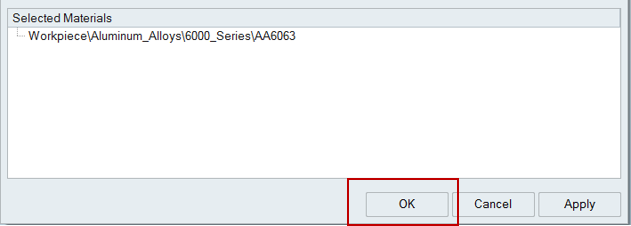
Note: To deselect a material there, right-click and click Deselect.
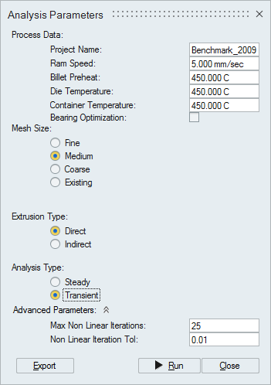
Specify Process Parameters and Simulate
-
Click the Submit job for analysis icon to run the
simulation.

-
In the Analysis Parameters window that pops up, enter
values as shown.
| Status after submitting the job |
 |
| Status after meshing is completed |
 |
| Status when job is running in the solver |
 |
Review the OUT File
The goal of post-processing is to understand the performance of the die. This is accomplished by studying the material flow and heat transfer in the model in HV. Before doing the detailed post-processing in HV, inspect the OUT file to get a quick overview of the results.
- Open the *.out file in a text editor.
- Inspect all data, applying the steps as outlined in the post-processing section.
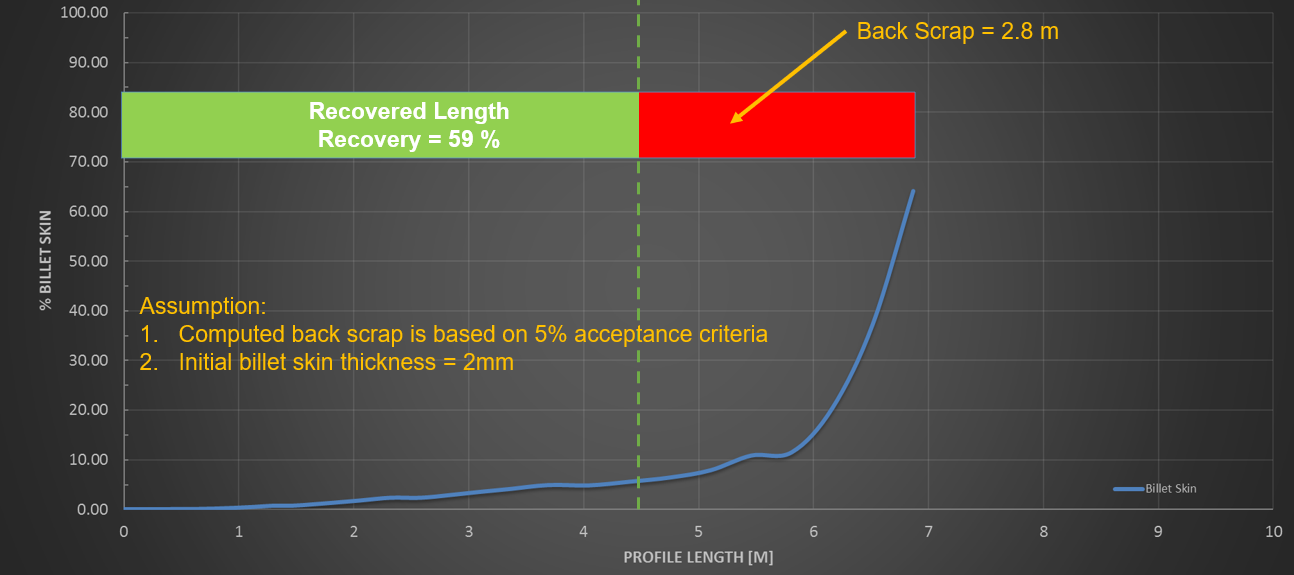
Analyze the Profile3D_volume.txt File
-
Review the data and verify.
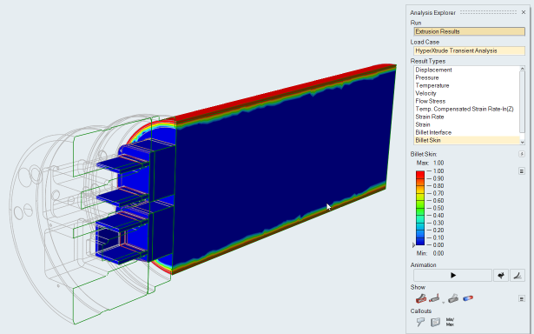
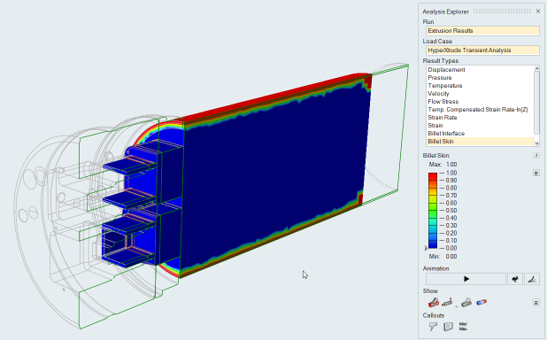
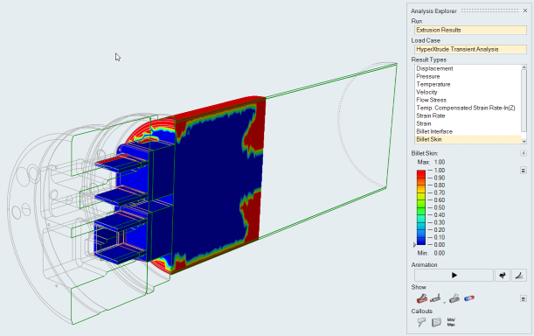
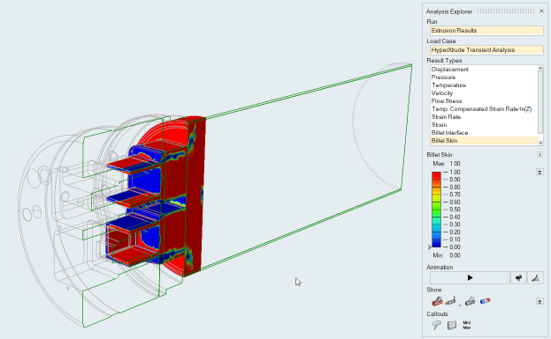
During Ram acceleration time, no billet skin material is present on the exit surface. As extrusion progresses, the billet skin material on the exit surface increases. After 49 seconds of extrusion (the 23rd time step), the exit surface contains more than 5% billet skin.Note: Assumed cutoff value is 5%. Profile with more than 5% billet skin is considered scrap.
View Simulation Results