


|
Working with Scripts
Automator supports the use of Visual Basic.NET script in global environment scripts and process scripts.
Global Environment Scripts
Global scripts allow users to view functions, classes, and variables that are available or will execute over all processes. It also allows the setting of global assembly imports and references, which are valid over Automator process boundaries.
Process Scripts
Process scripts are used for process-specific scripting. They enable you to specify pre-process and post-process operations that execute before or after any operations in the process itself.
|
|
NOTES For more details about scripts in Automator, refer to the Automator Administrator’s Guide.
Note that scripts from Standard Processes will not work in Visual Processes (e.g., after migrating Standard Processes to Visual Processes). |
|
|
|
|
|

In this lesson, let’s discover how global environment and process scripts work in a Visual Process.
Example of Scripts in Visual Processes
As we described previously, global environment scripts apply to all processes. In Visual Processes, any script provided under Global Declarations in the Script Editor will apply to all scripts used in any Visual Process.
Take for example this script:

Let’s try it in Automator.
Steps
1. In the Navigation Tree, click Automator. Under Visual Processes, click Scripts.
2. Under Global Declarations, add the sample script above. This script shall apply to all Visual Processes.
|
|
NOTES Click the User Scripting Help button to access the help file on user scripting. |
|
|
|
|
|
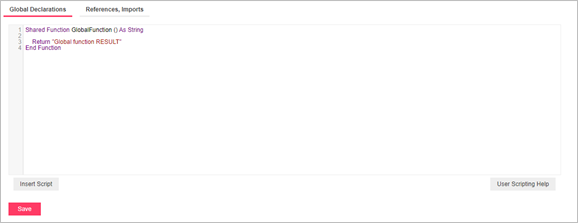
Click Save.
3. Create a new Visual Process. In the Navigation Tree, click Automator, click Visual Processes, and select Processes. Click the Add icon  .
.
4. Provide a name for the Visual Process (e.g., Script).
In the Visual Process Designer toolbar, click on the Scripts icon  .
.
The Process Scripts window displays.
5.  Under Process Declarations, use this sample script:
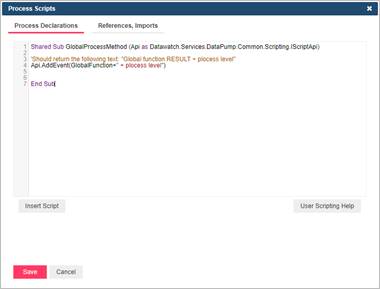
Click Save.
6. Now let’s try adding a script to the workspace. Add a Script element, which is found under Misc in the All tab of the Library.
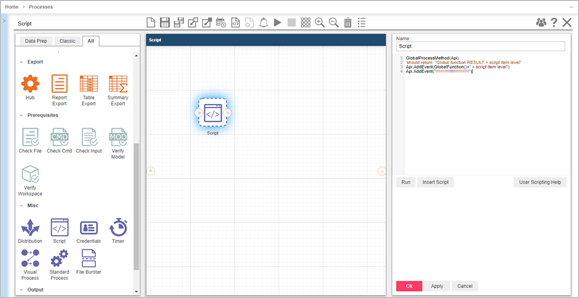
7. In the Property panel, provide a name for the element, and then input the sample process script below. Take note of the AddEvent APIs used.

Click Apply.
8. Let’s try running our script. In the Property panel, click the Run button.
The results are shown in the Run Script window.
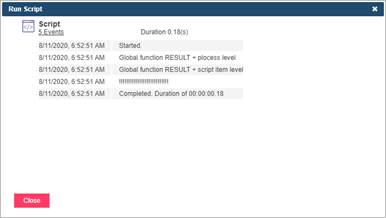
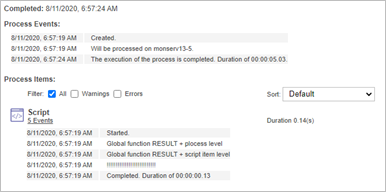
When we run our script as part of a process by clicking the Save and Run button  in the Visual Process Designer toolbar, the Log Mode view should display as follows.

You will notice that the results of the script we ran in the previous window are shown in the log details.

|
|
NOTES The results of running the script from the Property panel may not always be the same as those of running the full Visual Process. |
|
|
|
|
|
You can now try out other scripts for your Visual Processes. Click the  button to find more examples of scripts you can use.