


|
Joining Data in a Data Prep Session
Data Prep Studio allows the following join types:
q  Left outer join
A left outer join retains all of the rows of the “left” table, regardless of whether or not there is a row that matches on the “right” table.
q  Right
outer join
Right
outer join
A right outer join retains all of the rows of the “right” table, regardless of whether or not there is a row that matches on the “left” table.
q  Full
outer join
Full
outer join
The full outer join returns all rows from the left and right tables. The full outer join combines the results of both left and right joins.
q  Inner
join
Inner
join
An inner join yields the intersection of two tables, i.e., only the rows they have in common.
These joins essentially allow you to create new tables from preexisting ones so that you can get more information out of your data and more detail into future visualization or analytics work.
But what if you wanted more information on the data that can’t be joined? In this case, negative joins are what you will need to generate. You can create a left negative join, which shows all rows from the right table for which the join keys do not match, or a right negative join, which shows all rows from the left table without matching join keys. More information on this topic is available here.
In this exercise, we will join data from two tables. Following the steps outlined in Previewing and Adding Data to a Data Prep Session – Adding Data from a Database, load the table in Payroll.mdb into Data Prep Studio.
Steps:
1. Select Combine Data from the Data Prep Studio toolbar to launch the Combine Data stage.
All of the tables you loaded are displayed on the table list to the left of the screen. Note that the table Compensation must display at the bottom of this list if you successfully opened Payroll.mdb in Data Prep Studio.
2. Drag Accounting from the table list and into the first Drag a Table box. This table will be the “left” table of the join.
3. Drag Compensation from the table list and into the second Drag a Table box. This table will be the “right” table of the join.
4. Select the Click to Join button that displays on top of these tables.
The Join Configuration dialog displays.
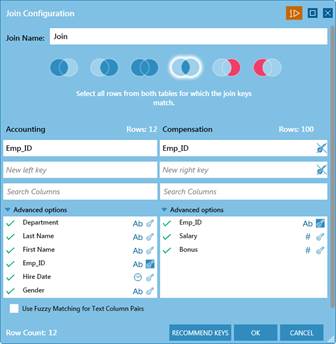
Figure 4-50. The resulting Join Configuration dialog.
In this exercise, we will join the two tables via an inner join (i.e., we only want to see rows where key fields from both tables match).
5. Select the  icon, which signifies an inner
join, from the available icons located at the bottom of the Join
Name field in the Join Configuration dialog.
icon, which signifies an inner
join, from the available icons located at the bottom of the Join
Name field in the Join Configuration dialog.
6. Select Emp_ID as the key field for the Accounting table.
7. Select Emp_ID as the key field for the Compensation table.
8. If you wish to take advantage of Data Prep Studio’s fuzzy matching function, tick the Use Fuzzy Matching box and then set an accuracy threshold using the slider that displays.
9. Select OK.
The resulting table is created and added to the table list. A preview of the table resulting from this join also displays in the Combine Data workspace.
In the Prep Data window, the joined table is named, by default, Join. Succeeding joins will be named Join(1), Join(2), and so on. These tables can be renamed to whatever you wish.
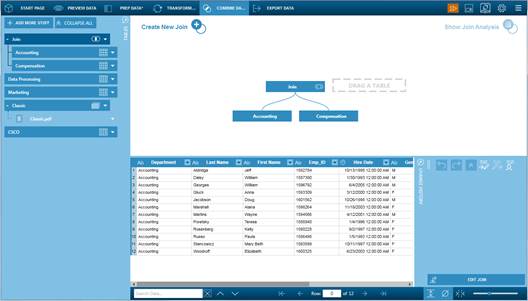
Figure 4-51. The results of our join operation.
10. Selecting the Prep Data button on the toolbar shows the contents of this new table.
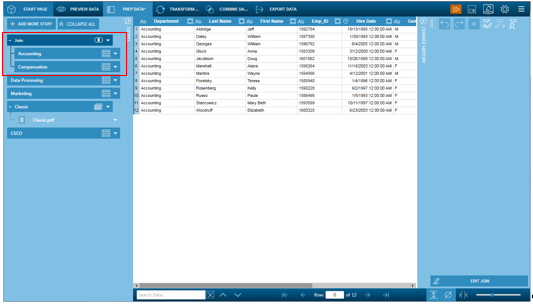
Figure 4-52. The newly defined table in the Prep Data window.