


|
Adding Data from a Database File
Steps:
1. Launch Data Prep Studio.
2. Select Open Data to display the Select Data Source to Open dialog.
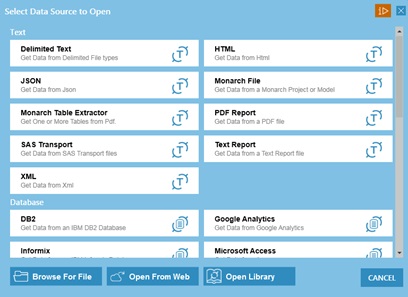
Figure 4-2. The Select Data Source to Open dialog.
3. Select the data source option Microsoft Access.
4. In the Open dialog that displays, navigate to C:\Users\Public\Documents\Datawatch Monarch\Data, select Beantown.mdb, and then click Open.
You are brought to the Preview Data window. Each of the tables that make up the database displays in this window.
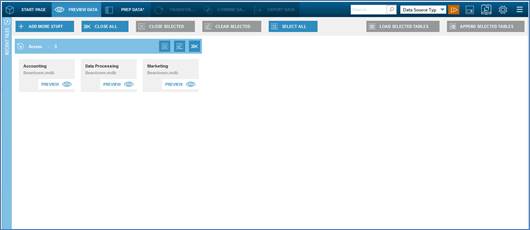
Figure 4-3. Tables brought into the Preview Data window.
|
|
NOTE Letters beyond the 64th character are truncated when opening tables from Excel files with column names exceeding 64 characters because the Access driver used to read these files imposes a 64-character limit. |
|
|
|
|
|

5. Inspect the table you wish to open by
clicking on its Preview  icon. In Figure 4-4, for example,
a preview of the table Accounting is displayed.
icon. In Figure 4-4, for example,
a preview of the table Accounting is displayed.
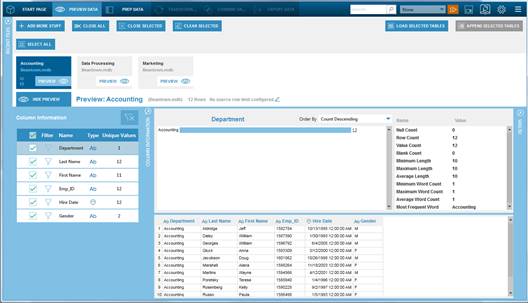
Figure 4-4. Viewing the contents of the Accounting table.
A set of panels showing information about the columns of the table, as well as a preview of the rows in the table, are shown.
6. To view information about a column, select this column in the Column Information panel.
Information about the column is also displayed on the Statistics panel.
7. To hide the statistics panel, select the Hide Preview button.
8. Load the table(s) into your Workspace by selecting the desired table(s) individually or clicking the Select All button to load all of the tables simultaneously and then clicking Load Selected Tables.
The table(s) you selected become(s) available in the Prep Data window.
In Figure 4-5, all three tables that make up the Beantown database were loaded into the workspace. Each table is presented in its own worksheet and displays on a single table panel.

Figure 4-5. Loading all of the tables in the Beantown database into the Prep Data window.
Clicking on the drop-down buttons located to the right of these tables displays a context menu that will allow you to perform table operations, including change row limits, edit file paths, pin tables, and the like.
A complete list of the actions that can be performed on tables may be found here.
The bottom of the Prep Data window (see figure above) presents several options that will allow you to navigate through your tables easily.
Note that while a database may contain any number of tables, only those tables you selected and loaded from the Preview Data window display in the Prep Data window.
Limiting Rows
You can change
the number of rows Data Prep Studio loads on a global basis when it
opens tables by selecting Settings  from the Data Prep Studio toolbar
and then selecting Application Default Settings from the options
that display. This setting may be found in the Row Limit tab.
Note that while decreasing the row limit when opening tables can improve
the performance of Data Prep Studio and speed up response times, this
may also result in missed exceptions and problematic rows, particularly
if these rows are not included in the limited row set.
from the Data Prep Studio toolbar
and then selecting Application Default Settings from the options
that display. This setting may be found in the Row Limit tab.
Note that while decreasing the row limit when opening tables can improve
the performance of Data Prep Studio and speed up response times, this
may also result in missed exceptions and problematic rows, particularly
if these rows are not included in the limited row set.
If you wish to change the row limit of a specific table that has been opened in the Prep Data window, click on the drop-down button located to the right of the table from the table selector and, from the options that display, select Load Options > Change Row Limit.
If you wish
to change the row limit of a table from the Preview Data window, select
the Edit Source Row Limit  button and use the Edit Source
Row Limit dialog that displays to do so.
button and use the Edit Source
Row Limit dialog that displays to do so.
Changing File Paths
You may wish to change the file path of an open table in the Prep Data window (e.g., a file with the same name is located in a different folder in your machine or network). To do so, click on the drop-down button located to the right of the table from the table selector and, from the options that display, select Load Options > Edit File Path. In the Open dialog that displays, navigate to the file you wish to use and then click Open. Note that you can only replace the contents of a table with those of another table with the same file extension. Data Prep Studio automatically detects the file extension of the open table to help guide your replacement choices.
Editing Load Options
When your table is one of several tables in an Access database or one of several worksheets in an Excel file, you can select a different table to open by clicking on the drop-down button located to the right of the table from the table selector and, from the options that display, selecting Load Options > Edit Load Options.
For Access data sources, the following dialog displays:
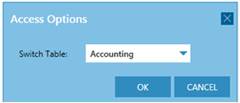
Figure 4-6. The Access Options dialog.
Select the new table you wish to load from the drop-down list provided and then click OK.
For Excel data sources, the following dialog displays:

Figure 4-7. The Excel Options dialog.
From the settings provided, specify those most applicable to the table you wish to open and then click OK.
For HTML tables, the following dialog displays:
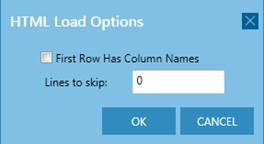
Figure 4-8. The HTML Options dialog.
After specifying the necessary details, click OK.
Pinning Tables
When a table is pinned in the Prep Data window (i.e., click on the drop-down button located to the right of the table from the table selector and, from the options that display, select Load Options > Pin Table from the options that display) and the workspace is saved, a user without direct access to the table source may open the pinned table by opening this same workspace. When pinning a table, a user may also choose to pin the current rows opened (when a row limit has been set) or pin the entire data set.

Figure 4-9. Pinning a table in the Prep Data window.
This functionality allows data-sharing with users who do not necessarily have rights to the source systems required to create working tables. Note, however, that the pinned table cannot be refreshed by a user without access to the data source.
Refreshing Table Data
When a table (e.g., an Excel worksheet) is open in the Prep Data window of Data Prep Studio, you essentially have a snapshot of the current state of this table. When you or another user makes changes to this table, your table “snapshot” must be rebuilt to reflect these changes. To do so, click on the drop-down button located to the right of the table from the table selector and, from the options that display, select Refresh Data Table from the options that display.
Note that tables obtained from drag-and-drop operations in web pages cannot be refreshed because such tables are not sourced from a file path or URL. In these tables, the Edit File Path and Refresh Data Table buttons are not available.
Saving Data Sources to the Data Source Library
Data Prep Studio can save tables you opened in the Prep Data window the Data Source Library Library. From here, you can further choose to save the table to your local library or to the Monarch Swarm library.
The Monarch Swarm Library includes all data source definitions and workspaces saved with the intention of sharing in Monarch Swarm.
When you save a data source or table to this library, Data Prep Studio “remembers” the path or location of this source and applies it when the same is opened in another data prep session. Thus, you can use the Data Source library to access commonly-used data sources quickly and seamlessly without using the Open Data Source dialog, previewing the data source, and selecting individual tables to open.
To save a data source to the Data Source library, go to the Prep Data window, click on the drop-down button of the table you want to save, and, from the options that display, select Load Options > Save in Library > Local or Monarch Swarm.
To load a
data source from the library, select the Open Library
 icon from the Data Prep Studio
toolbar or Open Library from the Select Data Source to Open
dialog. This action launches the Library dialog.
icon from the Data Prep Studio
toolbar or Open Library from the Select Data Source to Open
dialog. This action launches the Library dialog.
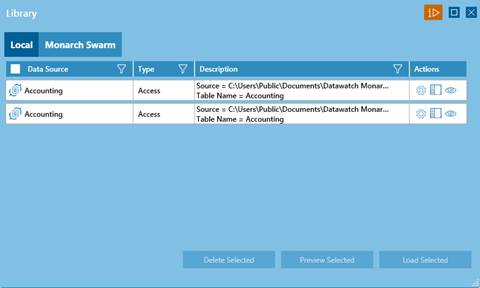
Figure 4-10. The Library dialog.
To perform an action on any data source in this list, select it to activate it and then choose an operation to execute. You can edit the table path, load the data source, preview the data source, or delete the selected data source.
More information on the Data Source Library may be found here.