OS-T: 5040 Rail Joint
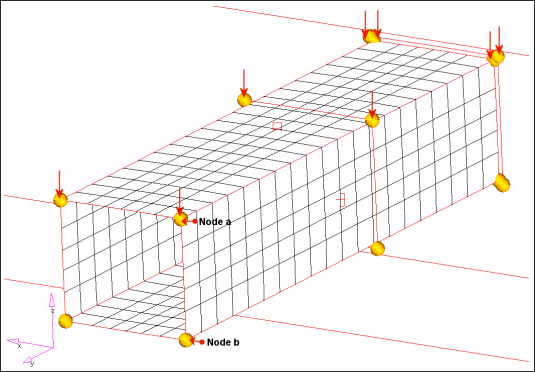
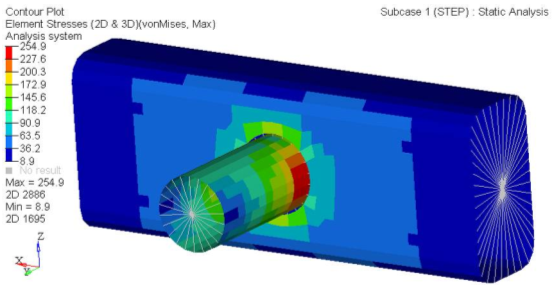
In this tutorial you will perform a shape optimization on a rail-joint. The rail-joint is made of shell elements and has one load case. The shape of the joint is modified to satisfy stress constraints while minimizing mass.
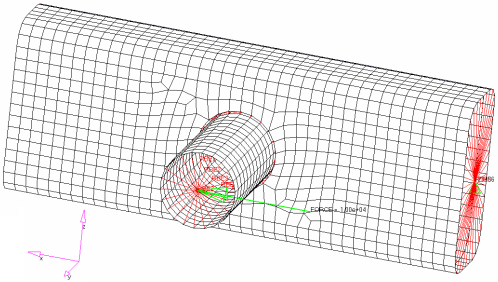
Figure 1. Rail Joint
- Objective
- Minimize mass.
- Constraints
- Maximum von Mises stress of the joint < 200 MPa.
- Design Variables
- Shape variables.
Launch HyperMesh and Set the OptiStruct User Profile
Open the Model
Submit the Job
View the Results
Set Up the Model
Display Node IDs
Build 2D Domains on the Rail
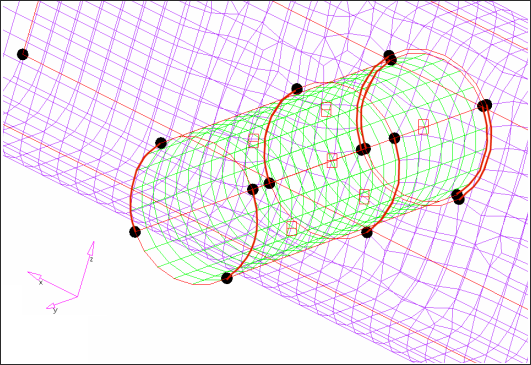
Split the Circular Edge Domains Around the Opening of the Rail
- Select edit edges subpanel.
- Set the top selector to split.
-
Split the first circular edge-domain.
-
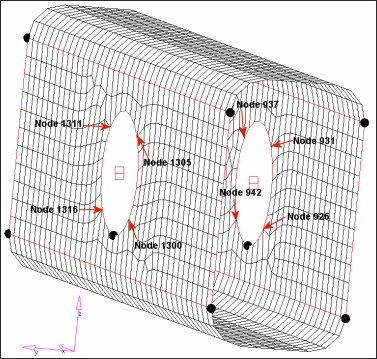
Split the circular domain using the four nodes on the other side of the
rail.
- Using the domain selector, select the circular edge-domain passing through nodes 931, 926, 937 and 942.
- Using the node selector, select node 931.
- Click split.
- Using the domain selector, select the circular edge between node 931 and the other handle.
- Using the node selector, select node 926.
- Click split.
- Split the curved edge at nodes 937 and 942, respectively.
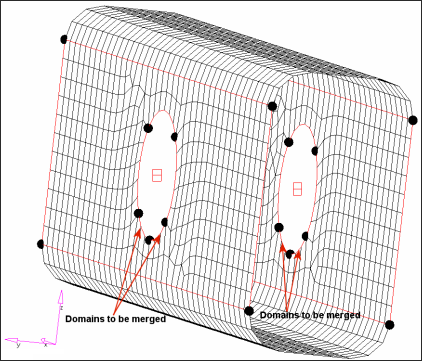
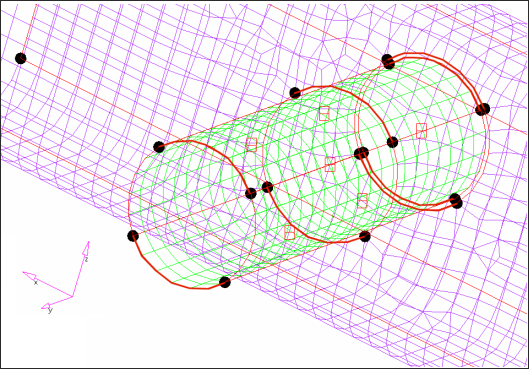
Figure 5. Rail Domains After The Circular Edge Have Been Split
Merge Edge Domains
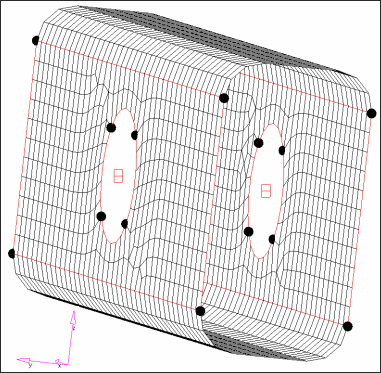
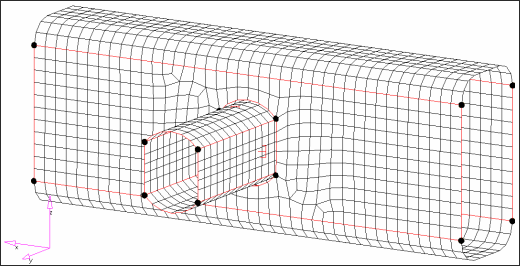
Figure 6. Rail Domains After Few Domains Are Merged
Build 2D Domains on the Tube
- In the Model Browser, Component folder, right-click on PSHELL.1 and select Show from the context menu.
- In the domains panel, select the create subpanel.
- Set the top selector to 2D domains.
-
Create a domain for the element set, elem_set1.
- Click .
- Select elem_set1, then click select.
- Click create.
- Create three more 2D domains for elements in sets elem_set2, elem_set3, and elem_set4.
- Click return and go back to the HyperMorph module.
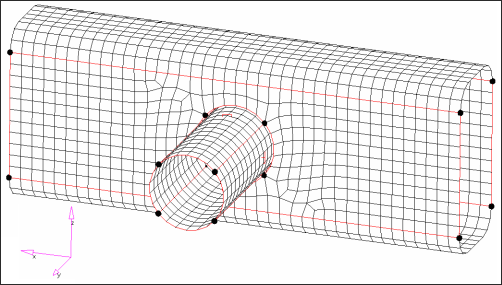
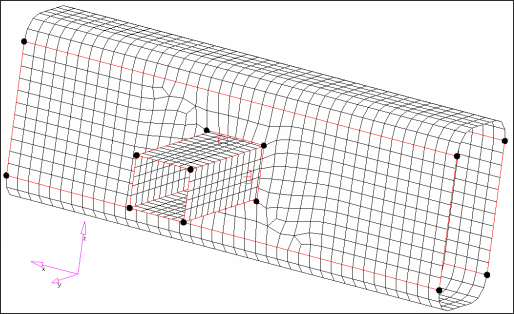
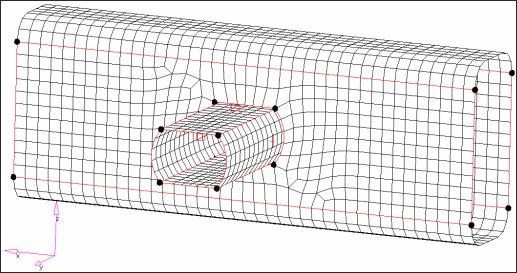
Figure 7. Domains on Rail and Tube Joint
Create Shapes
Set Up the Optimization
Define the Shape Design Variables and Review Animation
Create Optimization Responses
- From the Analysis page, click optimization.
- Click Responses.
-
Create the mass response, which is defined for the total volume of the
model.
- In the responses= field, enter mass.
- Below response type, select mass.
- Set regional selection to total and no regionid.
- Click create.
-
Create a static stress response.
- In the response= field, enter Stress.
- Set the response type to static stress.
- Using the props selector, select PSHELL.1.
- Set the response selector to von mises.
- Under von mises, select both surfaces.
- Click create.
- Click return to go back to the Optimization panel.
Define the Objective Function
- Click the objective panel.
- Verify that min is selected.
- Click response and select Mass.
- Click create.
- Click return twice to exit the Optimization panel.
Create Design Constraints
- Click the dconstraints panel.
- In the constraint= field, enter con.
- Click response = and select Stress.
- Check the box next to upper bound, then enter 200.
- Using the loadsteps selector, select STEP.
- Click create.
- Click return to go back to the Optimization panel.
Define Control Cards for Shape Optimization
- From the Analysis page, click the control cards panel.
- In the Card Image dialog, click PARAM.
- Select CHECKEL.
- Set CHECKEL_V1 to NO.
- Click return twice.
Run the Optimization
View the Results
Review the Shape Optimization Results
View a Contour Plot of the Stress
-
In the top, right of the application, click
 to proceed to page 2.
-
On the Results toolbar, click
 to open the
Contour panel.
- Set the Result type to Element Stresses [2D & 3D] [t] and von Mises.
- In the Results Browser, select the last iteration.
- Click Apply.
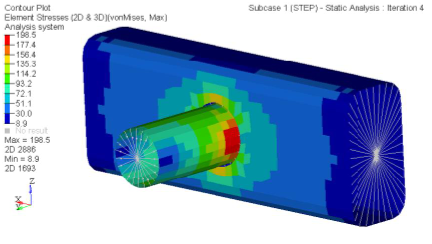
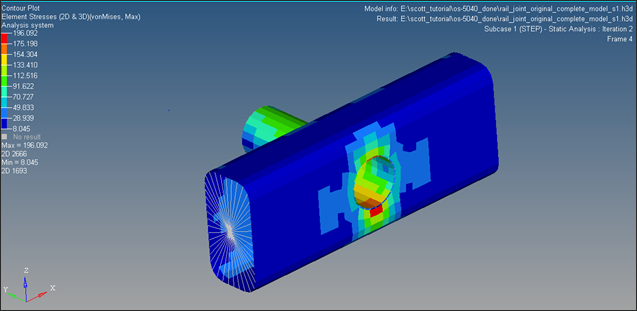
Figure 17. von Mises Stress for the Last Iteration (Max < 200 MPa)
Review the Results
Is your design objective of minimizing the volume obtained? If not, can you explain why?
Are your design constraints satisfied?
Which shape has the most influence in this problem setup?
What is the percentage decrease in compliance?
Can size optimization be introduced to the joint?
 to
open the
 to
delete the page within the
 to
reset and remove any previous selections.