The Animation Secondary panel allows you to control the display of your model during animation sequences. It displays after completing the Deformed panel.
The graphics engine allows you to:
| • | Select automatic or manual control of the animation speed |
| • | Use the visual options menu or the Visual panel to change the display of your model |
| • | Create and move cutting planes through your model |
How do I...
Click create replay to save an animation sequence to a file.
|
Move the slider to the right to increase speed, or to the left to decrease it.
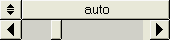
| Note: | This function only works when the toggle is set to auto. When set to manual, the buttons instead step forward and backward through the animation. |
|
| 1. | Click the rightmost toggle to select auto or manual. |
| 2. | In manual mode, the animation can be advanced or set back a frame at a time by using the arrow buttons that appear below manual. |
In auto mode, the animation loops automatically, and a slider replaces the arrow buttons to control the animation speed.
| 3. | Click the leftmost toggle to select visual options or visual panel as the method to control the model display. |
Comments
By default, the visual options menu controls the display.
|
| 2. | Select the desired plane(s) (xy plane, yz plane, xz plane). |
After the plane has been turned on, it cuts through the model.
Comments
Once a plane has been activated, it can be moved through the model by picking the plane in the graphics area and dragging the mouse along the normal to the plane.
Planes can be trimmed and colored.
Planes can be single planes or double planes. If double is selected, the menu item t = represents the thickness of the plane or the offset from the base cutting plane.
|
Click the reverse button that corresponds to the desired cutting plane.
|
Click reset planes to reset the cutting planes so they pass through the graphical centroid of the model.
|
| 1. | Select the isosurface subpanel. |
Comments
Isosurfaces may be displayed based on the values contained within the legend or based on a single value.
If a single value isosurface is displayed, you can modify the value of the isosurface. To modify the value:
| • | Move the mouse into the legend and select the pointer that appears after the color boxes. |
| • | Hold the mouse button down and move the mouse to the desired location. |
You may also set the value by using the menu item, iso surface =, or increment by using increment = and the add and sub menu items.
The color of the displayed isosurface can be the legend color or a constant user- selected value. See the menu item, legend color, while displaying a value-based isosurface.
While a value-based isosurface is displayed, you can choose to display the faces in the model that are above the isosurface value by selecting include faces above.
While a value-based isosurface is displayed, you can choose to display the faces in the model that are above the isosurface value by selecting transparent below.
|
| 1. | Use the toggle to select auto or manual as the method to use to create the AVI file. |
| 2. | If you select manual, use the slider bar to control the portion of the animation to be included in the animation file. |
The file is generated and saved in your specified user directory with a file extension of .avi. File names are automatically incremented when you create multiple AVI files.
Comments
You can insert AVI files into Microsoft Word or PowerPoint documents.
|
See also
Deformed panel


