|
»Click here to display Table of Contents«
|

Card Editor Panel |

|

|

|

|
|
Card Editor Panel |
|
|
|

|
|
»Click here to display Table of Contents«
|
Card Editor Panel |
|
|
|
|
|
Card Editor Panel |
|
|
|
|
User Profiles: |
Incremental_RADIOSS Incremental_LS-DYNA |
Use the Card Editor panel to select entities whose card image you wish to view or edit. The card image represents the data in the same format as it will be written upon export of the solver deck.
Card images are defined in the currently loaded template file.
The default panel layout is very simple, consisting only of an entity collector, a green edit button, and a red return button. The entity selector supports most types of entities via a switch. However, the panel layout changes dynamically based on the type of entity specified in the switch.
You can select multiple entities, but it is not possible to select entities of different types.
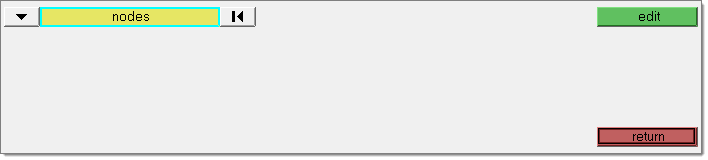
There are no subpanels on the Card Editor panel. All inputs and command buttons are located on the main panel.
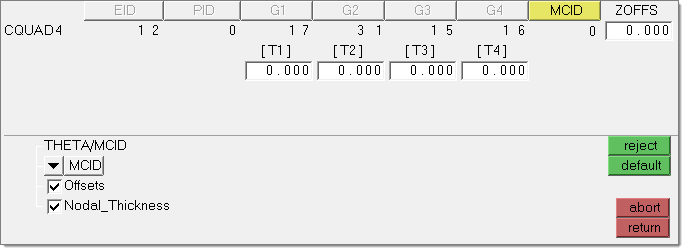
Once the entity type has been set, additional fields will appear in the panel if that entity type supports more than one configuration, type or card image. However, once you click edit, the default entity selection panel changes to the edit mode view, which is quite different. The lower part of the graphics area shows the selected data in the same format and layout as it will be written on export. The panel area displays a checklist or pull-down menu of any optional fields for that card. One example for Altair OptiStruct CQUAD4 elements is shown below:
Some card image fields can be directly edited by clicking in the field and entering the information; for example the values on most material cards. In such cases, a white field appears under the field heading.
Grey fields indicate assigned values that cannot be modified in the card editor, for example, material or property assignment fields, or grid connectivity for an element.
Assigned fields that can be edited will have a gold field header. Clicking the field header presents a list of entity IDs which can be assigned to that field. In the example bulk data format CQUAD4 entry shown above, all of the element options have been activated. The first 7 fields of the card cannot be edited. The 8th field presents a selector for the material coordinate system. In the remaining fields, enter floating point number values for the element offset of nodal thickness values.
Option |
Description |
(Entity collector) |
Use the yellow entity collector to select the desired entities. Use the switch to pick the desired entity type from a pop-up menu. |
config = |
This option displays for elems and loads. Click in the empty text field to open a pop-up menu containing valid configurations, and pick the desired one. |
type = |
This option displays for elems, loads, and equations. In most cases a default value displays based on the config selected. In some cases, more than one type is available; click in the text field to open a pop-up menu of valid types. In some configs there is no type and this field can be left blank. |
card image = |
This option displays for comps, loadcols, systcols, sets, props, groups, blocks, mats, vectorcols, beamsectcols, controlvols, multibodies, and contactsurfs. Click in the empty text field to open a pop-up menu containing valid images, and pick the desired one. Any selected entities that do not have the specified dictionary loaded are deselected before entering the card image secondary panel. |
edit |
Once entities are selected, click this button to view their current card assignments. This activates enter the card editing mode. The lower part of the graphics area shows the selected data in the same format and layout as it will be written on export. The panel area displays a checklist or drop down list of any optional fields for that card. |
The following action buttons appear:
Button |
Action |
reject |
Use this button to undo recent changes without leaving the card edit mode. |
default |
This button resets the card image to the default state. And options and setting changes will be undone. |
abort |
Reverts any changes and returns to the main Card Editor panel. All changes made while editing are discarded. |
return |
Applies all changes and closes the editing mode, returning to the main Card Editor panel. |