|
»Click here to display Table of Contents«
|

Browser |

|

|

|

|
|
Browser |
|
|
|

|
|
»Click here to display Table of Contents«
|
Browser |
|
|
|
|
|
Browser |
|
|
|
|
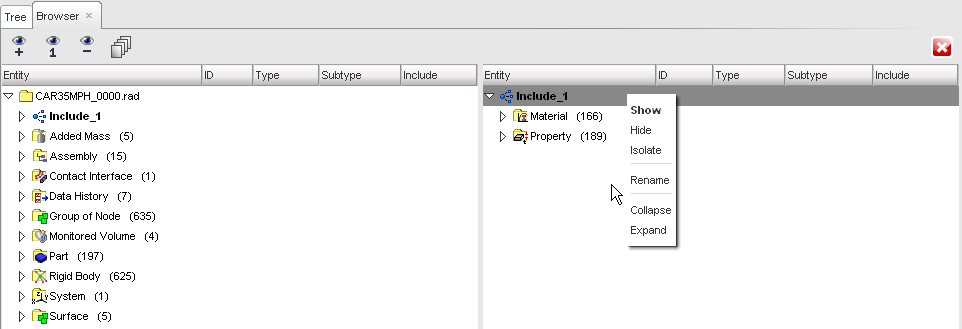
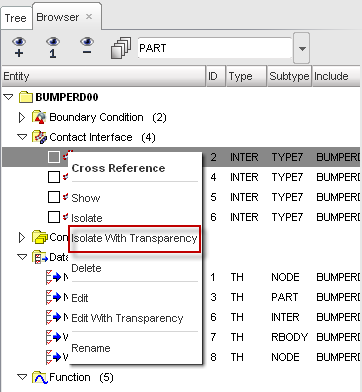
The Model Browser allows you to view all the objects (parts, materials, properties, node groups, any include files, etc.) that belong to a model in a flat view or an expandable/collapsible list. By right-clicking any item in the Browser, you will be able to control the display of the objects in the graphic area.
Entities can be displayed or masked in the graphic area by clicking in the checkbox next to the entity's name in the Model Browser. This allows you to quickly isolate an entity or a group of entities in a model.
If you want to modify an object, it is important to know how that might affect other objects. To see if an object in a model is linked to other objects, right-click its name in the Browser and select the option Cross Reference. A pop-up window will appear with the name of all objects that are linked to your object, their IDs, and their type.
It is possible to create a new include file or submodel from the Model > Browser.
| 1. | Click Model View ( |
A Model View dialog appears.
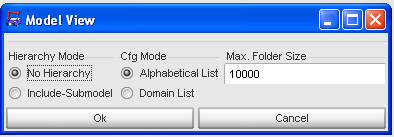
| 2. | Select the Include-Submodel radio button. |
| 3. | Click Ok. |
| 4. | Right-click the part or assembly you wish to create an include or submodel from. |
| 5. | Select New Include or New Submodel. |
A new include or submodel panel opens to the right of the Browser.
| 6. | Hold down the middle mouse button and drag parts or assemblies from the Model Browser into the Include or Submodel panel. |
You can output data history variables using the Model > Browser.
| 1. | In the Model Browser, click the arrow button to the right of Data History to expand. |
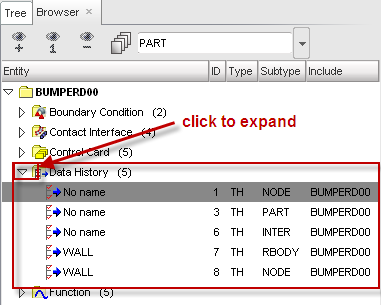
| 2. | Right-click a data history whose variables you want to output. |
| 3. | Select Output Variables from the menu. |
A Choice of the Saved Variables window opens.

| 4. | Select the appropriate variables and click Save > Close. |
Select the object in the graphic.
| 1. | From the Menu bar, select Model > Browser. |
| 2. | Click the PART button to expand. |
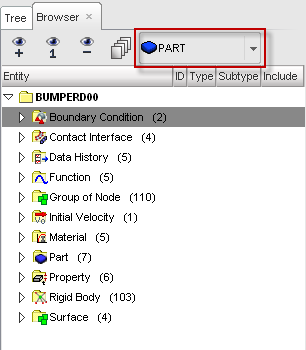
In the Model Browser window, the part or assembly can be turned ON/OFF by checking/unchecking the square box to the left of the Part or Assembly.
You can also display all by right-clicking the mouse on the Root Model, then select either Show or Hide.
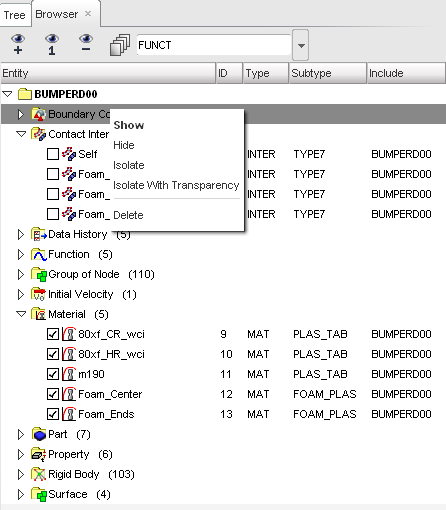
Isolate and edit are available with transparency in both Browser and Entity Modules.
The use of transparency enhances the review capability without modifying graphics for the entities displayed.
| 1. | From the Menu bar, select Model > Browser. |
| 2. | Select the entity and right-click on the icon. |
| 3. | Select Isolate with Transparency. |
Include transformation defines content on which to apply an offset, as well as a transformation. The Include Transformation is a collection of entities, and an instruction to move the object in a particular way.
| 1. | From the Menu bar, select Model > Browser. |
| 2. | Select the entity and right-click on the icon. |
| 3. | Select New Include Transform. |
When using the RADIOSS profile, you can approximate similar functionality by means of the //SUBMODEL and #include commands. A standard RADIOSS transformation can then be performed on the nodes of a submodel or include.