


|
Adding Dashboard Parameters
In addition to the parameters of the associated data tables that are used by visualizations and other parts on the dashboard, a Designer user can add new dashboard parameters which can be value sources inside actions and title of visualizations and parts.
Steps:
1. On the Dashboard and Workbook Settings pane, click the Dashboard tab.
2. Click 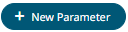 .
.
A New Parameter instance is displayed.
3. Click on this new instance.
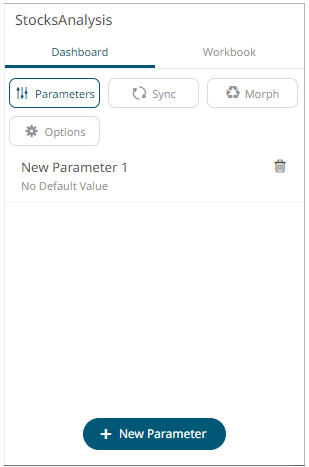
4. Enter
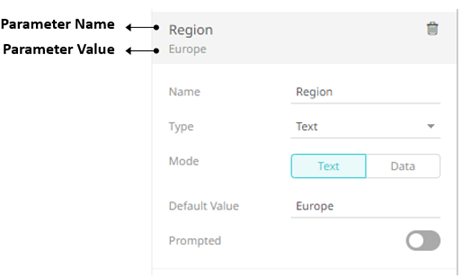
the Name of the parameter
then click  .
.
5. Select the data Type: Text, Numeric, or Time.
6. Select the Mode: Text or Data
· For the Text mode, enter the
Default Value then click  You can enter several default values,
separated by a comma.
You can enter several default values,
separated by a comma.
|
NOTE |
For the Time type, the following formats for the default value are accepted: · "yyyy-MM-dd" · "yyyy-MM-ddTHH:mm:ss" · "yyyy-MM-ddTHH:mm:ss.SSS"
|
To prompt the parameter input when opening the workbook, tap the Prompted slider to turn it on. The dashboard parameter instance changes to allow specification of the following:
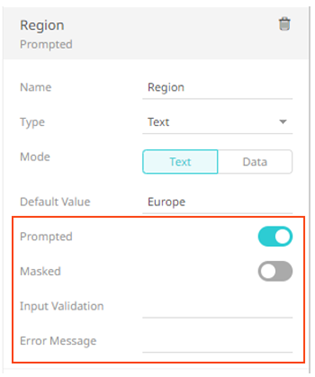
¨ To encrypt the value upon entry, tap the Masked slider to turn it on.
¨ Add a custom Input Validation. This can be any regular expression (e.g., “A-Z{3}”)
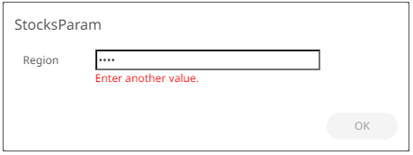
¨ The workbook will not be opened unless it passes the validation. Enter an Error Message to help in defining a better input to match the regular expression (e.g., “Enter another value.”)
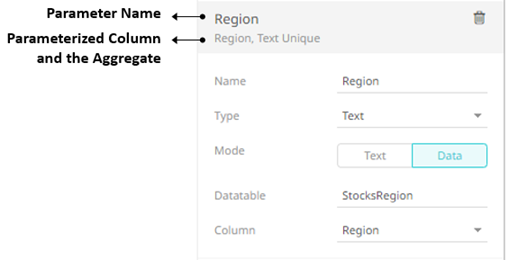
· For the Data mode, select the Data Table and parameterized Column.
The value of the parameterized data table column will be used. For example, Region = Europe.
2. Repeat steps 2 to 6 to add more parameters.
3. Click the Save  icon on the toolbar to save
the changes.
icon on the toolbar to save
the changes.
When
saved, the  notification is displayed.