Working with Block Libraries

Learn how to access and manage block libraries.

Library Organization

The blocks in a library are organized into directories called palettes. Each library can have multiple palettes to expose different sets of blocks. The palettes are displayed as nested directories in the Palette Browser. When opened in the modeling window, the palettes are displayed as diagrams.

The standard system library of the software includes the Activate and Modelica palettes. These palettes hold a wide range of predefined blocks. Additional libraries are available in the Professional version of Activate including Spice, Hydraulics by Fluidon, Arduino and more.

Library Management

The software includes a Library Manager tool for facilitating the creation, installation, and editing of block libraries. A set of APIs is also available for these operations.

Libraries are versioned for managing additions or modifications to the libraries.

Library Contents
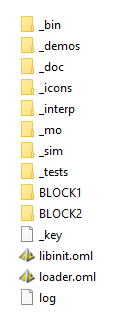
Libraries contain an organized set of OML scripts, demos, utilities and help files:


Library Customization

A set of functions is available for customizing libraries. See the chapter on Libraries in the Extended Definitions for Advanced Users.

Library Licensing

Activate supports licensed third-party and external libraries. Licenses are implemented based on the Altair Licensing system.

Accessing Blocks from Libraries

Drag blocks into the modeling window from the Palette Browser or insert them from the Libraries menu.

Important: Libraries must be installed for blocks to be accessible in the workspace.
  1. From the Palette Browser, select a palette, then select and drag a block into your model.
    A block added to a model from the Palette Browser retains a reference to the block library.
  2. Alternatively, select File > Libraries > Insert block from library, navigate to the block .scm file, and click Open.

Creating Libraries

Create a library with the Library Manager.

  1. From the menu bar, select File > Libraries > Manager.
  2. In the Library Manager dialog, select Create a new library.
  3. In the Library Creator dialog, enter a name for the library and a path to the directory where you want to save the new library.
  4. Press OK.
    A new empty library is created in the specified directory.

Editing Libraries

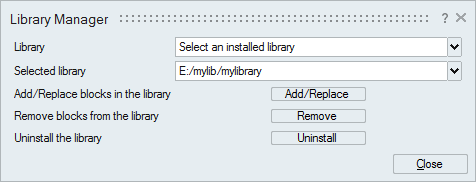
The Library Manager includes options for adding, replacing, and removing blocks in libraries, and uninstalling libraries.

  1. From the menu bar, select File > Libraries > Manager.
  2. In the Library Manager dialog that appears, from the Library drop down menu, select an installed library that you want to edit.
  3. For Selected library, enter a directory path where you want to save the edited library.
  4. Select from the following options:
    • To add a block to the library, in the current diagram, select a block, and click Add/Replace. If a selected block already exists in the library, the existing block is replaced with the new block.
    • To remove a block from the library, in the current diagram, select a block, and click Remove.
    • To uninstall the entire library from your installation, click Uninstall.

Installing Libraries

Create, name and install a new library in a specified directory.

  1. From the menu bar, select File > Libraries > Install.
  2. In the Install dialog that appears, navigate to the library that you want to install, and click Select Folder.
  3. In the Library Creator dialog that appears, enter a name for the new library and a path to the directory where you want to store the library.
  4. Click OK.
    A new empty library is created in the directory specified.

Uninstalling Libraries

Uninstall a library from the Uninstall or Library Manager dialog.
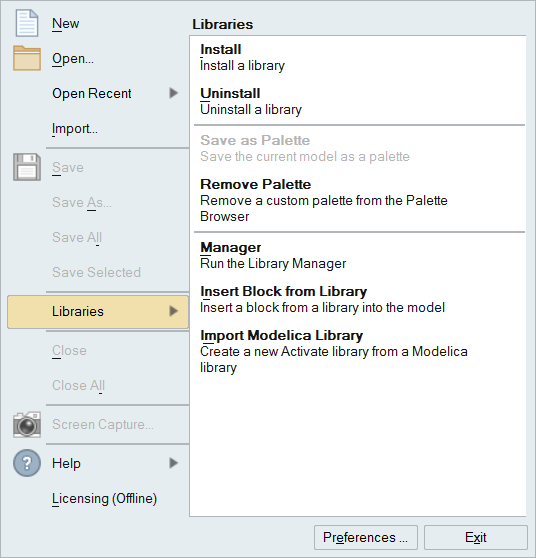
  1. From the menu bar, select File > Libraries > Uninstall.
  2. In the Uninstall Libraries dialog that appears, select the library that you want to uninstall, and click OK. Alternatively, you can uninstall a library from the Library Manager: File > Libraries > Library Manager.
    The selected library is removed from the installation.