SS-T: 0000 EDEM, Transfer Chute Deflector Plate
Learn how to export data from Altair EDEM for use in linear structural analysis in SimSolid.
Purpose
This tutorial is intended for users with experience using EDEM. In this tutorial, you will do the following:- Export force data from EDEM.
- Prepare, solve, and post process the model in SimSolid.
Model Description
The following file is needed for this tutorial:
- Transfer Chute for SimSolid.dem
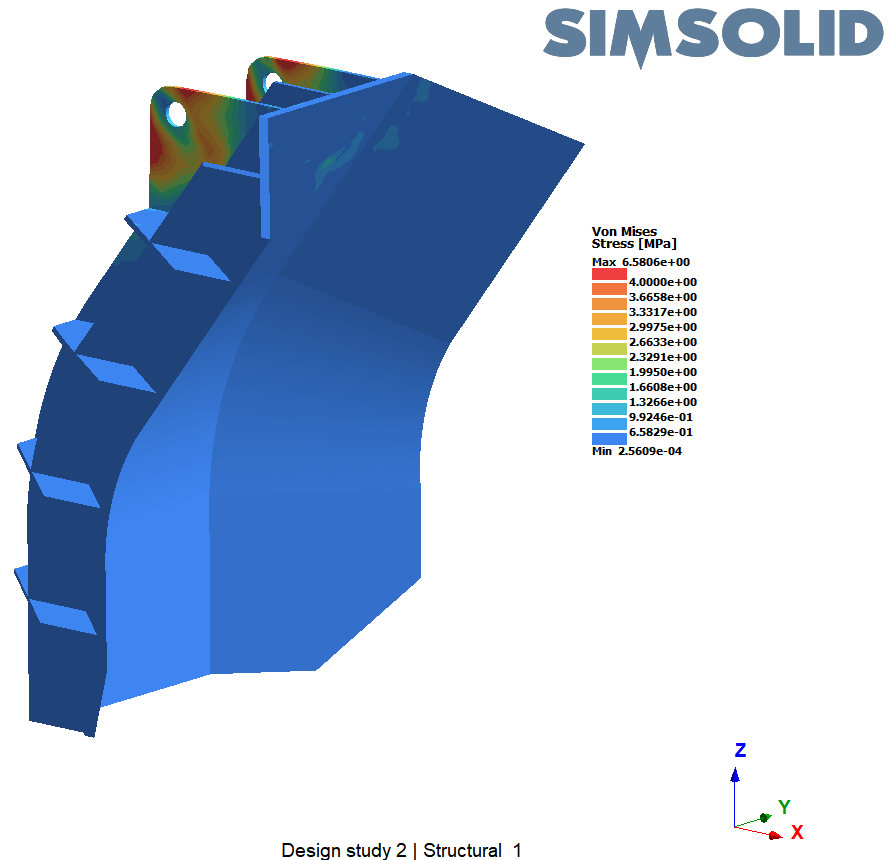
Figure 1.
Export Force Data
-
Click
 to run the simulation for 10 seconds.
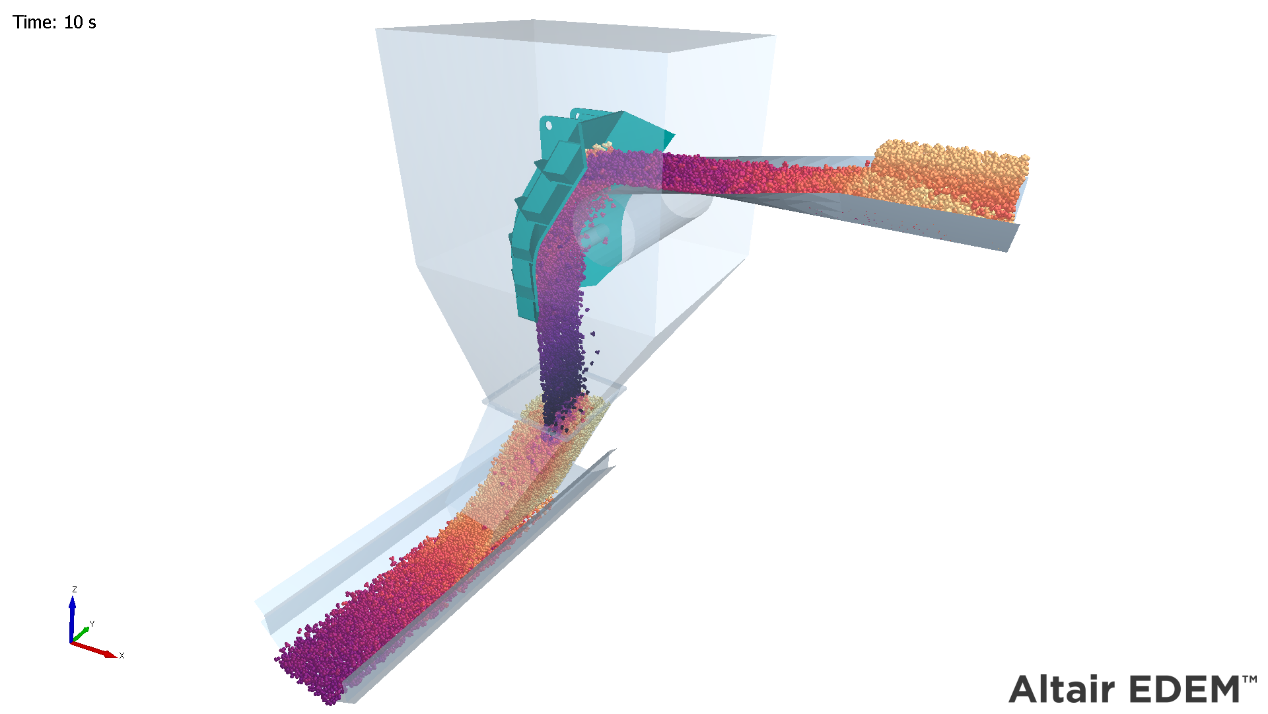
Figure 2.
Import Geometry
-
Click the
 (Import from file) icon.

Figure 3.
Assign Materials
-
In the Assembly workbench, click
 (Apply materials).
Create Structural Linear Analysis
-
On the main window toolbar, click
 > Structural linear.
-
On the Analysis Workbench toolbar, select
 (Immovable support).
-
In the modeling window, select the faces highlighted in
Figure 4.

Figure 4. -
On the Analysis Workbench toolbar, select
 > Imported forces.
Run Analysis
Solve the analysis.
- In the Project Tree, open the Analysis Workbench.
-
Click
 (Solve).
Review Results
-
On the Analysis workbench toolbar, click the
 (Results plot) icon.