Exporting an Animation
Export an animation of a model to use in a presentation or report.
-
On the 3D View
contextual tabs set, on the Animate tab, on the
Animation group, click the
 Export animation icon.

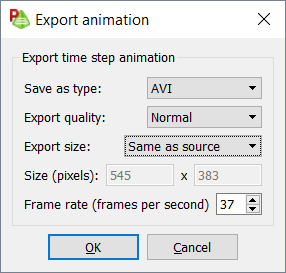
Figure 1. The Export animation dialog. -
From the Save as type drop-down list,
select one of the following:
- AVI
- MOV
- GIF
- MKV
-
From the Export quality
drop-down list, select one of the following:
- High
- Normal
- Low
Setting the quality affects the compression ratio for the specified screen size. For very high-quality exports, it is good practice to reduce the screen size to as small as is need and setting the Export quality to High. -
From the Export size
drop-down list, select one of the following:
- Same as source
- QQVGA (160x120)
- QVGA (320x240)
- VGA (640x480)
- SVGA (800x600)
- XGA (1024x768)
- SXGA (1280x1024)
- Custom
- In the Frame rate (frames per second) field, specify the frame rate. Setting the frame rate affects how “smooth” the animation appears.
-
Click OK.
The Animation export file name dialog is displayed.
- In the File name field, specify the name of the exported animation file.
- In the Save as type, specify the file type of the exported animation file.
- Click Save to export the animation to file and to close the dialog.