Move Nodes
The Node Move Tool defines the location of the node with the mouse.
Node locations can be changed either directly via the Nodes tab of the System Configuration dialog or by using the Node Move Tool. The Node Move Tool can be accessed by selecting from the Project menu or by pressing the corresponding button on the Project toolbar. A further possibility is to use Move from the context menu of the 2D View if the node to be moved is already selected.
If the tool is started, the mouse cursor changes to a finger symbol and the node to be moved has to be selected. After right-clicking, the selected node can be moved while moving the mouse cursor. The display height of the 2D View automatically changes to the actual height of the selected node. By pressing the Shift key while scrolling the mouse wheel, the height of the 2D display as well as the height of the node to be moved can be changed. If the final location is reached, another right-click will release the node and assign the new location coordinates.
If the Node Move Tool is started for a pre-selected node via the context menu of the 2D View, a dialog opens where the movement of the selected node can be specified either as a shift vector or as a fixed location vector.
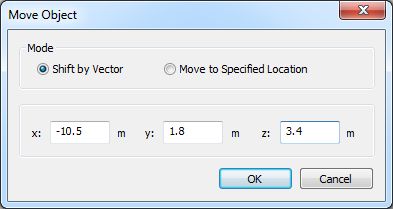
Figure 1. The Move Object dialog.
Nodes can be shifted with the specified vector or moved to the defined location vector.